
Scanning Help Page
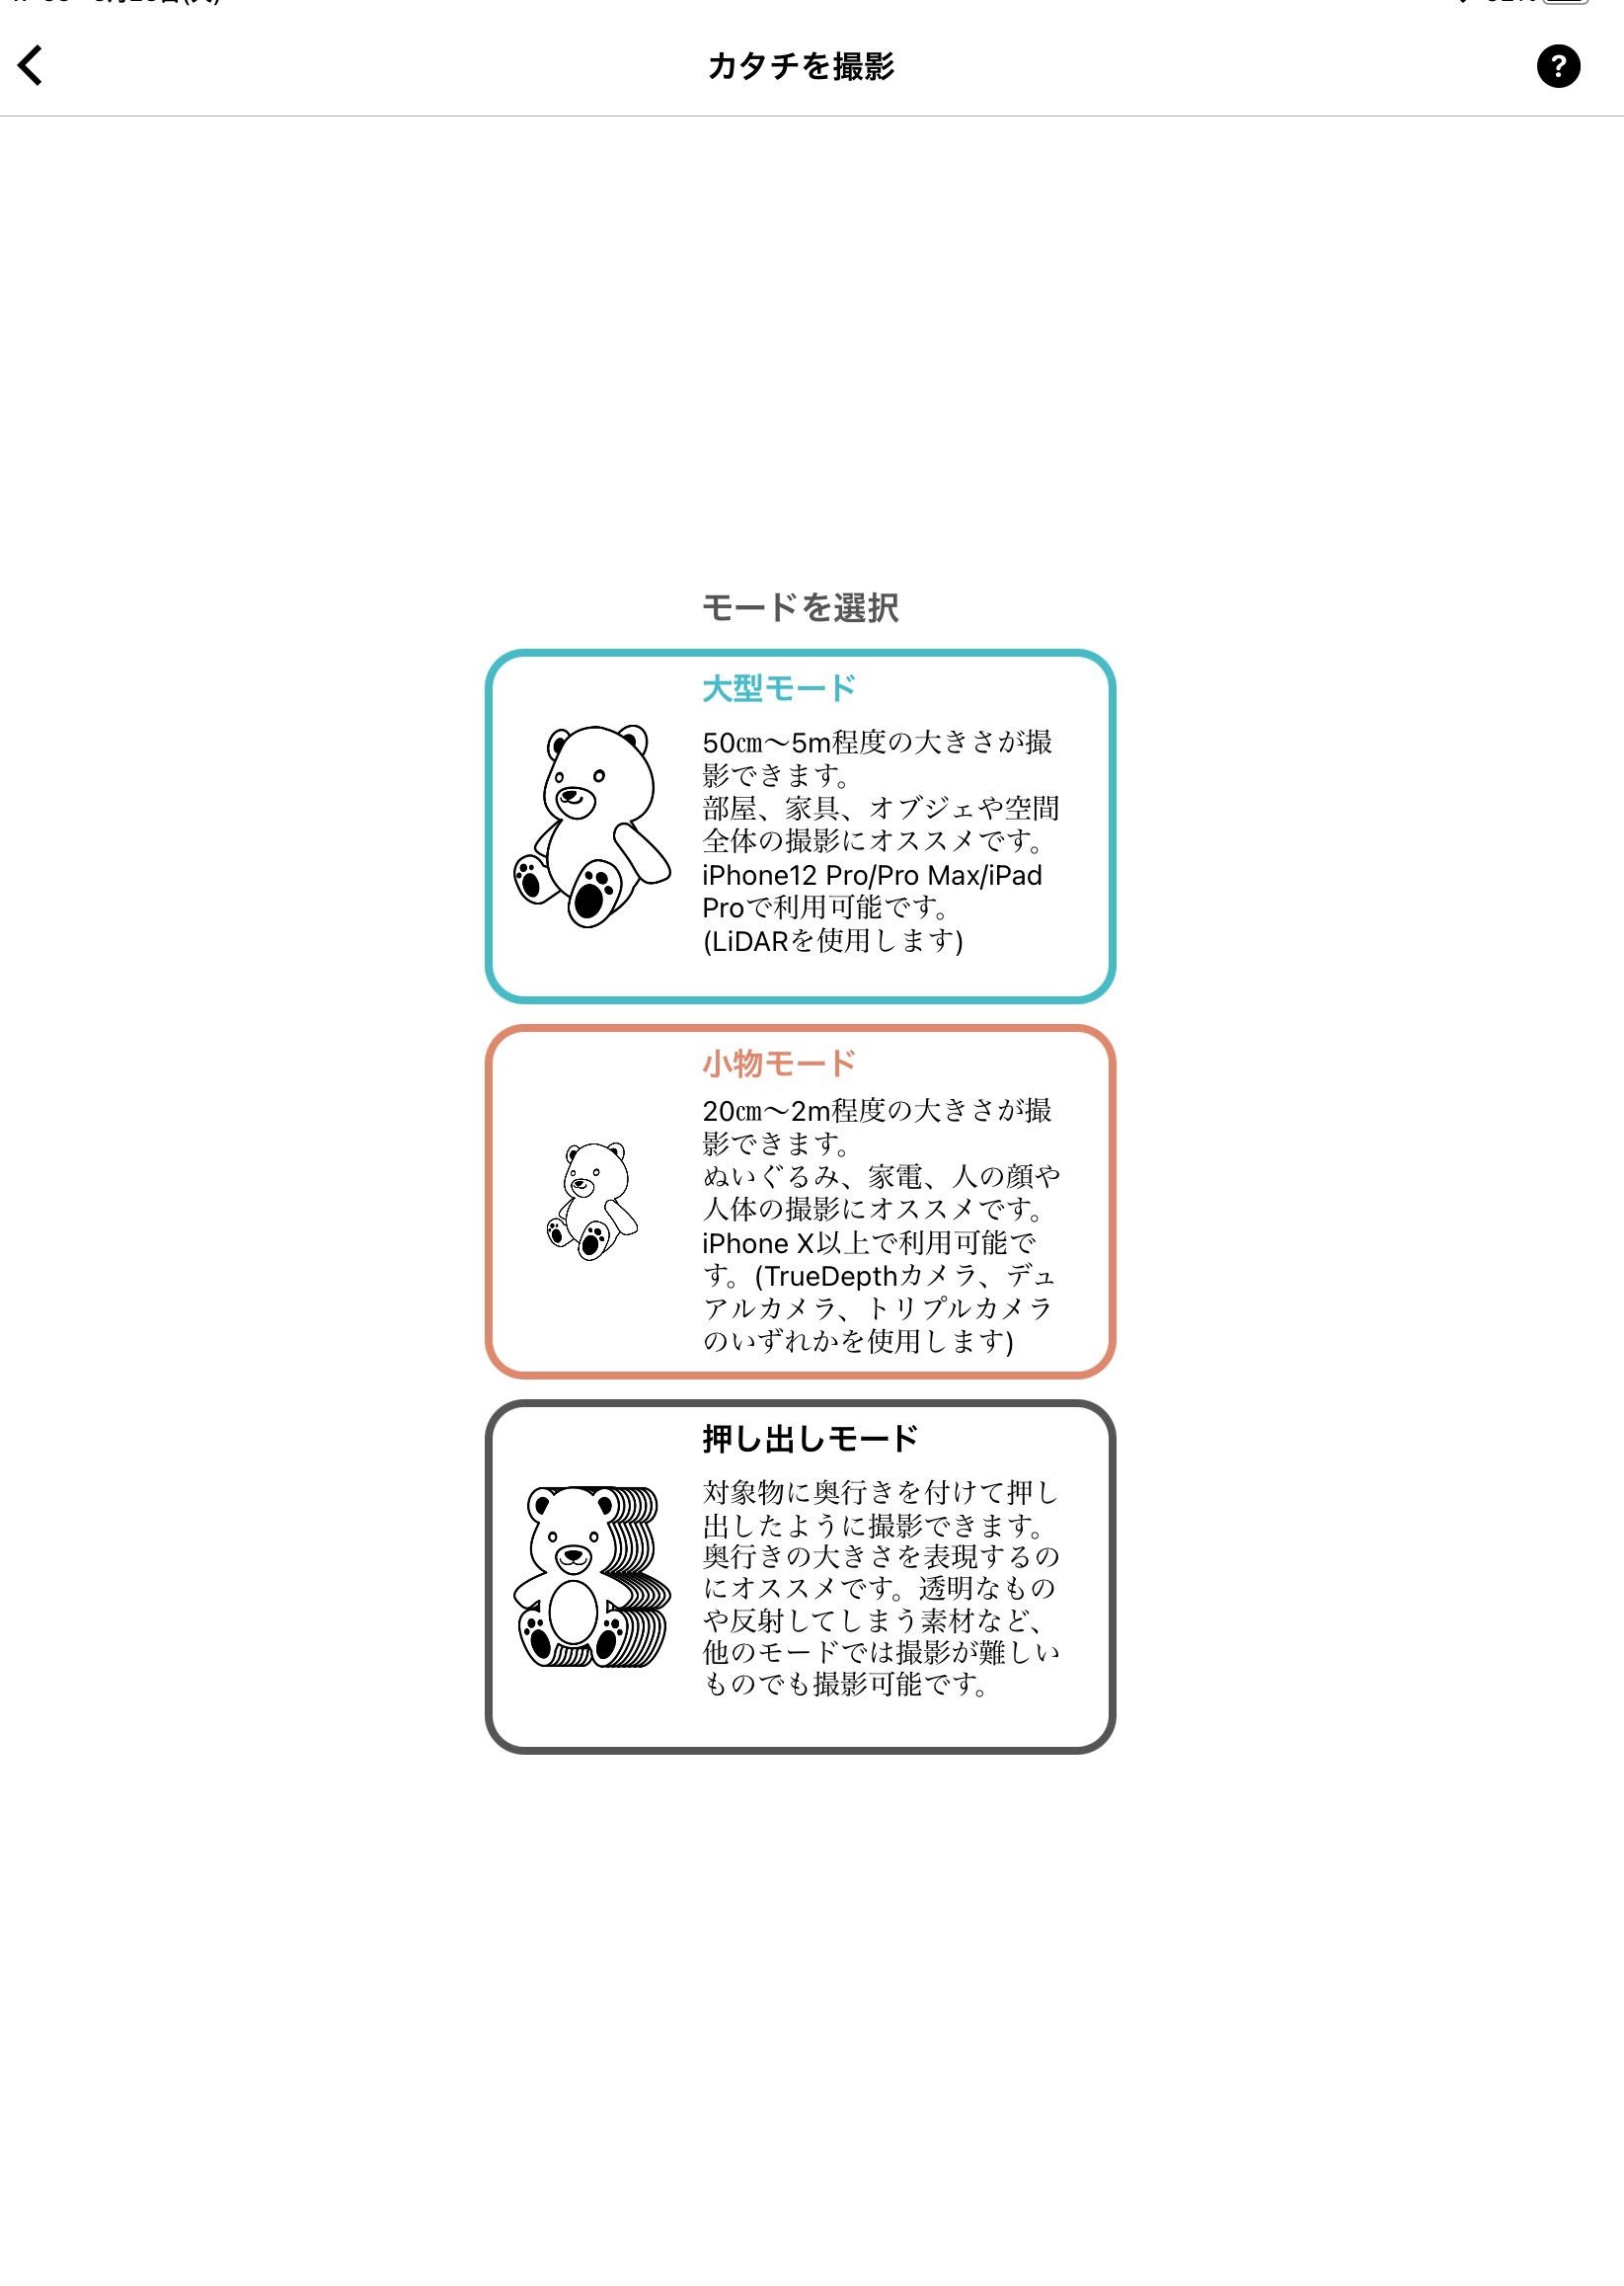
We have three modes in Katachi Space for 3D scanning.
Shooting mode howto
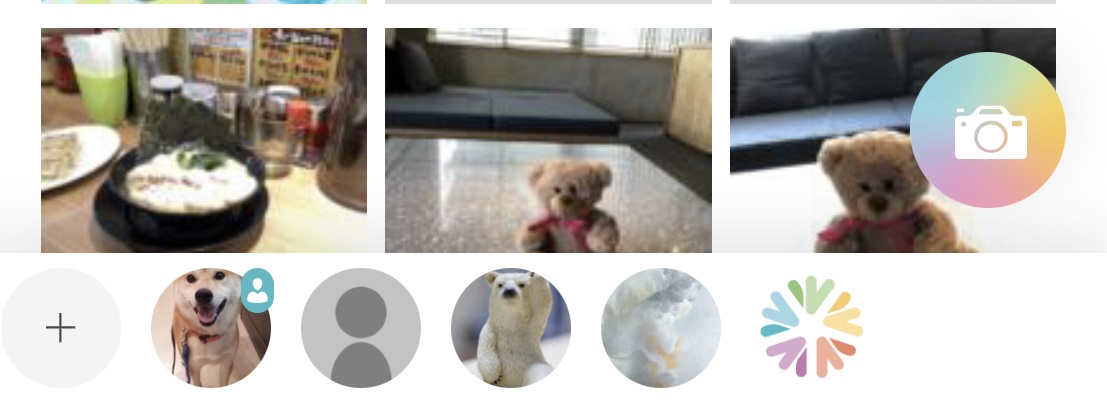
1. Run Katachi Space camera
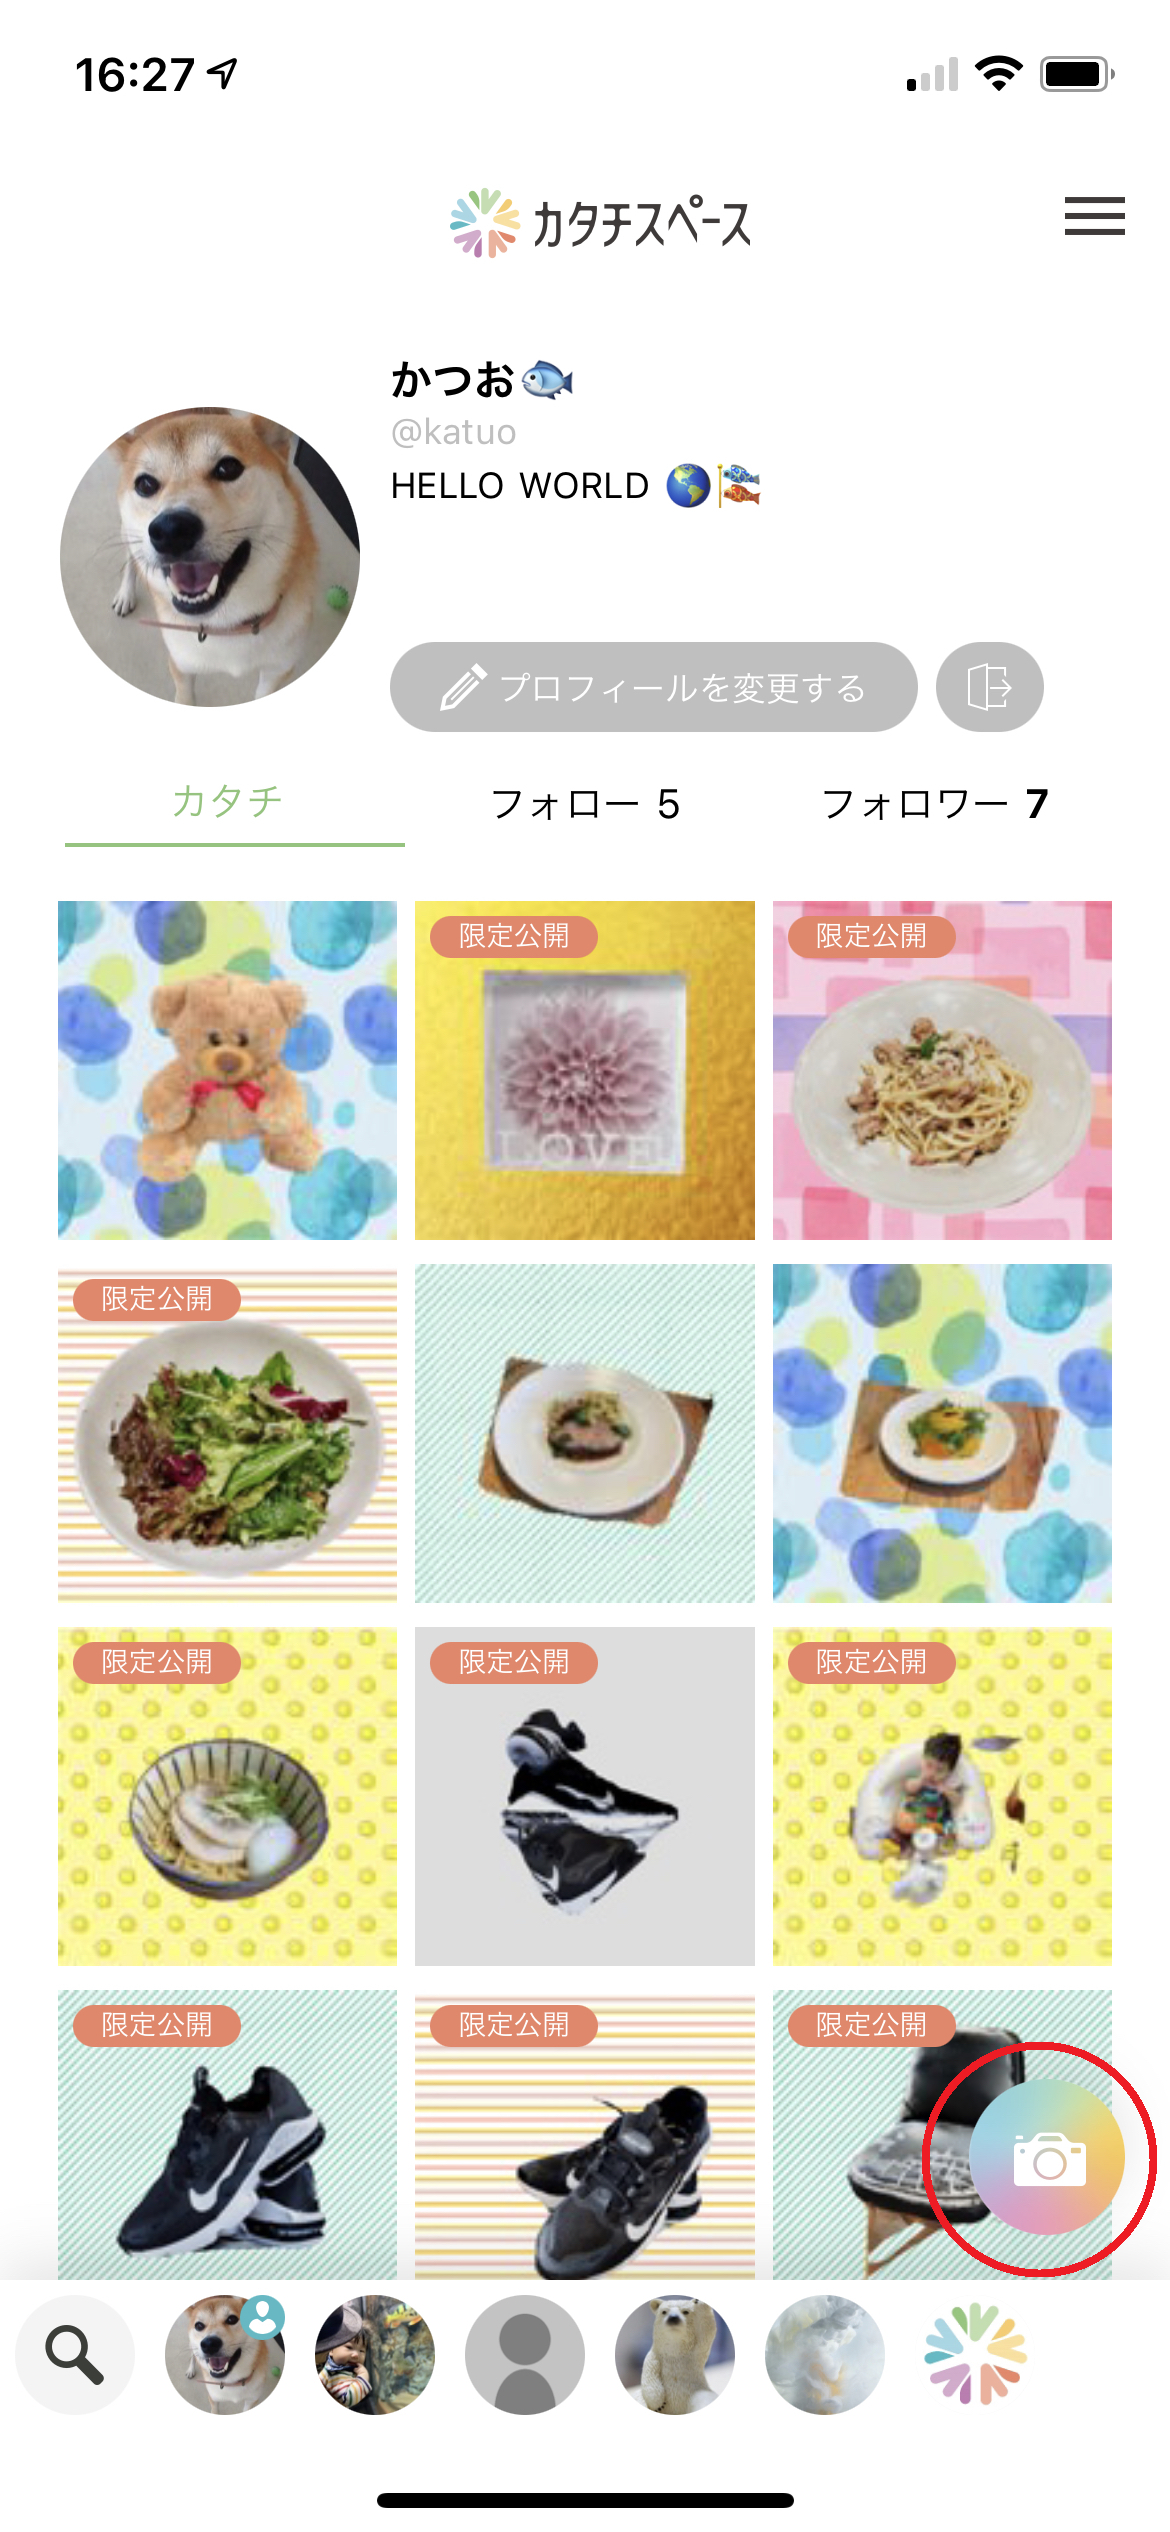
Login to Katachi Space, tap the camera button on the bottom right.
2. Select the scanning mode
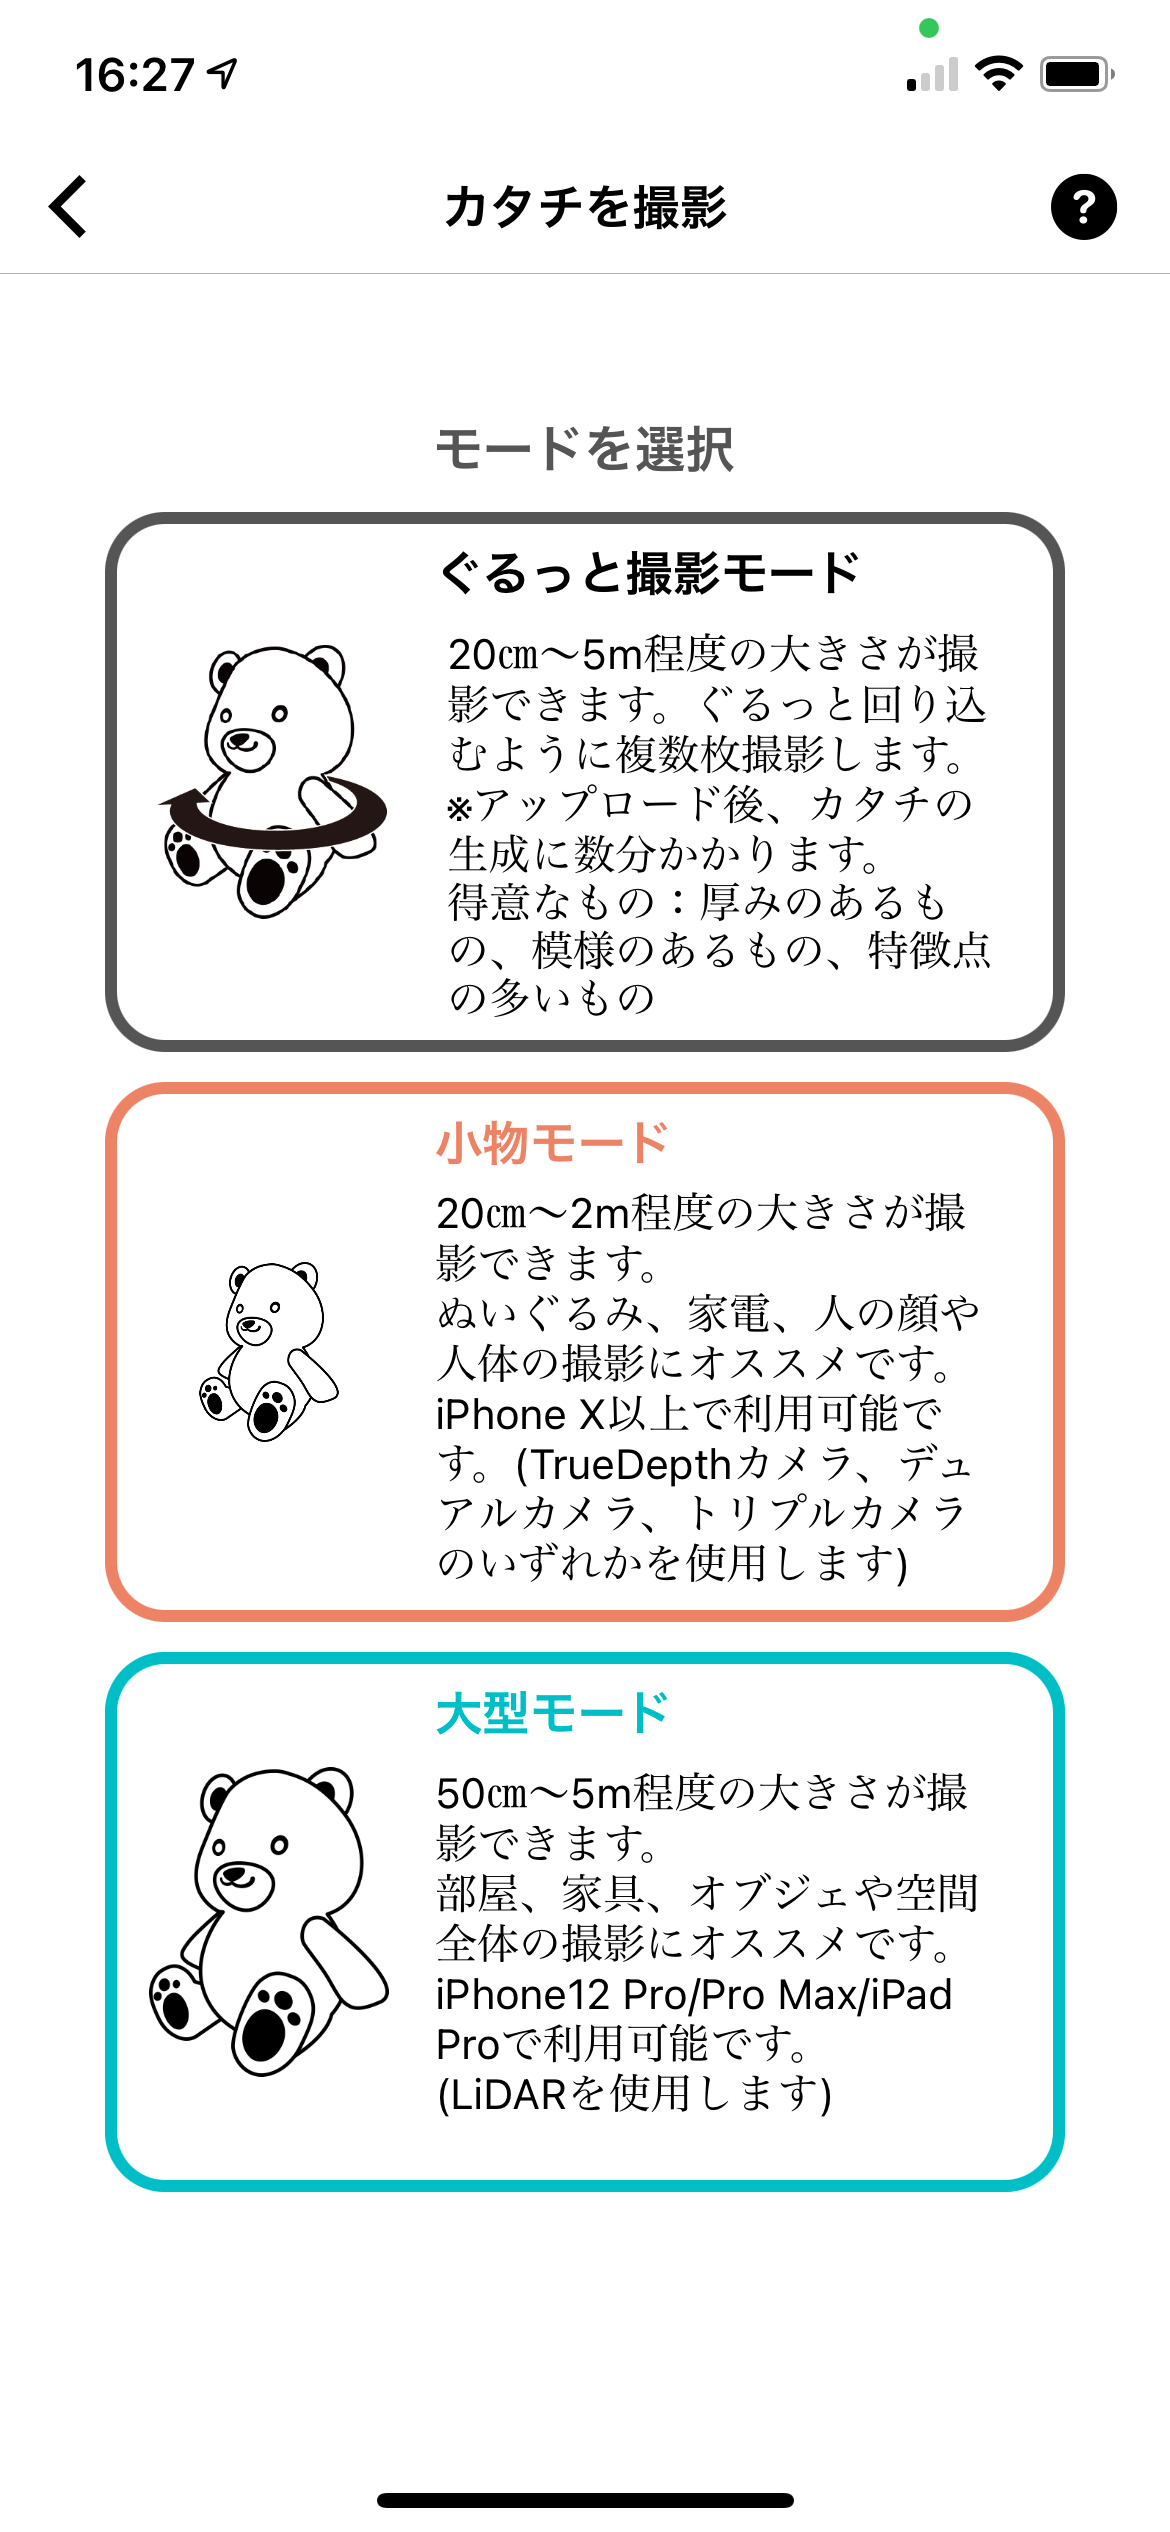
Select "Shooting mode" on the mode selection screen.
3. Camera settings
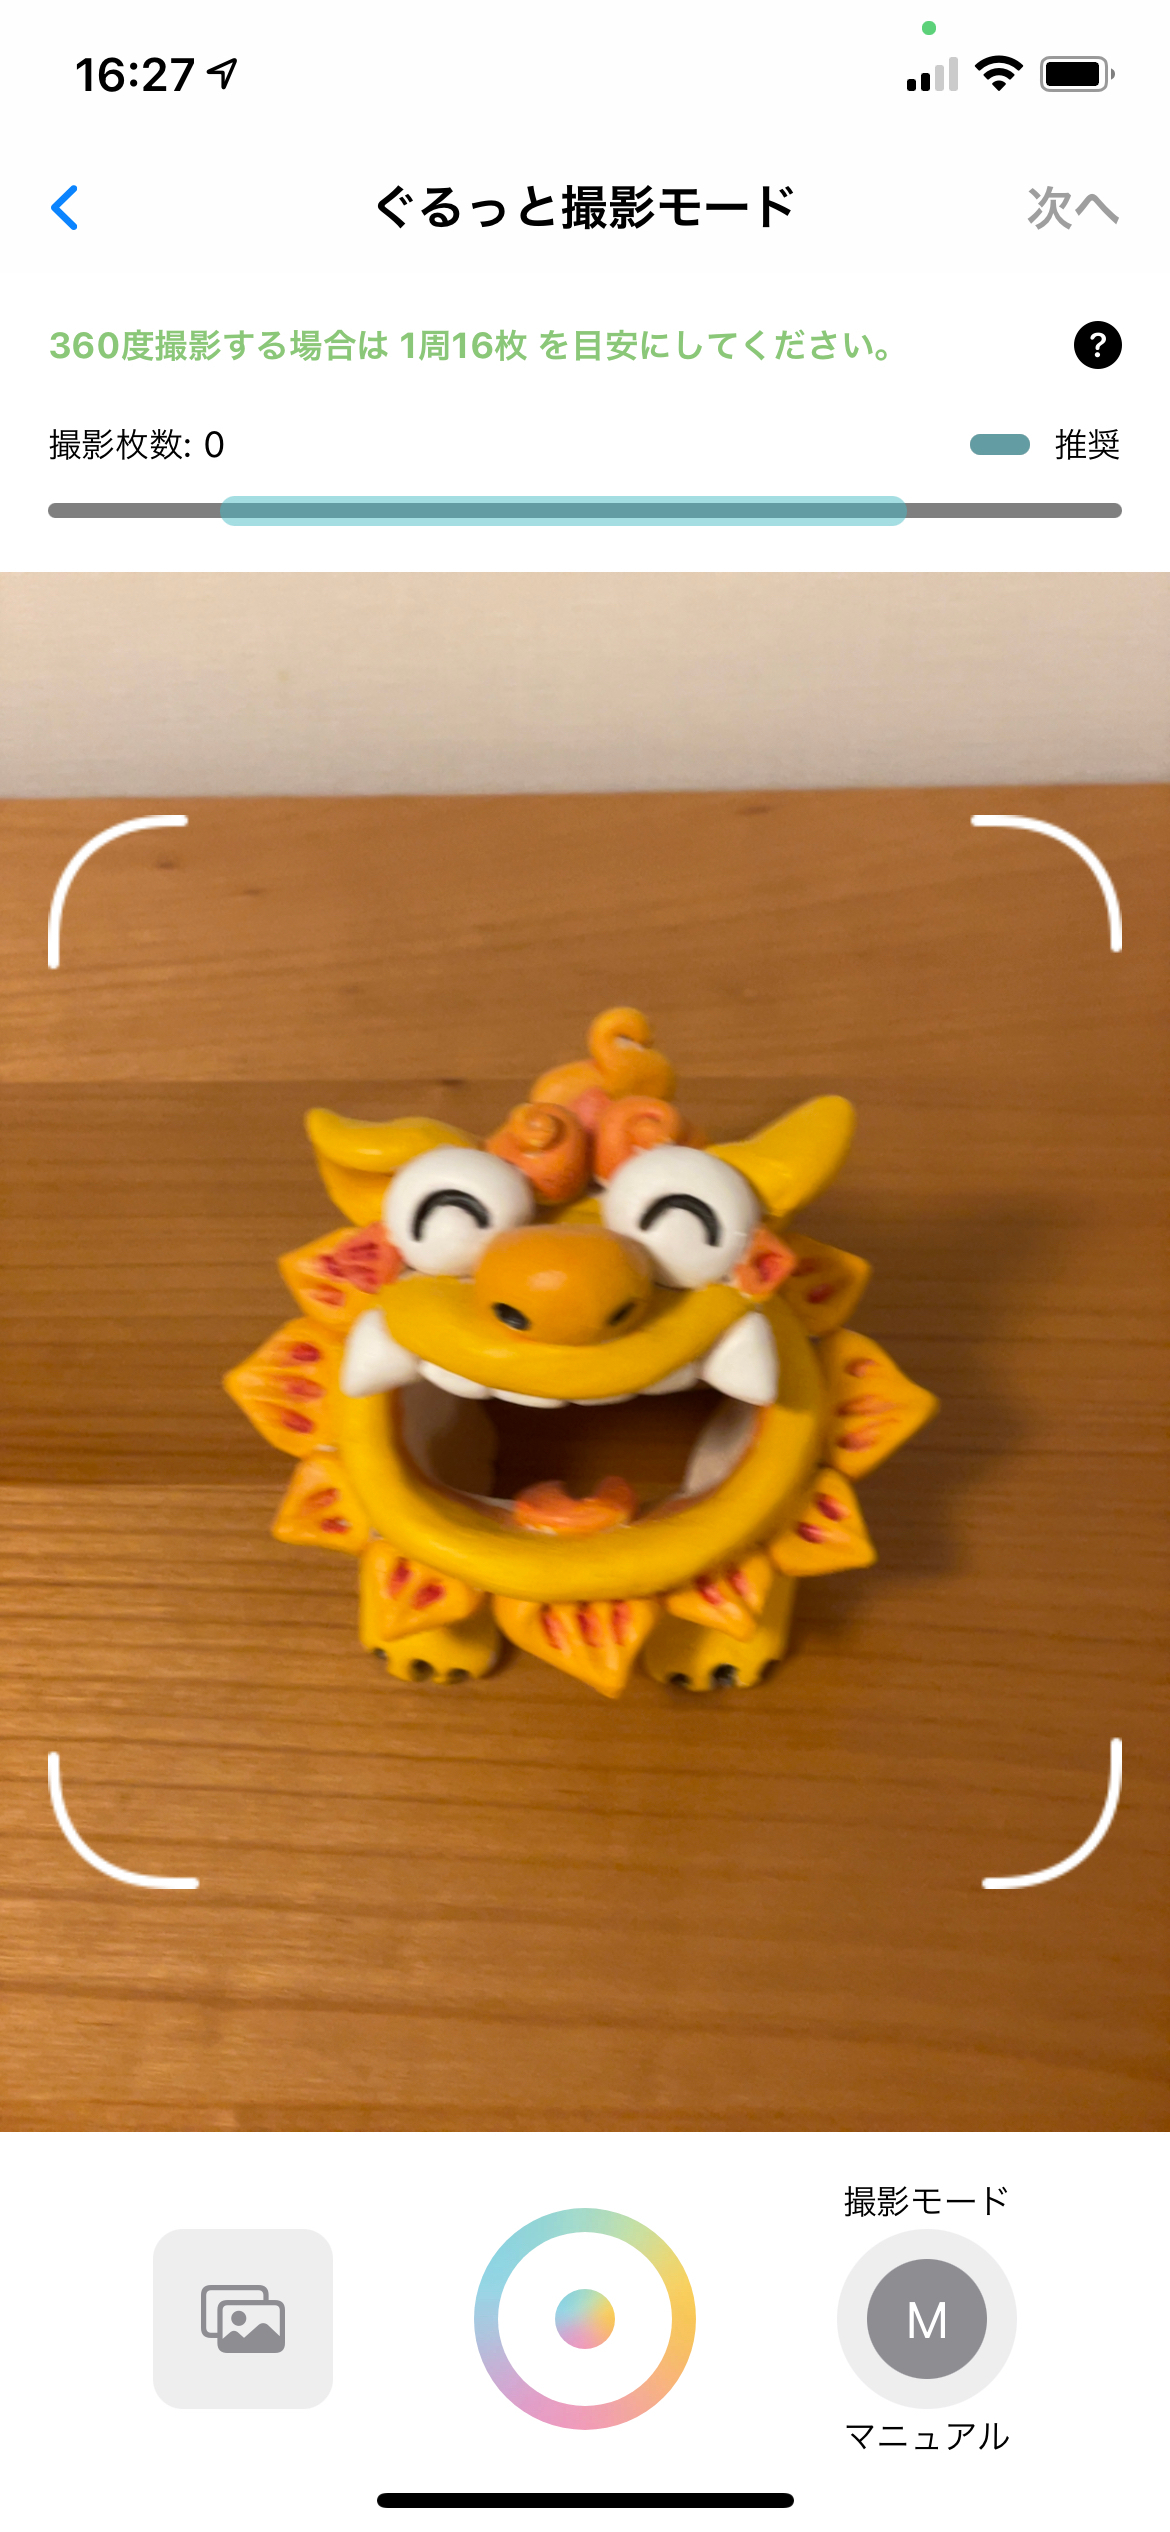
Shooting mode supports the out camera only.
We have both manual and automatic(4 seconds intervals shooting) camera modes.
We have both manual and automatic(4 seconds intervals shooting) camera modes.
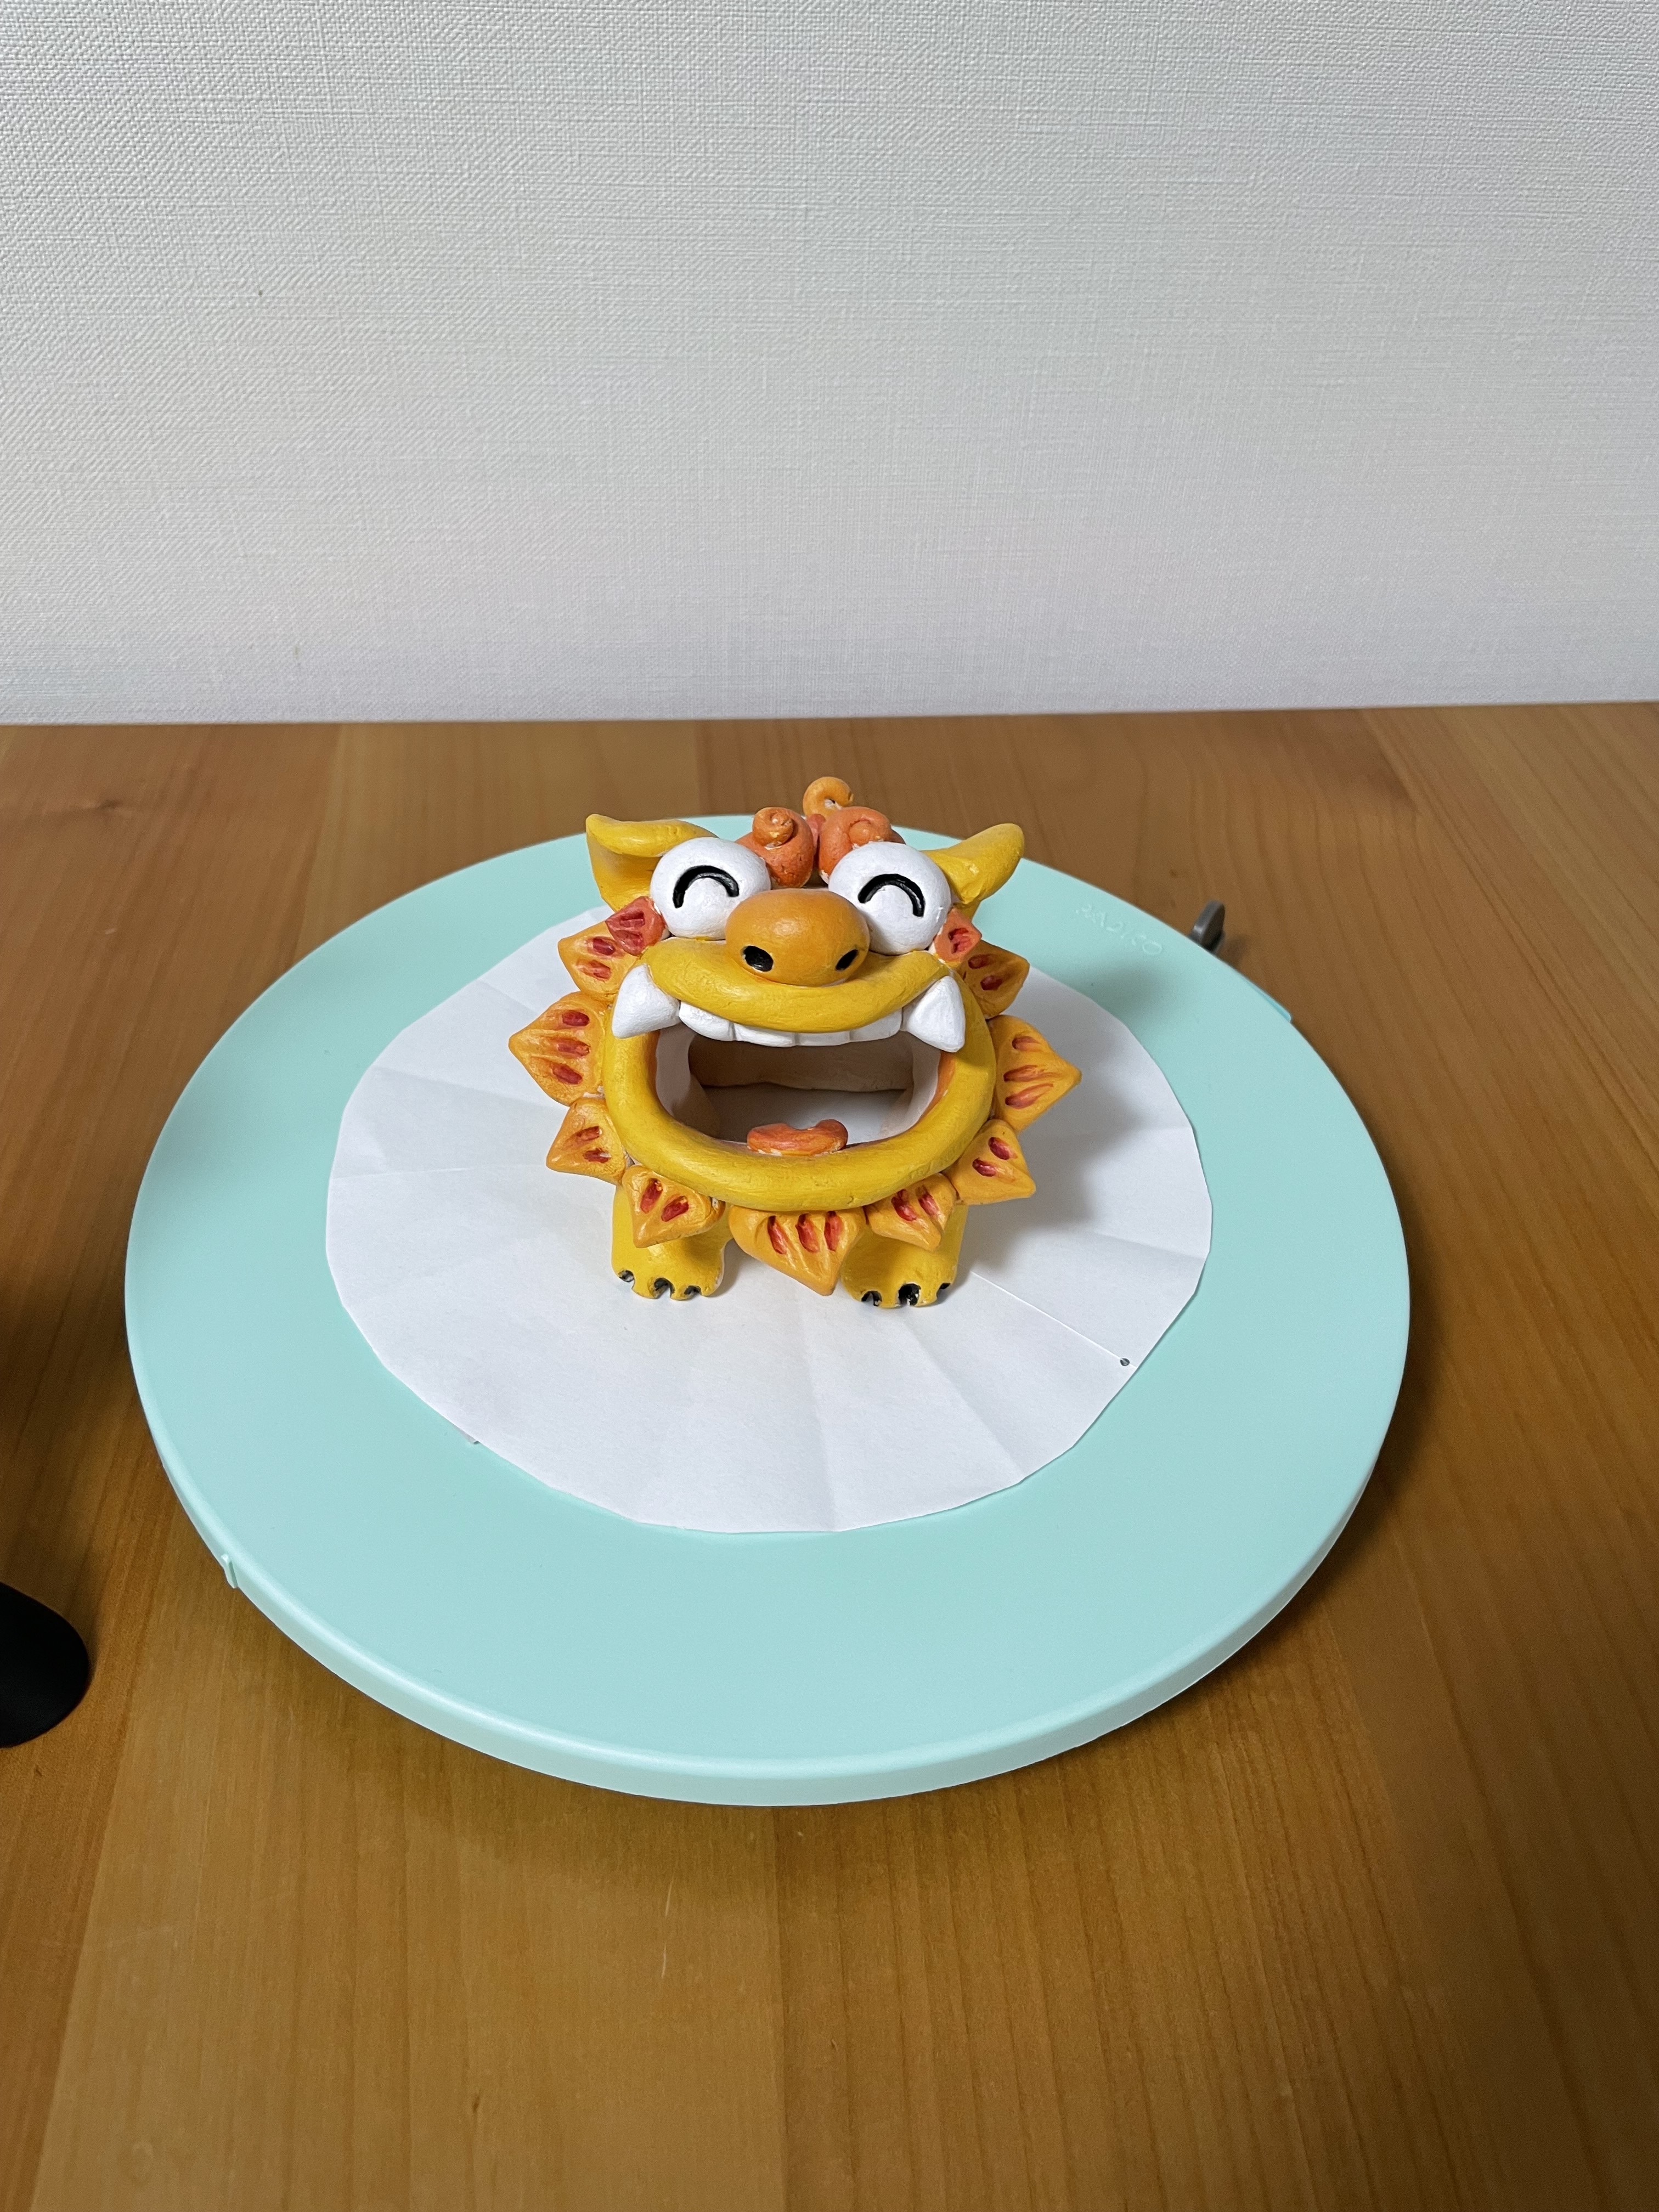
4. 3D scan
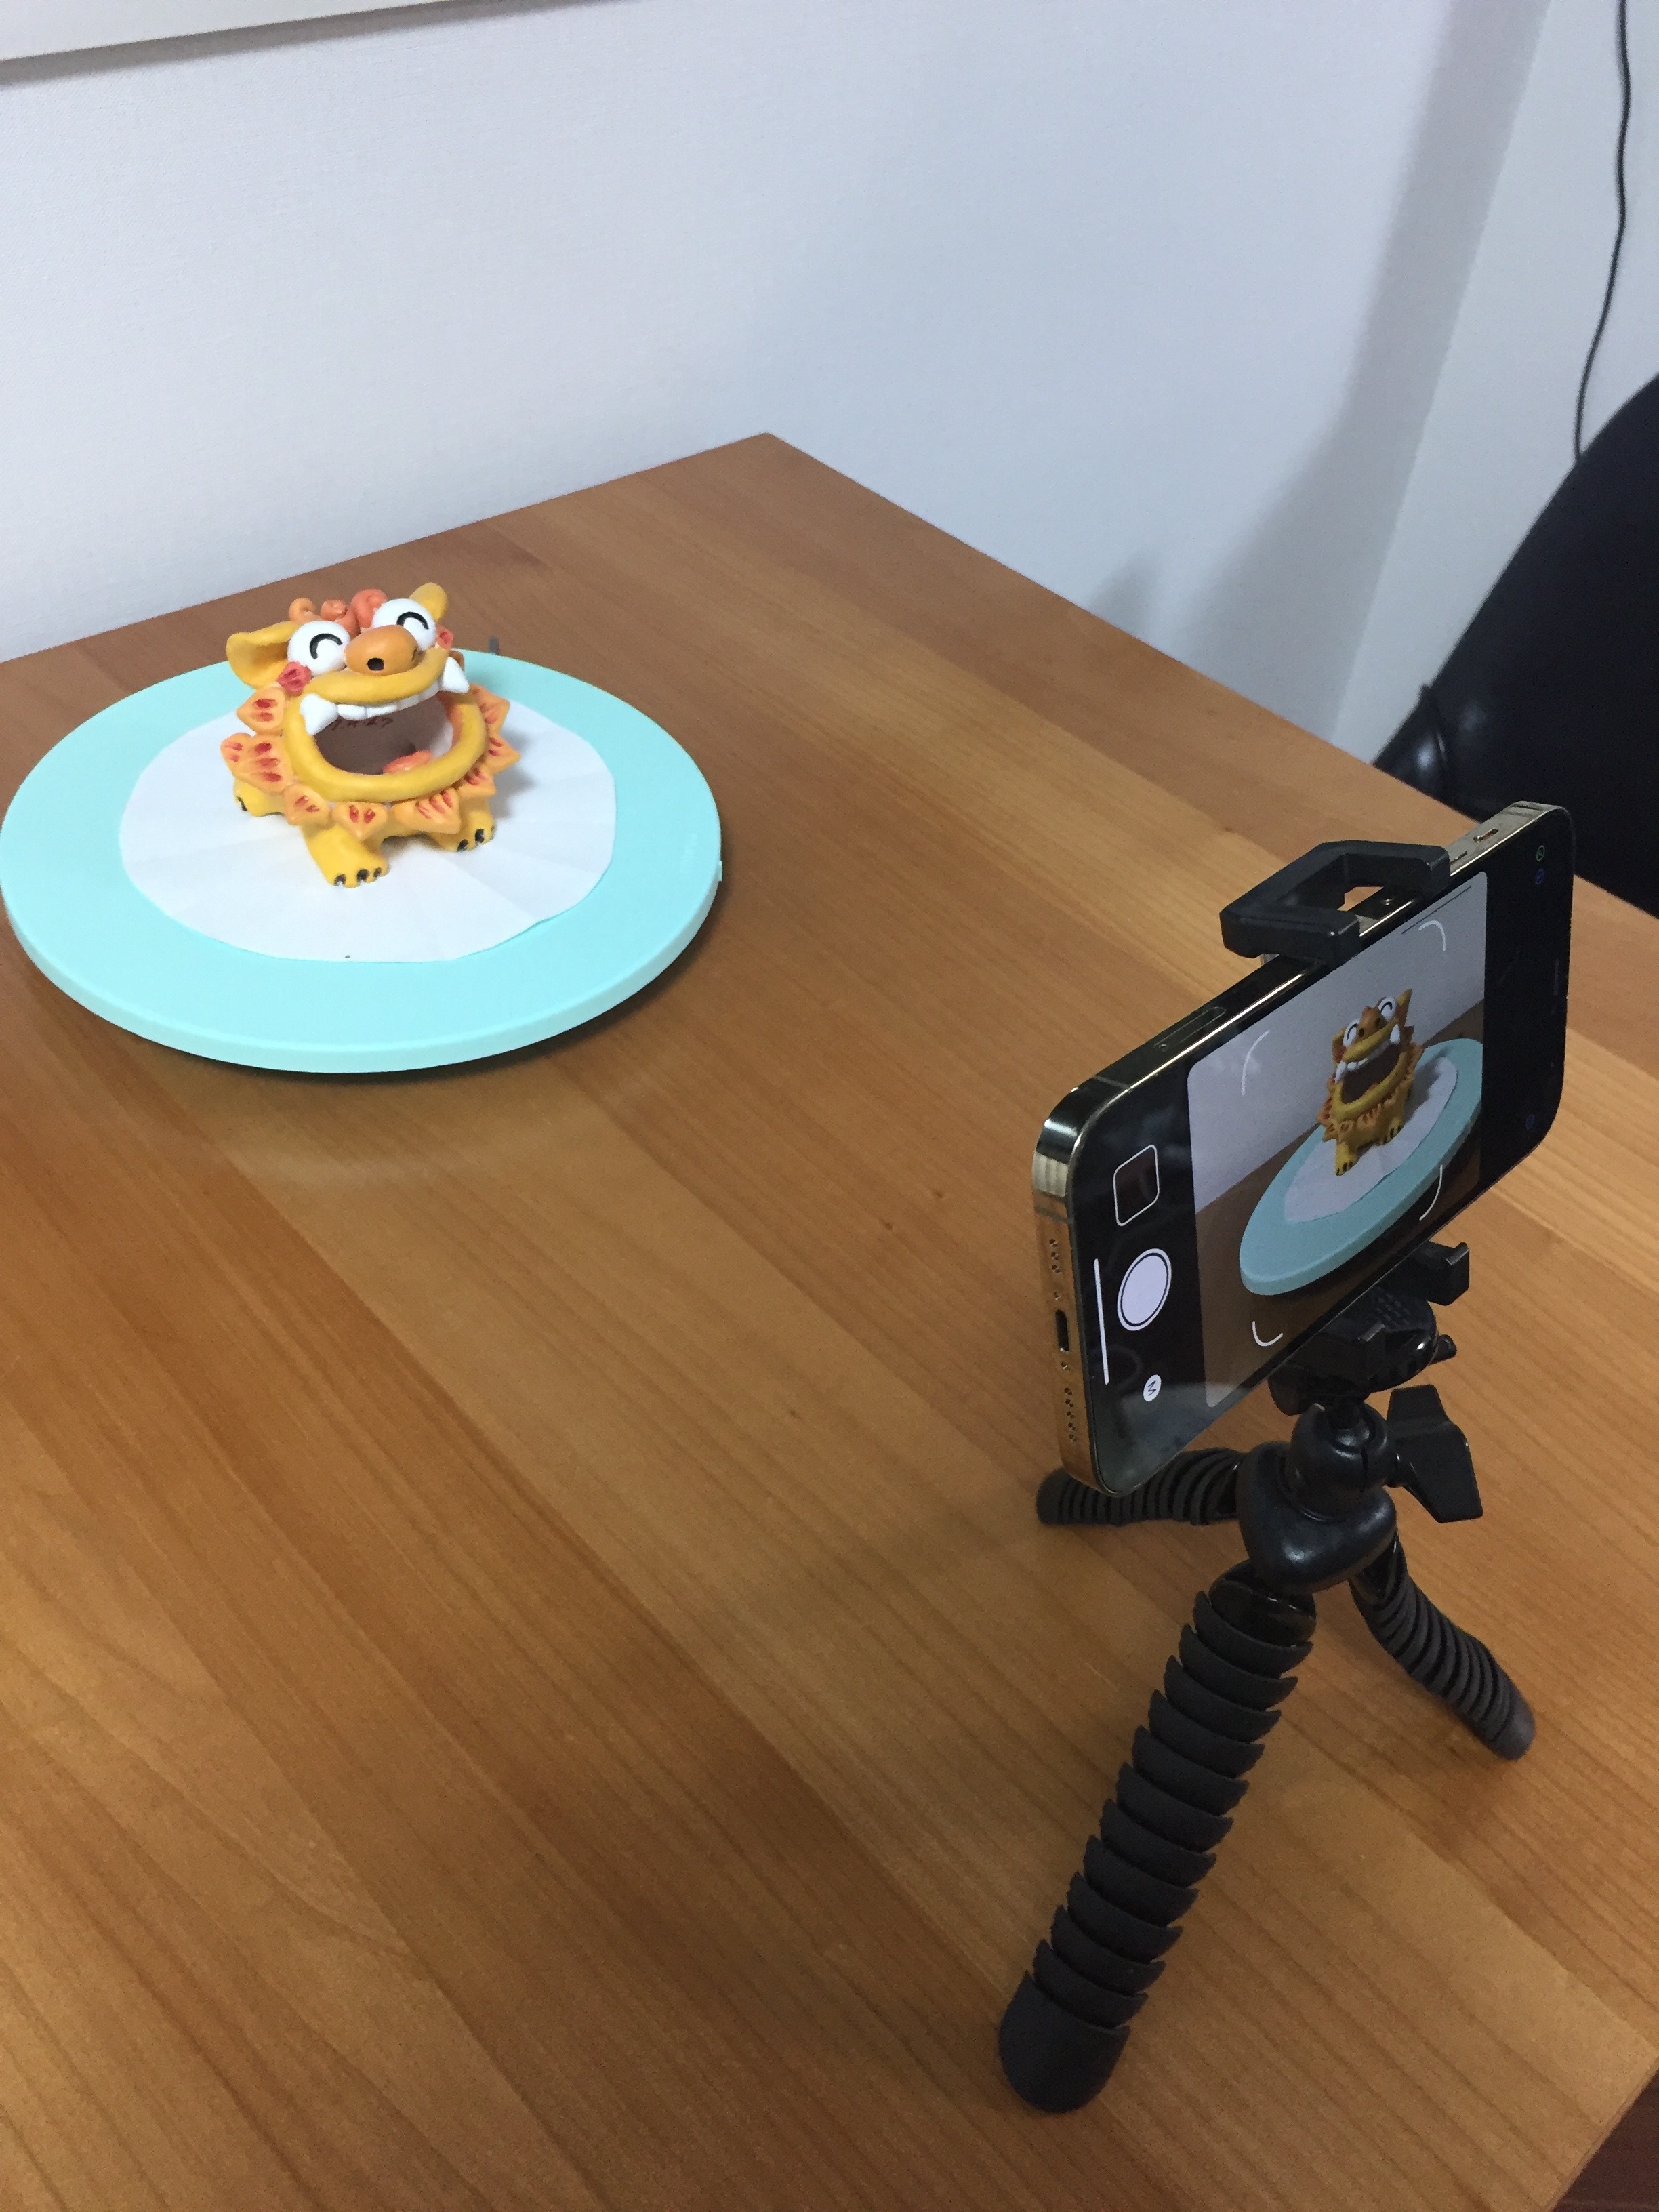
In the automatic mode, it would be very helpful if you have a turntable rotates automatically by use of a motor.
Putting the object with a plain background, or in a
light tent will improve your 3D models quality.
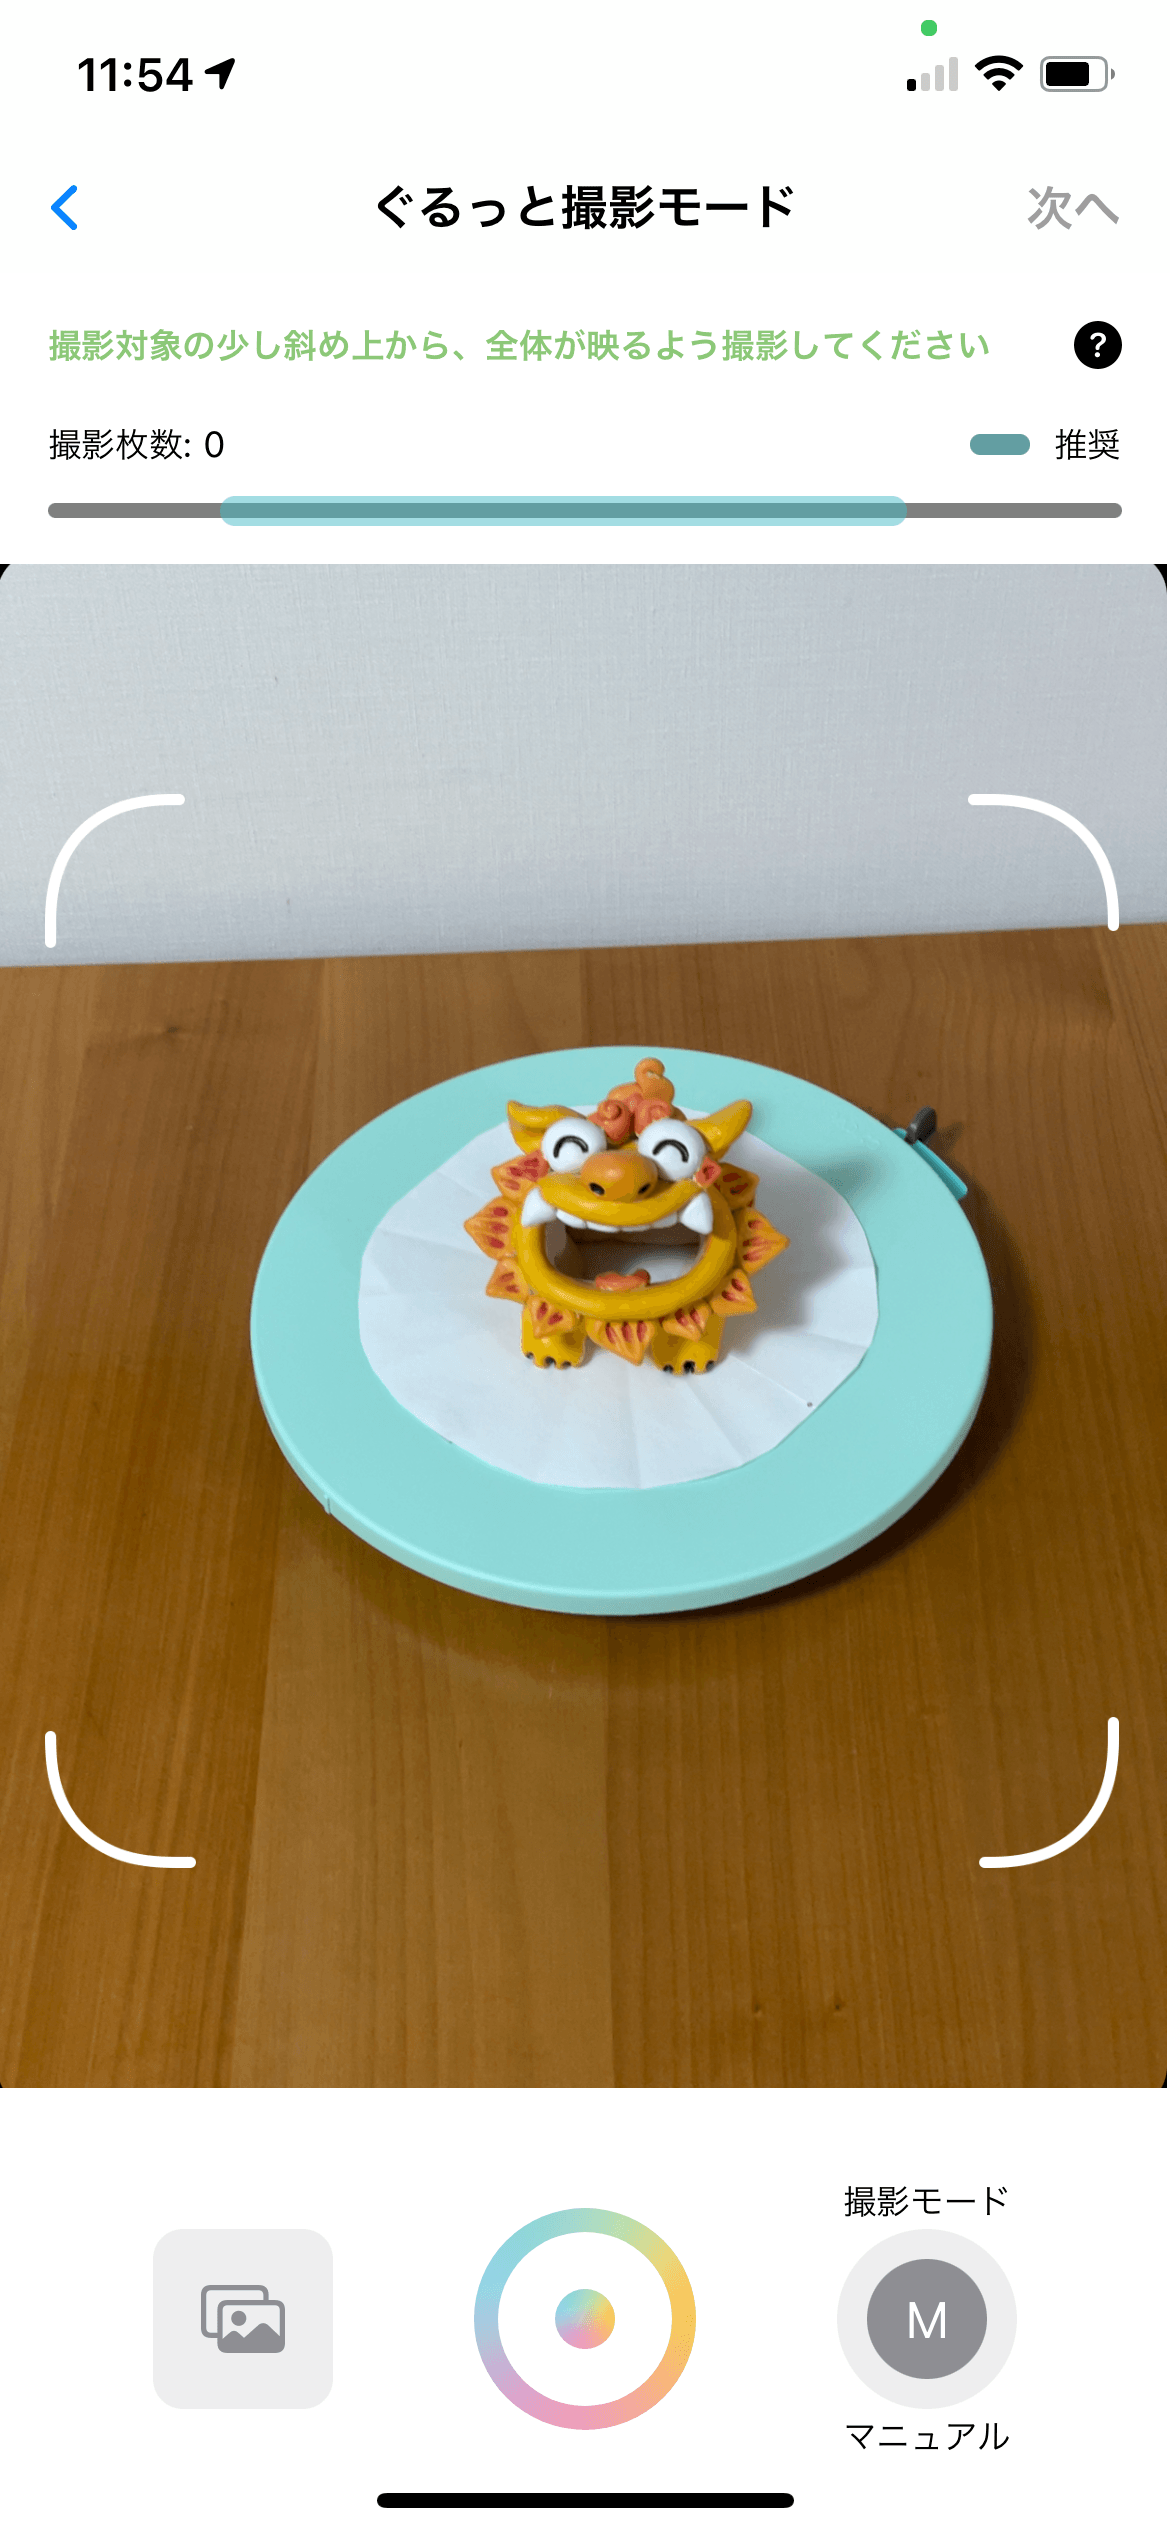
Adjust the distance to the object to frame it in. Press the shoot button on the bottom center, after finishing the adjustment. If you are using the automatic mode, the camera will take photos at 4 seconds interval)
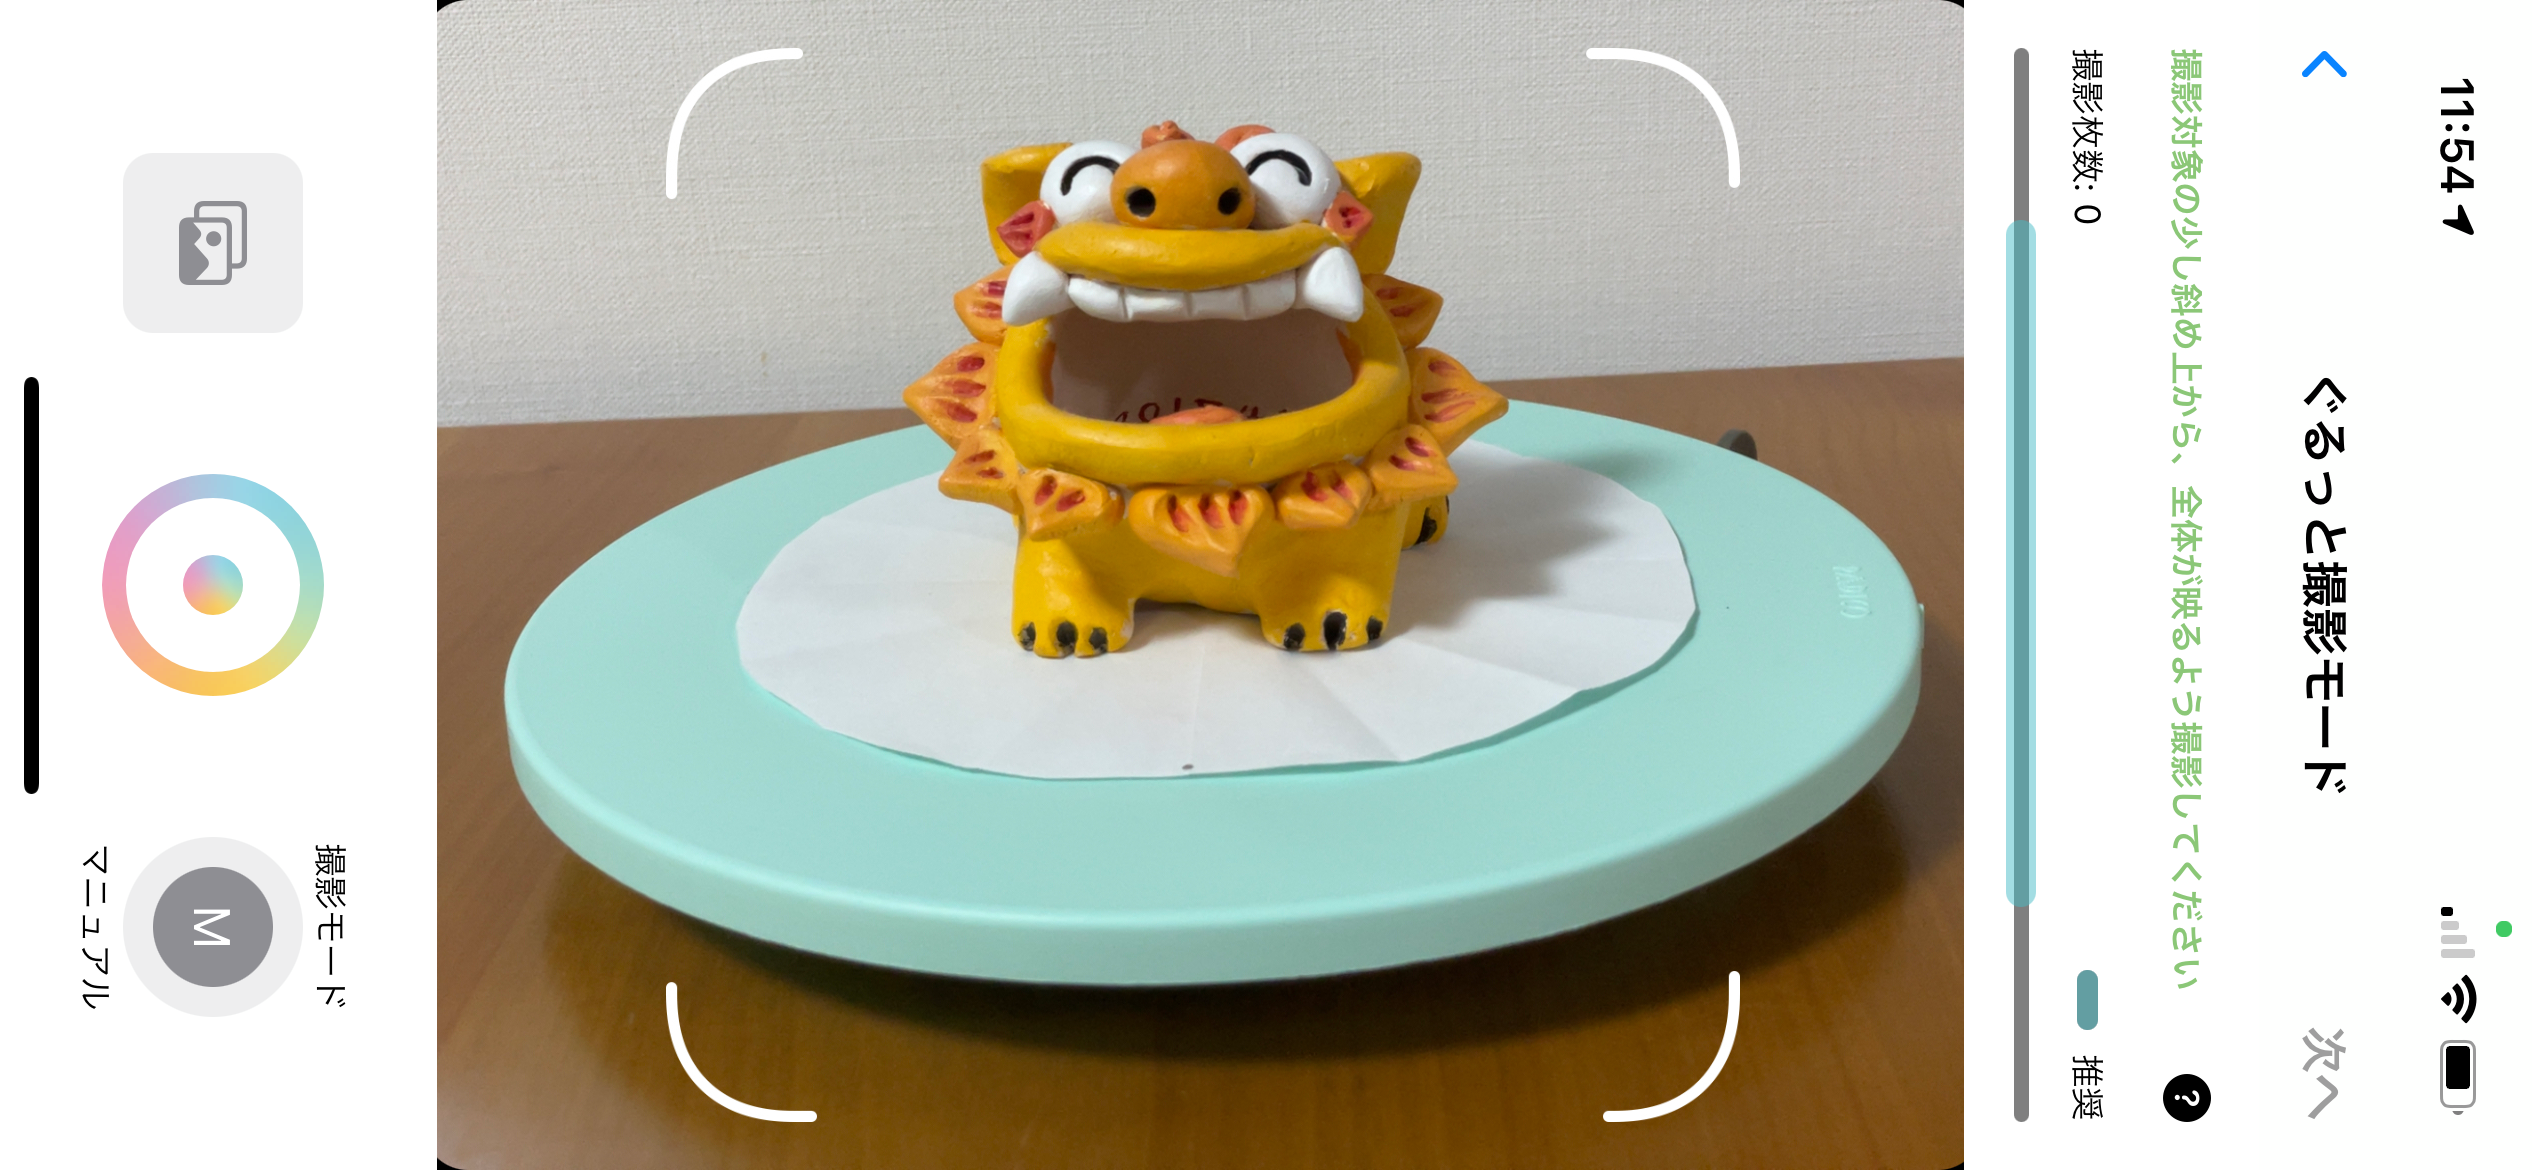
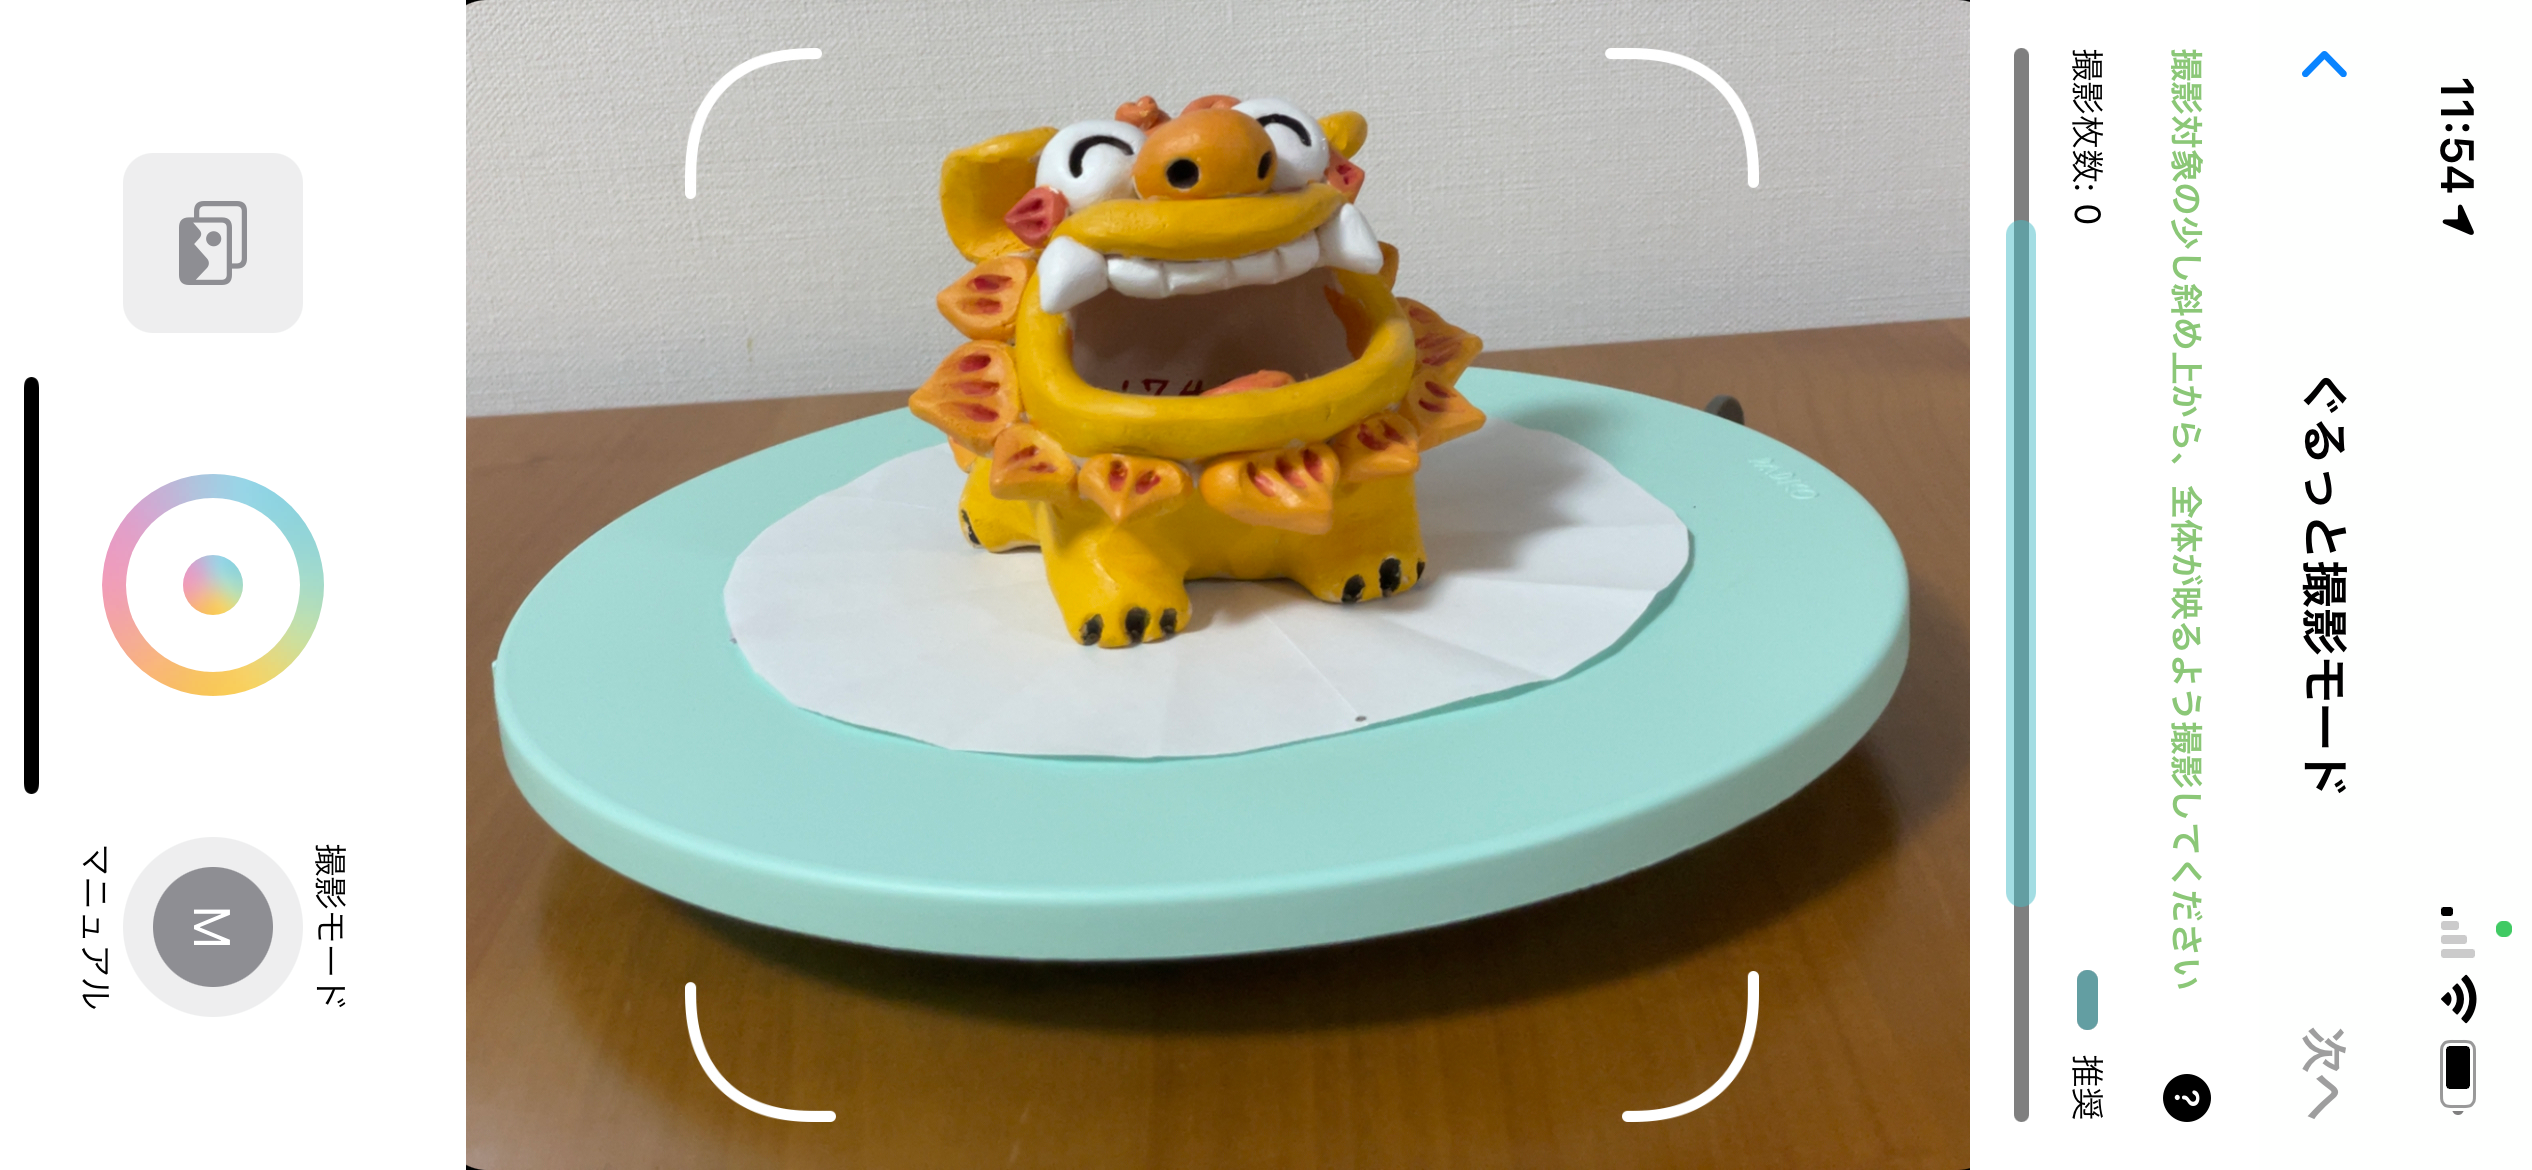
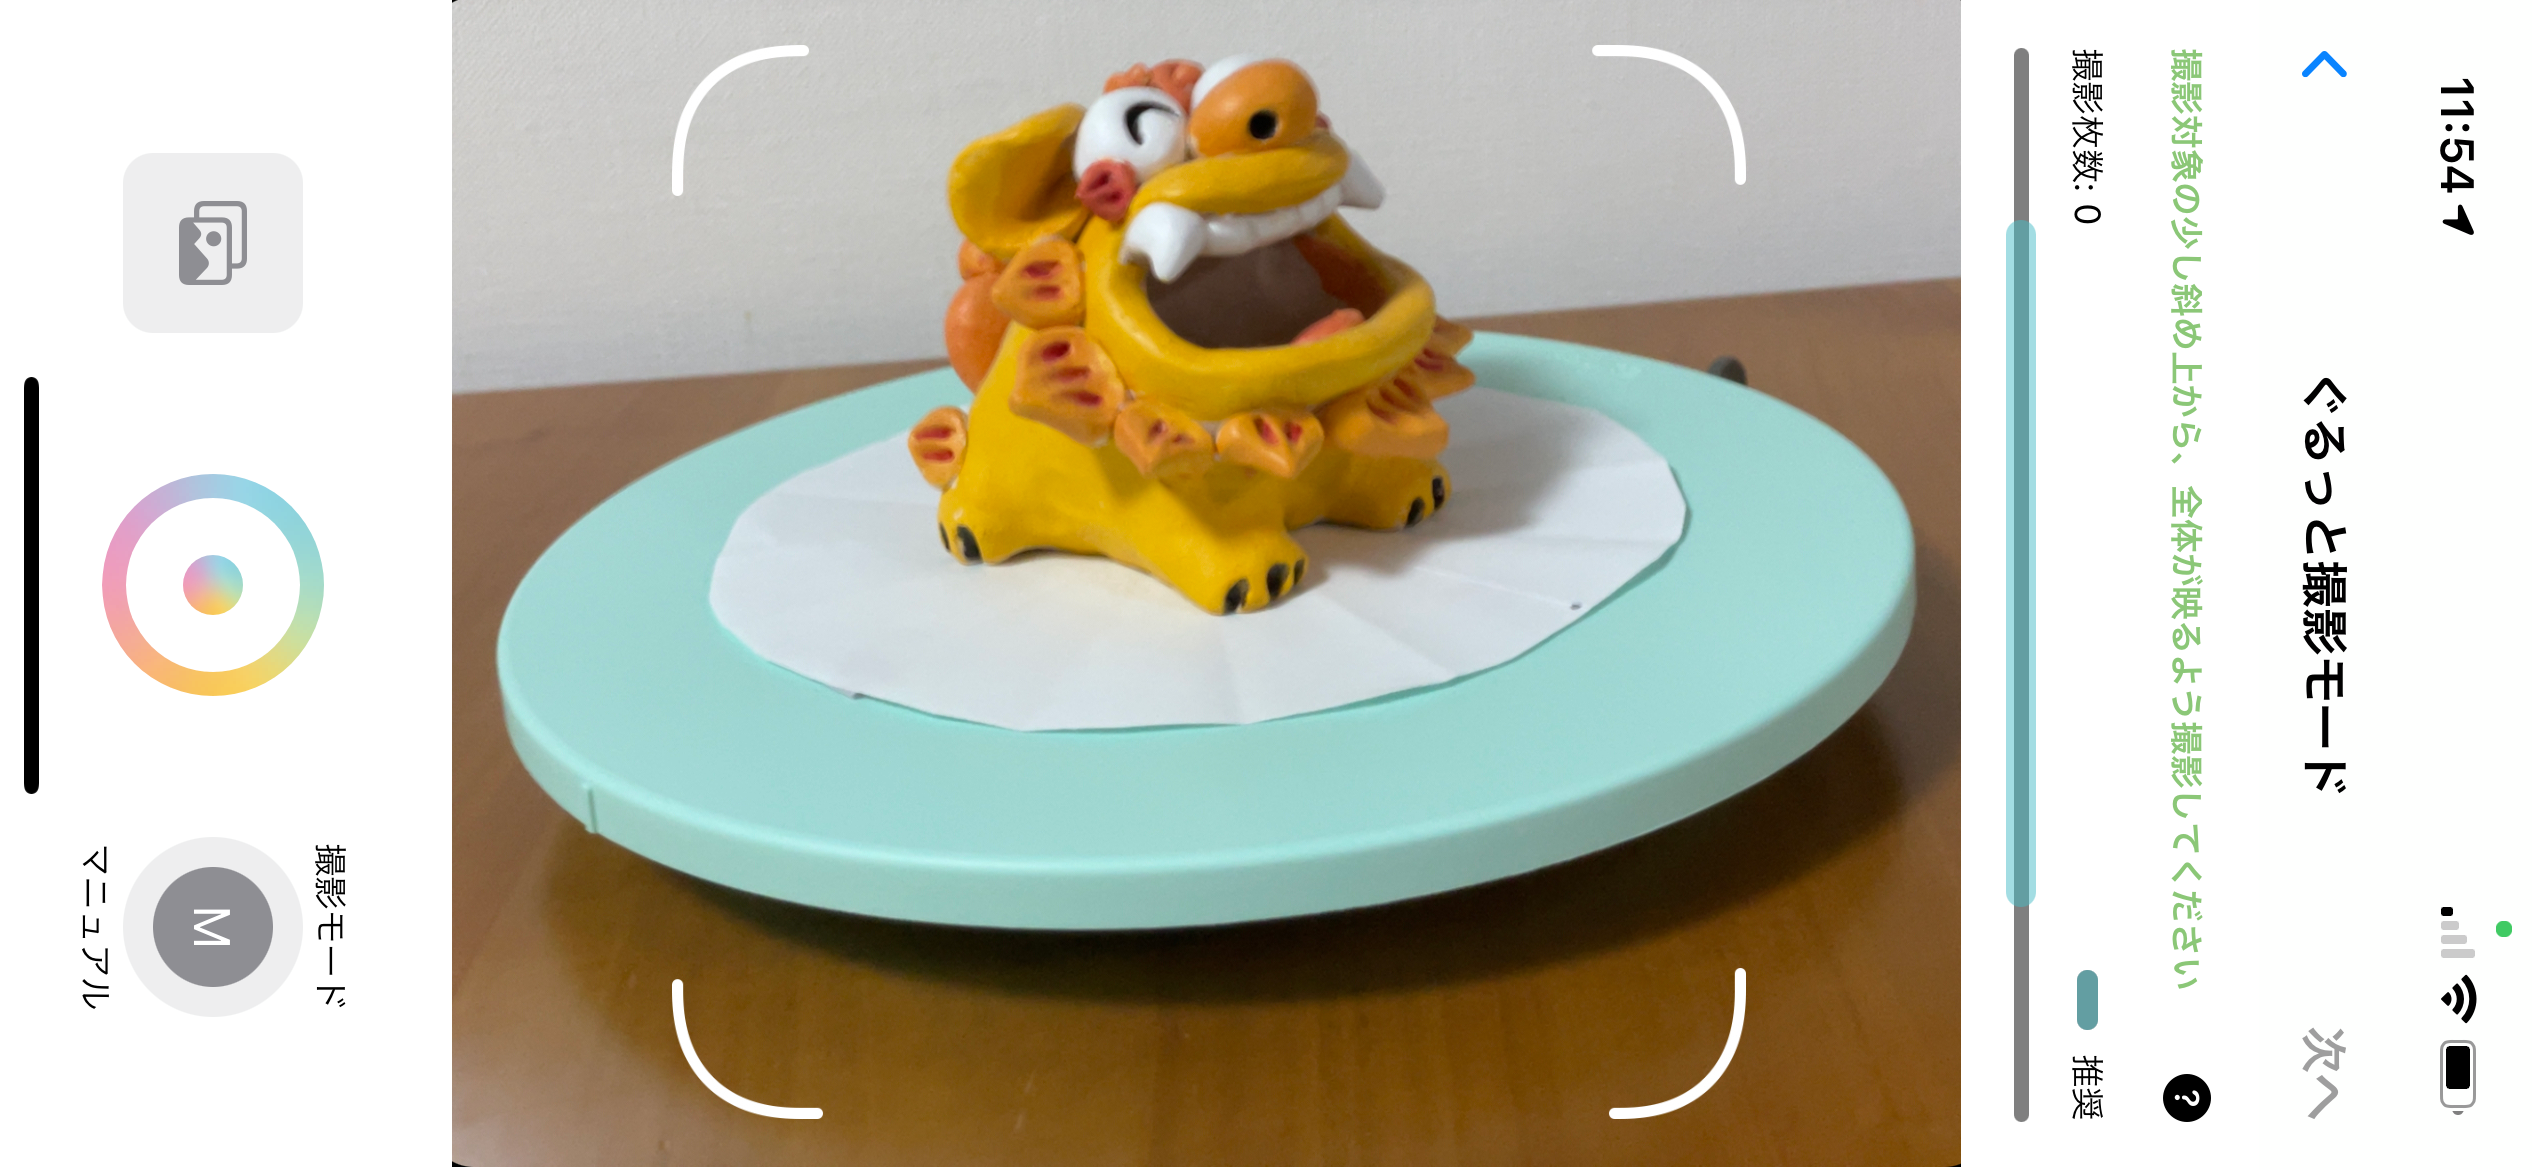
At least 16 photos are recommended for 360°

More photos will improve 3D models quality, whereas the size of the data increases.
Recommendation:
16 photos horizontal to, and 16 photos 45° tilting down from above(32 photos in total) to the object will create a very good 3D model.
16 photos horizontal to, and 16 photos 45° tilting down from above(32 photos in total) to the object will create a very good 3D model.
5.アップロードする

Tapping on the next button on top right will upload the photos and generate your 3D model automatically.
6.保存する
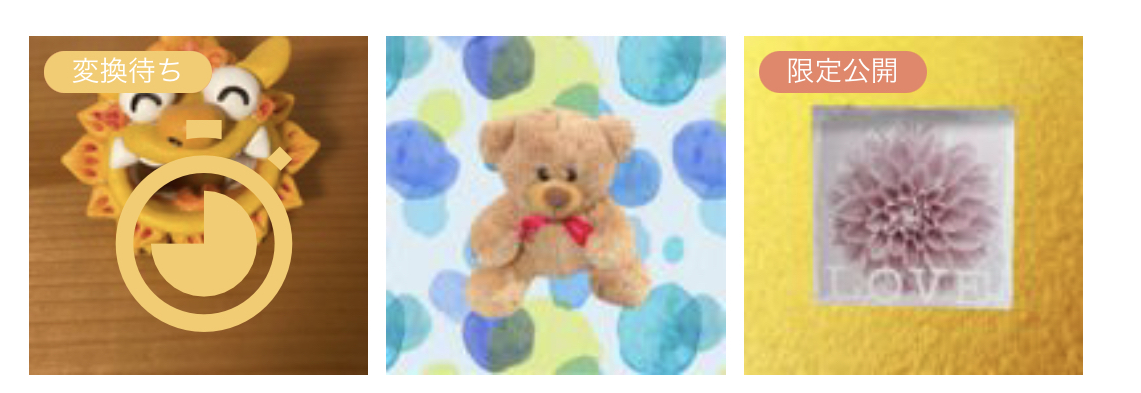
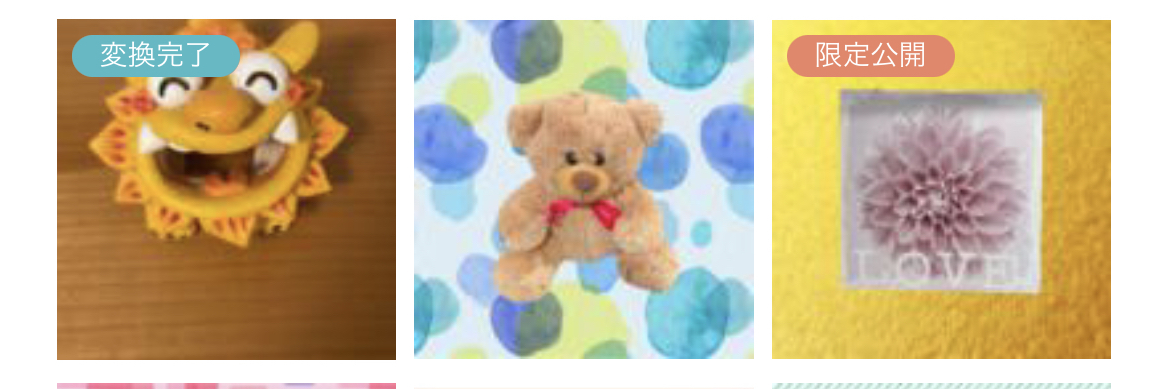
Your 3D model will be appeared on your Katachi space app's screen. Status will be changed to complete from in progress, after the model generation completed.
7.編集・公開する
Tap on the 3D model you created to edit a wallpaper, texts and visibility setting(Private/Public).
Quick mode
1.カメラを立ち上げる
Login to Katachi Space, tap the camera button on the bottom right.
2.撮影モードを選択
Select "Quick mode" on the mode selection screen.
Note: Quick mode is available only device supported iPhones.
Note: Quick mode is available only device supported iPhones.
3.カメラの設定
Quick mode supports both in/out cameras.
The in camera(true-depth sensor) will measure more accurate sizes.
The in camera(true-depth sensor) will measure more accurate sizes.
4.カタチの撮影
If you use the in camera, 45° tilting down from above, keeping a constant distance of approximately 50cm will create a very good 3D model.
Tips:
Putting the object on a platform will make it easier for you to edit the bottom face.
Putting the object on a platform will make it easier for you to edit the bottom face.
5.カタチの編集
Beautify the object you shot by getting rid of the environment around the object that has been taken with the target object.
6.背景の調節

Slide right to move the background forward. The green background wall is the area to be removed, adjust it to keep the object looks fine.
7.床面の調節
Slide right to move the floor up.
The orange plain is the area to be removed, adjust it to keep the object looks fine.
The orange plain is the area to be removed, adjust it to keep the object looks fine.
8.大きさの調節
Adjust the size after the wall and floor.Pinch in and out to adjust the scale in the AR camera mode.
9.保存する
Set up a wallpaper, texts and visibility setting(Private/Public), press save to complete.
Set up a wallpaper, texts and visibility setting(Private/Public), press save to complete.
Multiple photo mode
1.カメラを立ち上げる
Login to Katachi Space, tap the camera button on the bottom right.
2.撮影モードを選択
Select "Multiple photo mode" on the mode selection screen.
Note: Quick mode is available only device supported iPhones.
Select "Multiple photo mode" on the mode selection screen.
Note: Quick mode is available only device supported iPhones.
3.カメラの設定
Frame the target object in and select "Furniture" or "Room".
Select "Custom" for more advanced settings.
Select "Custom" for more advanced settings.
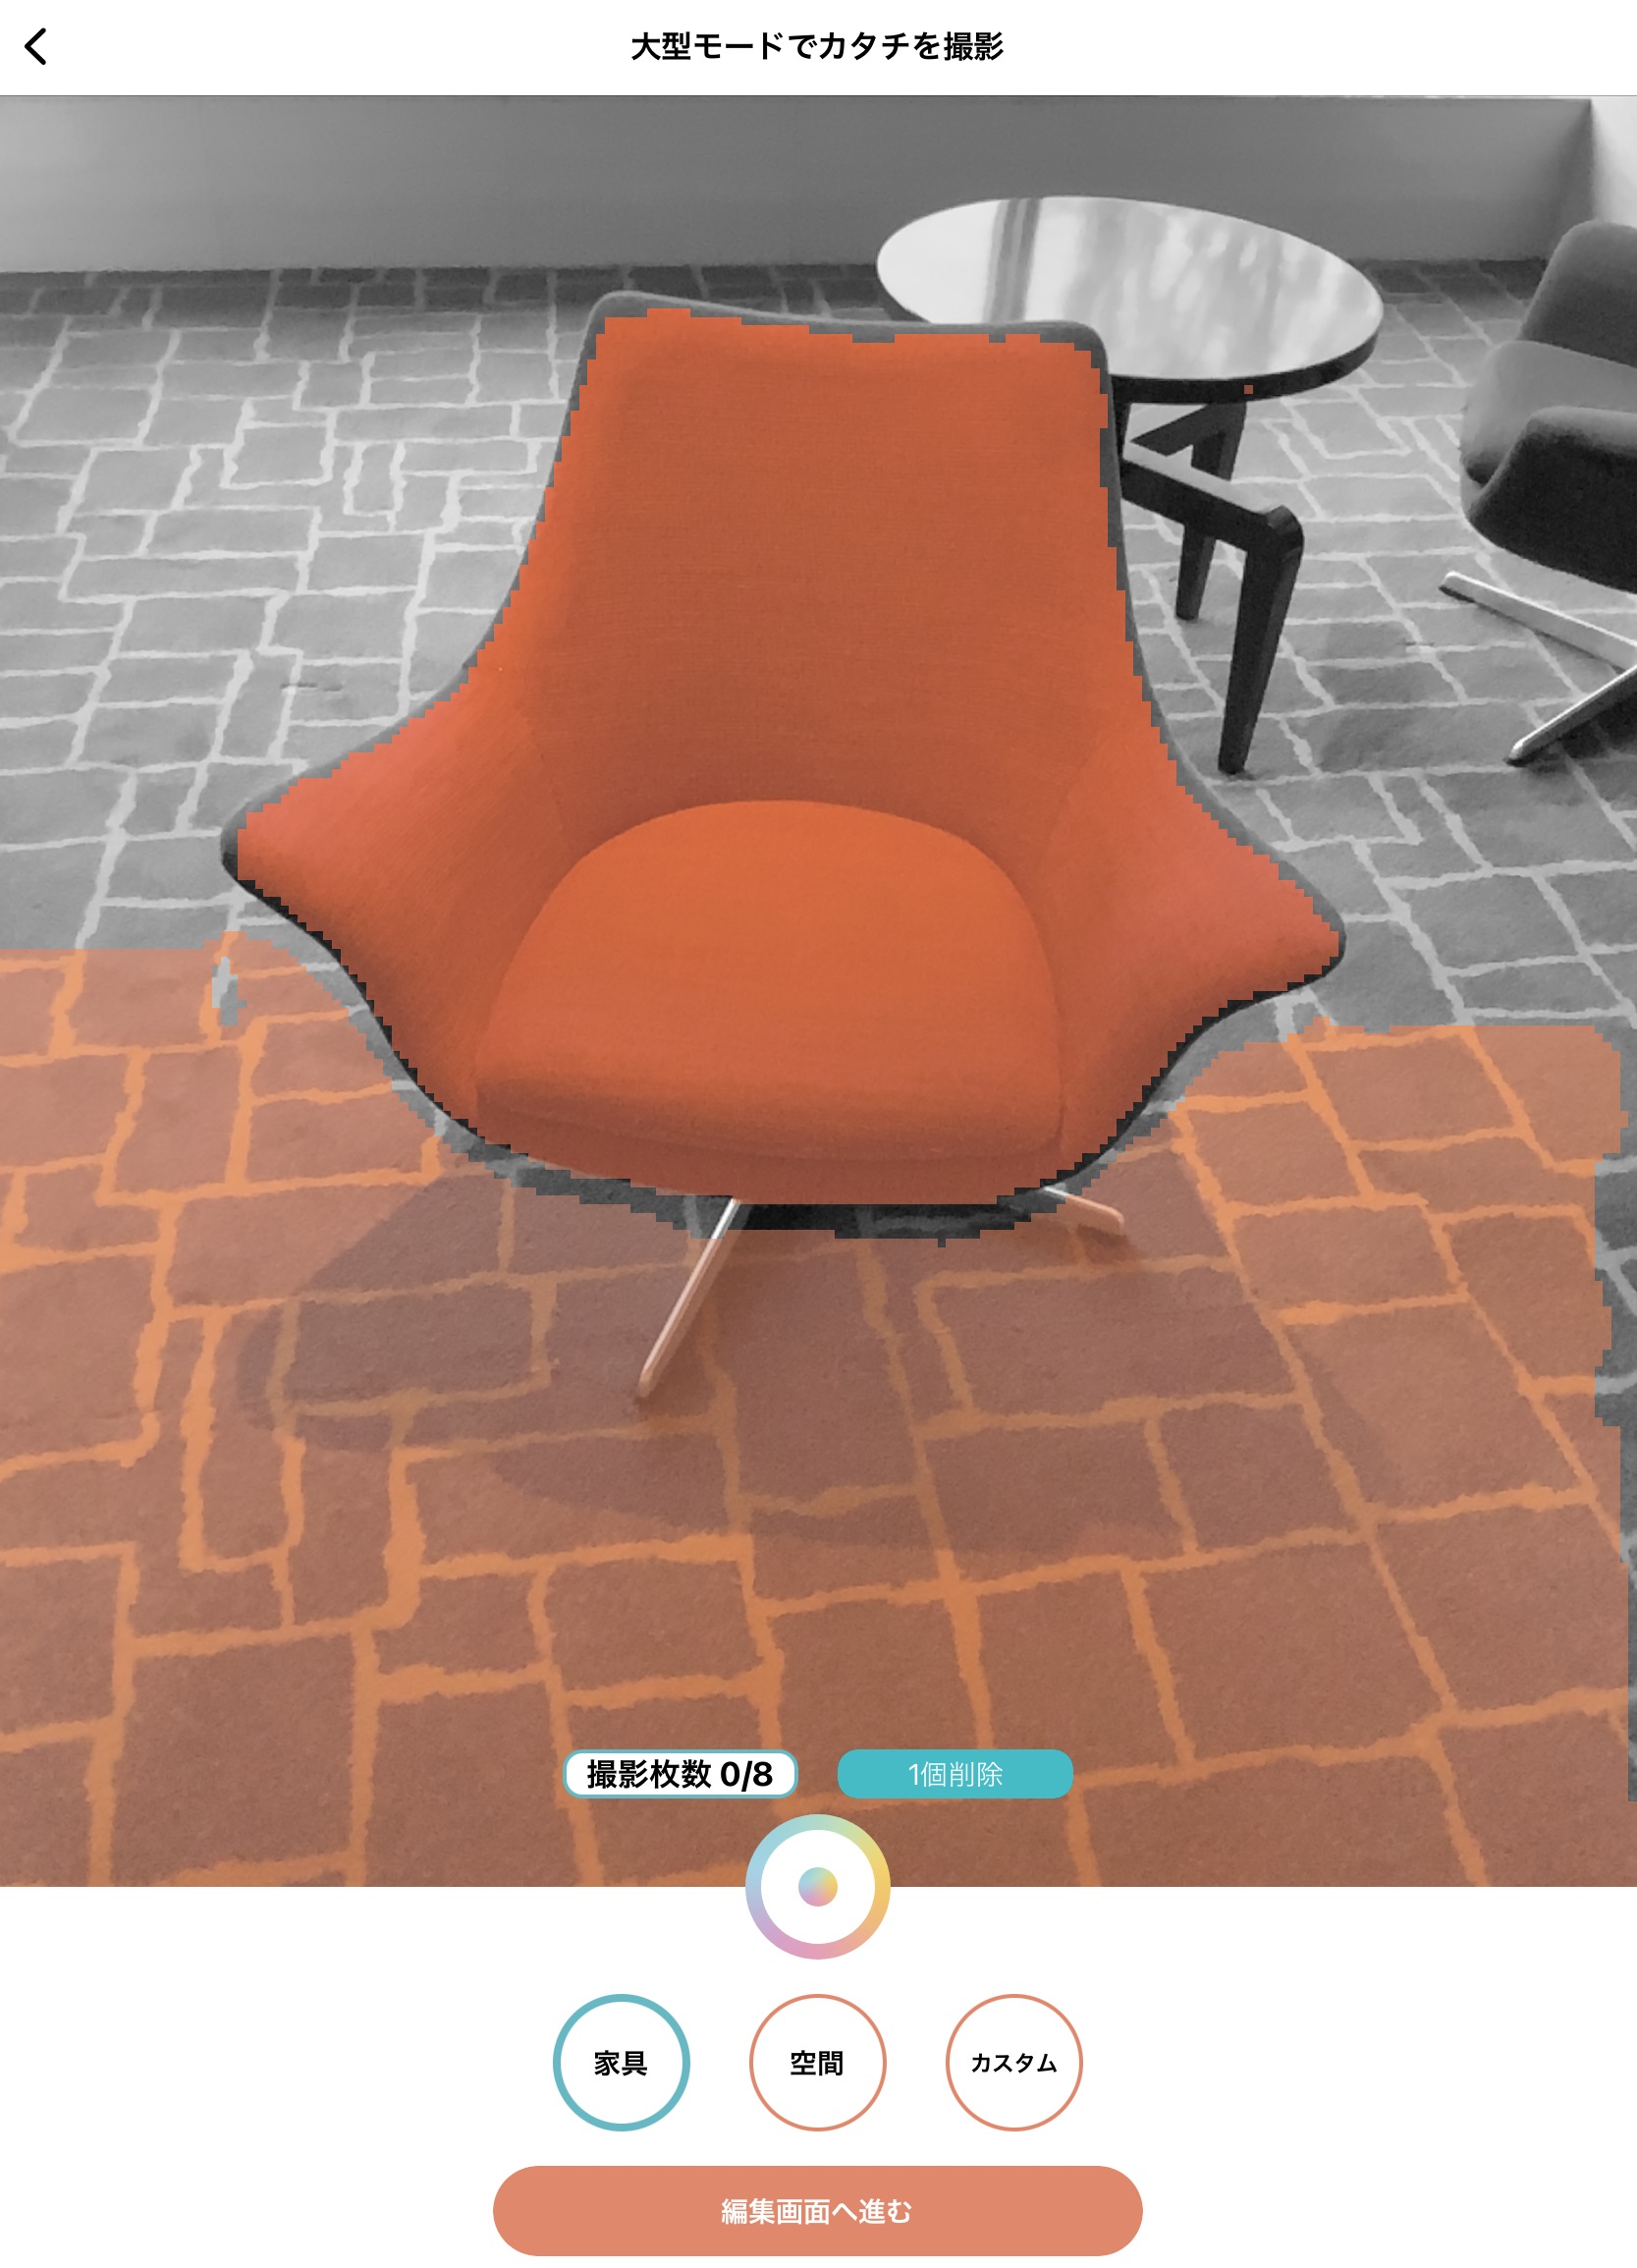
4.カタチの撮影
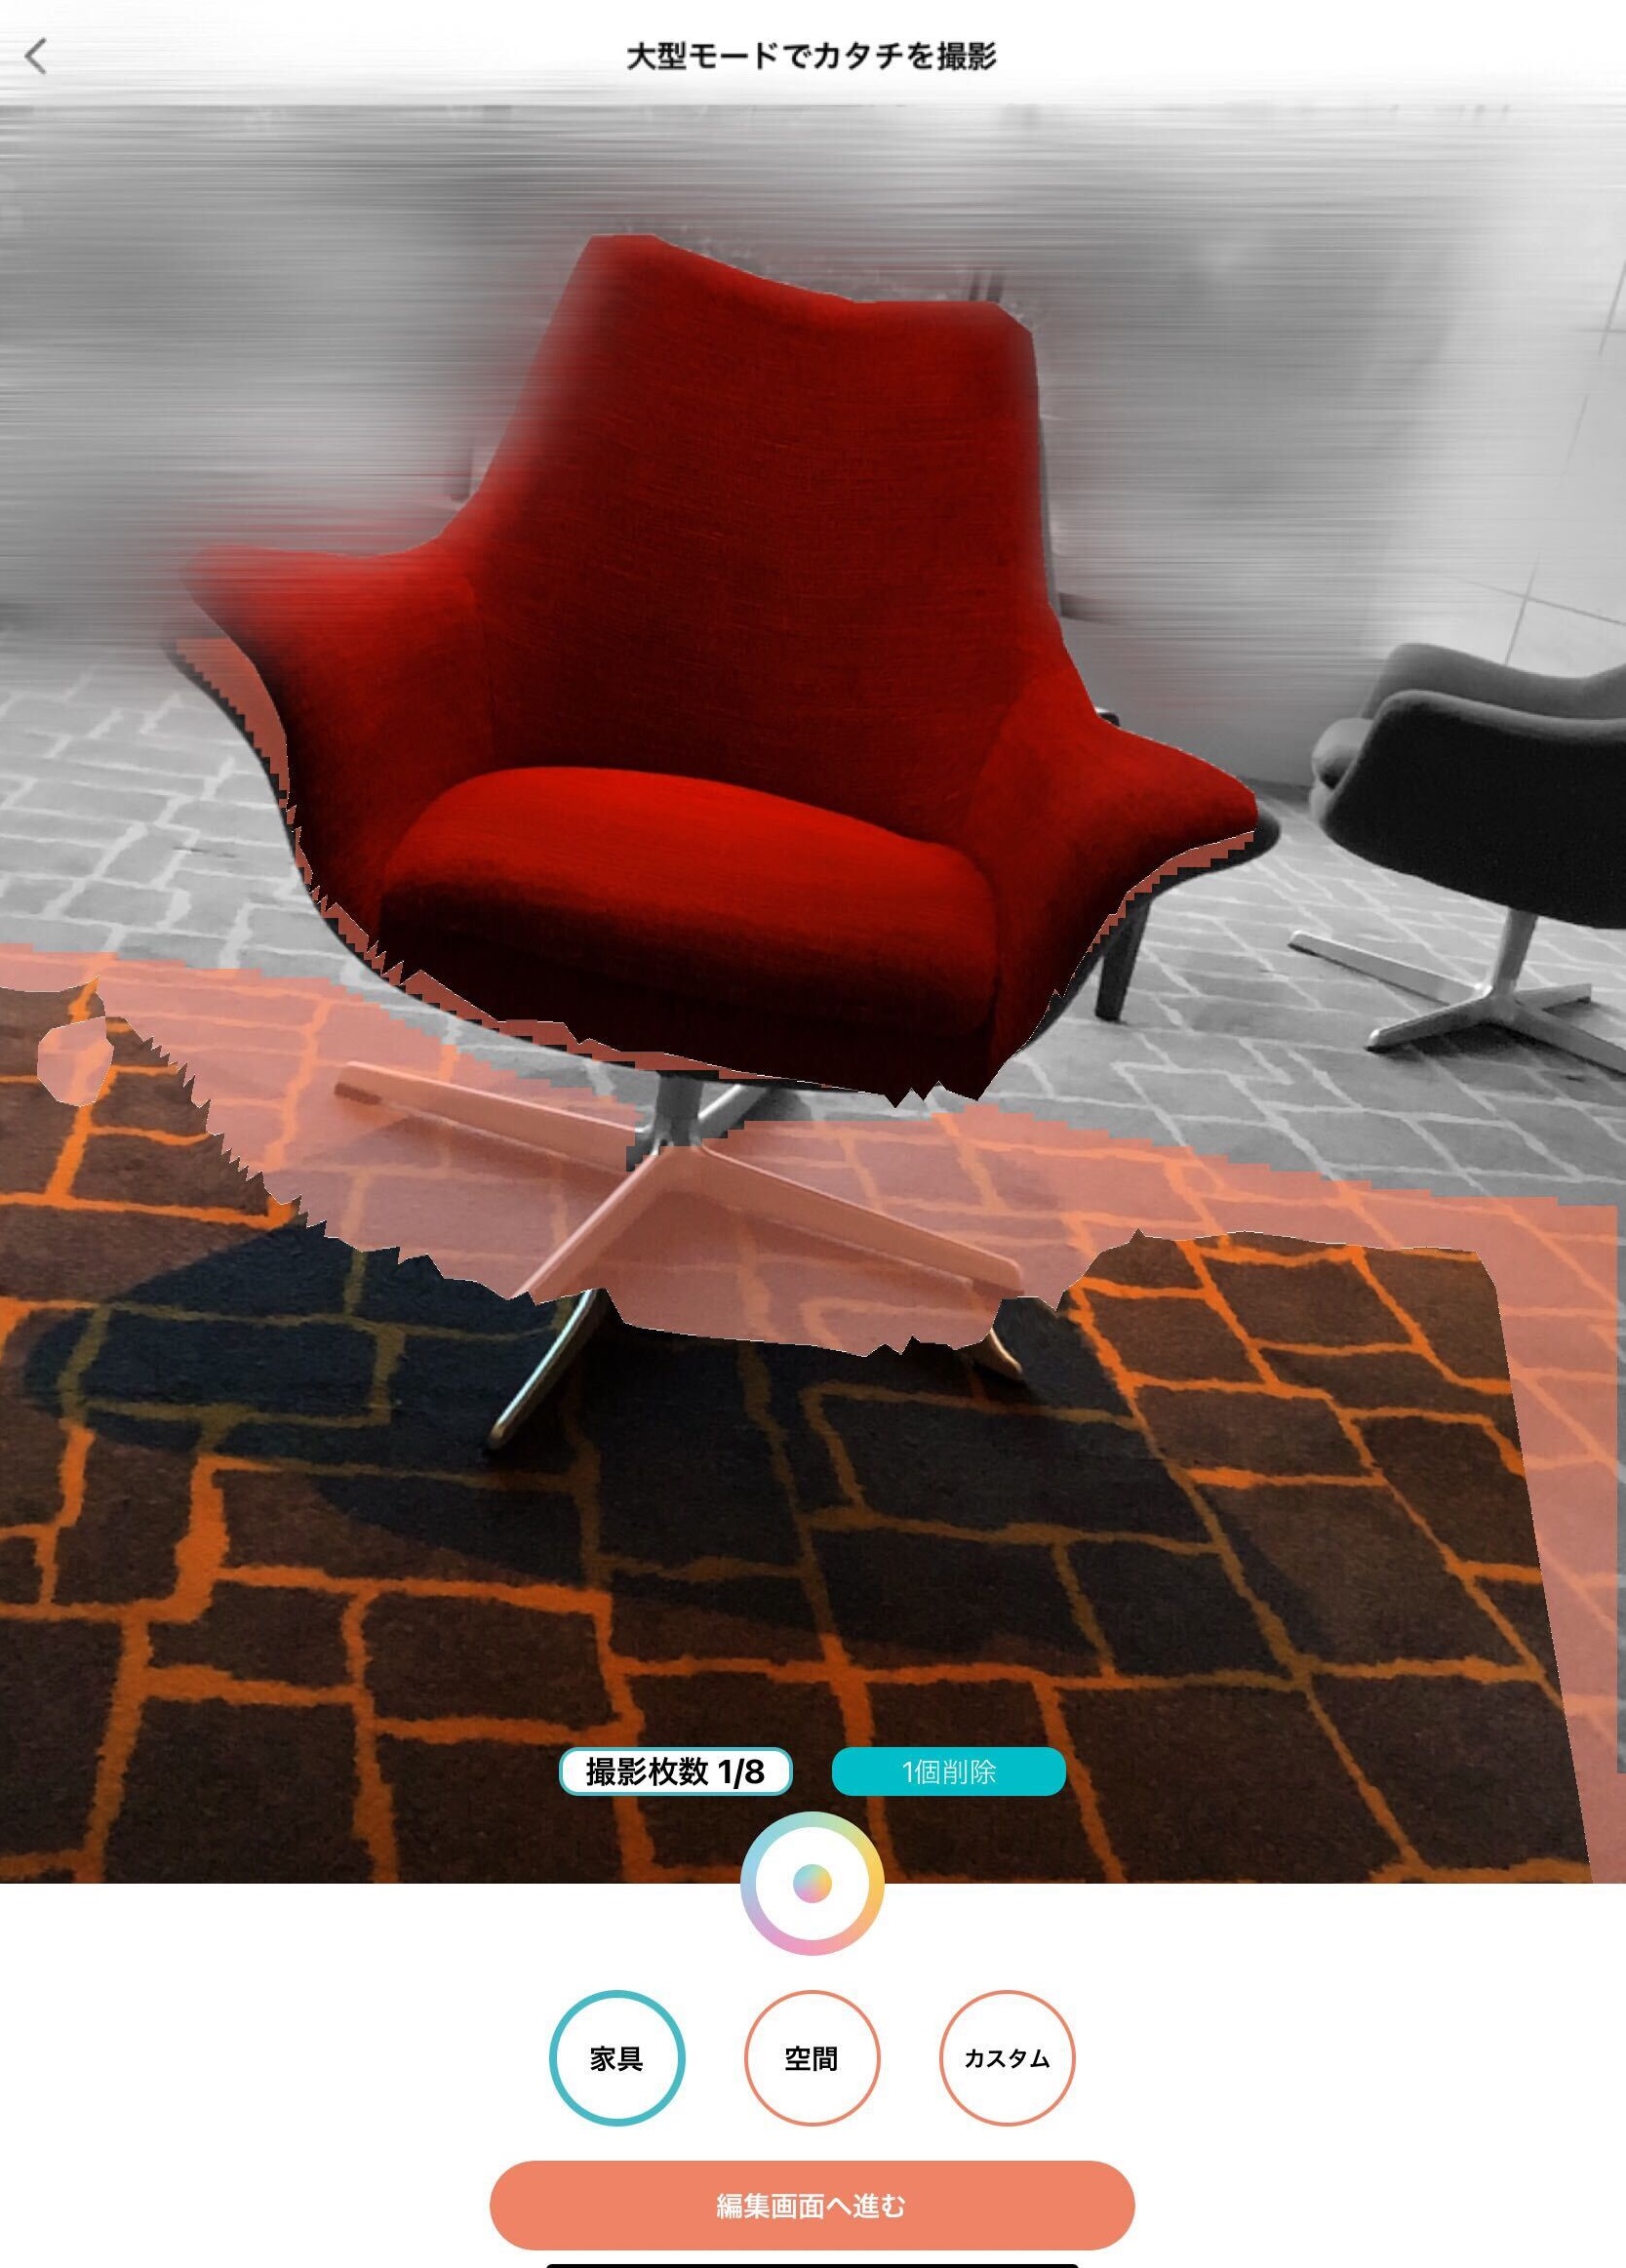
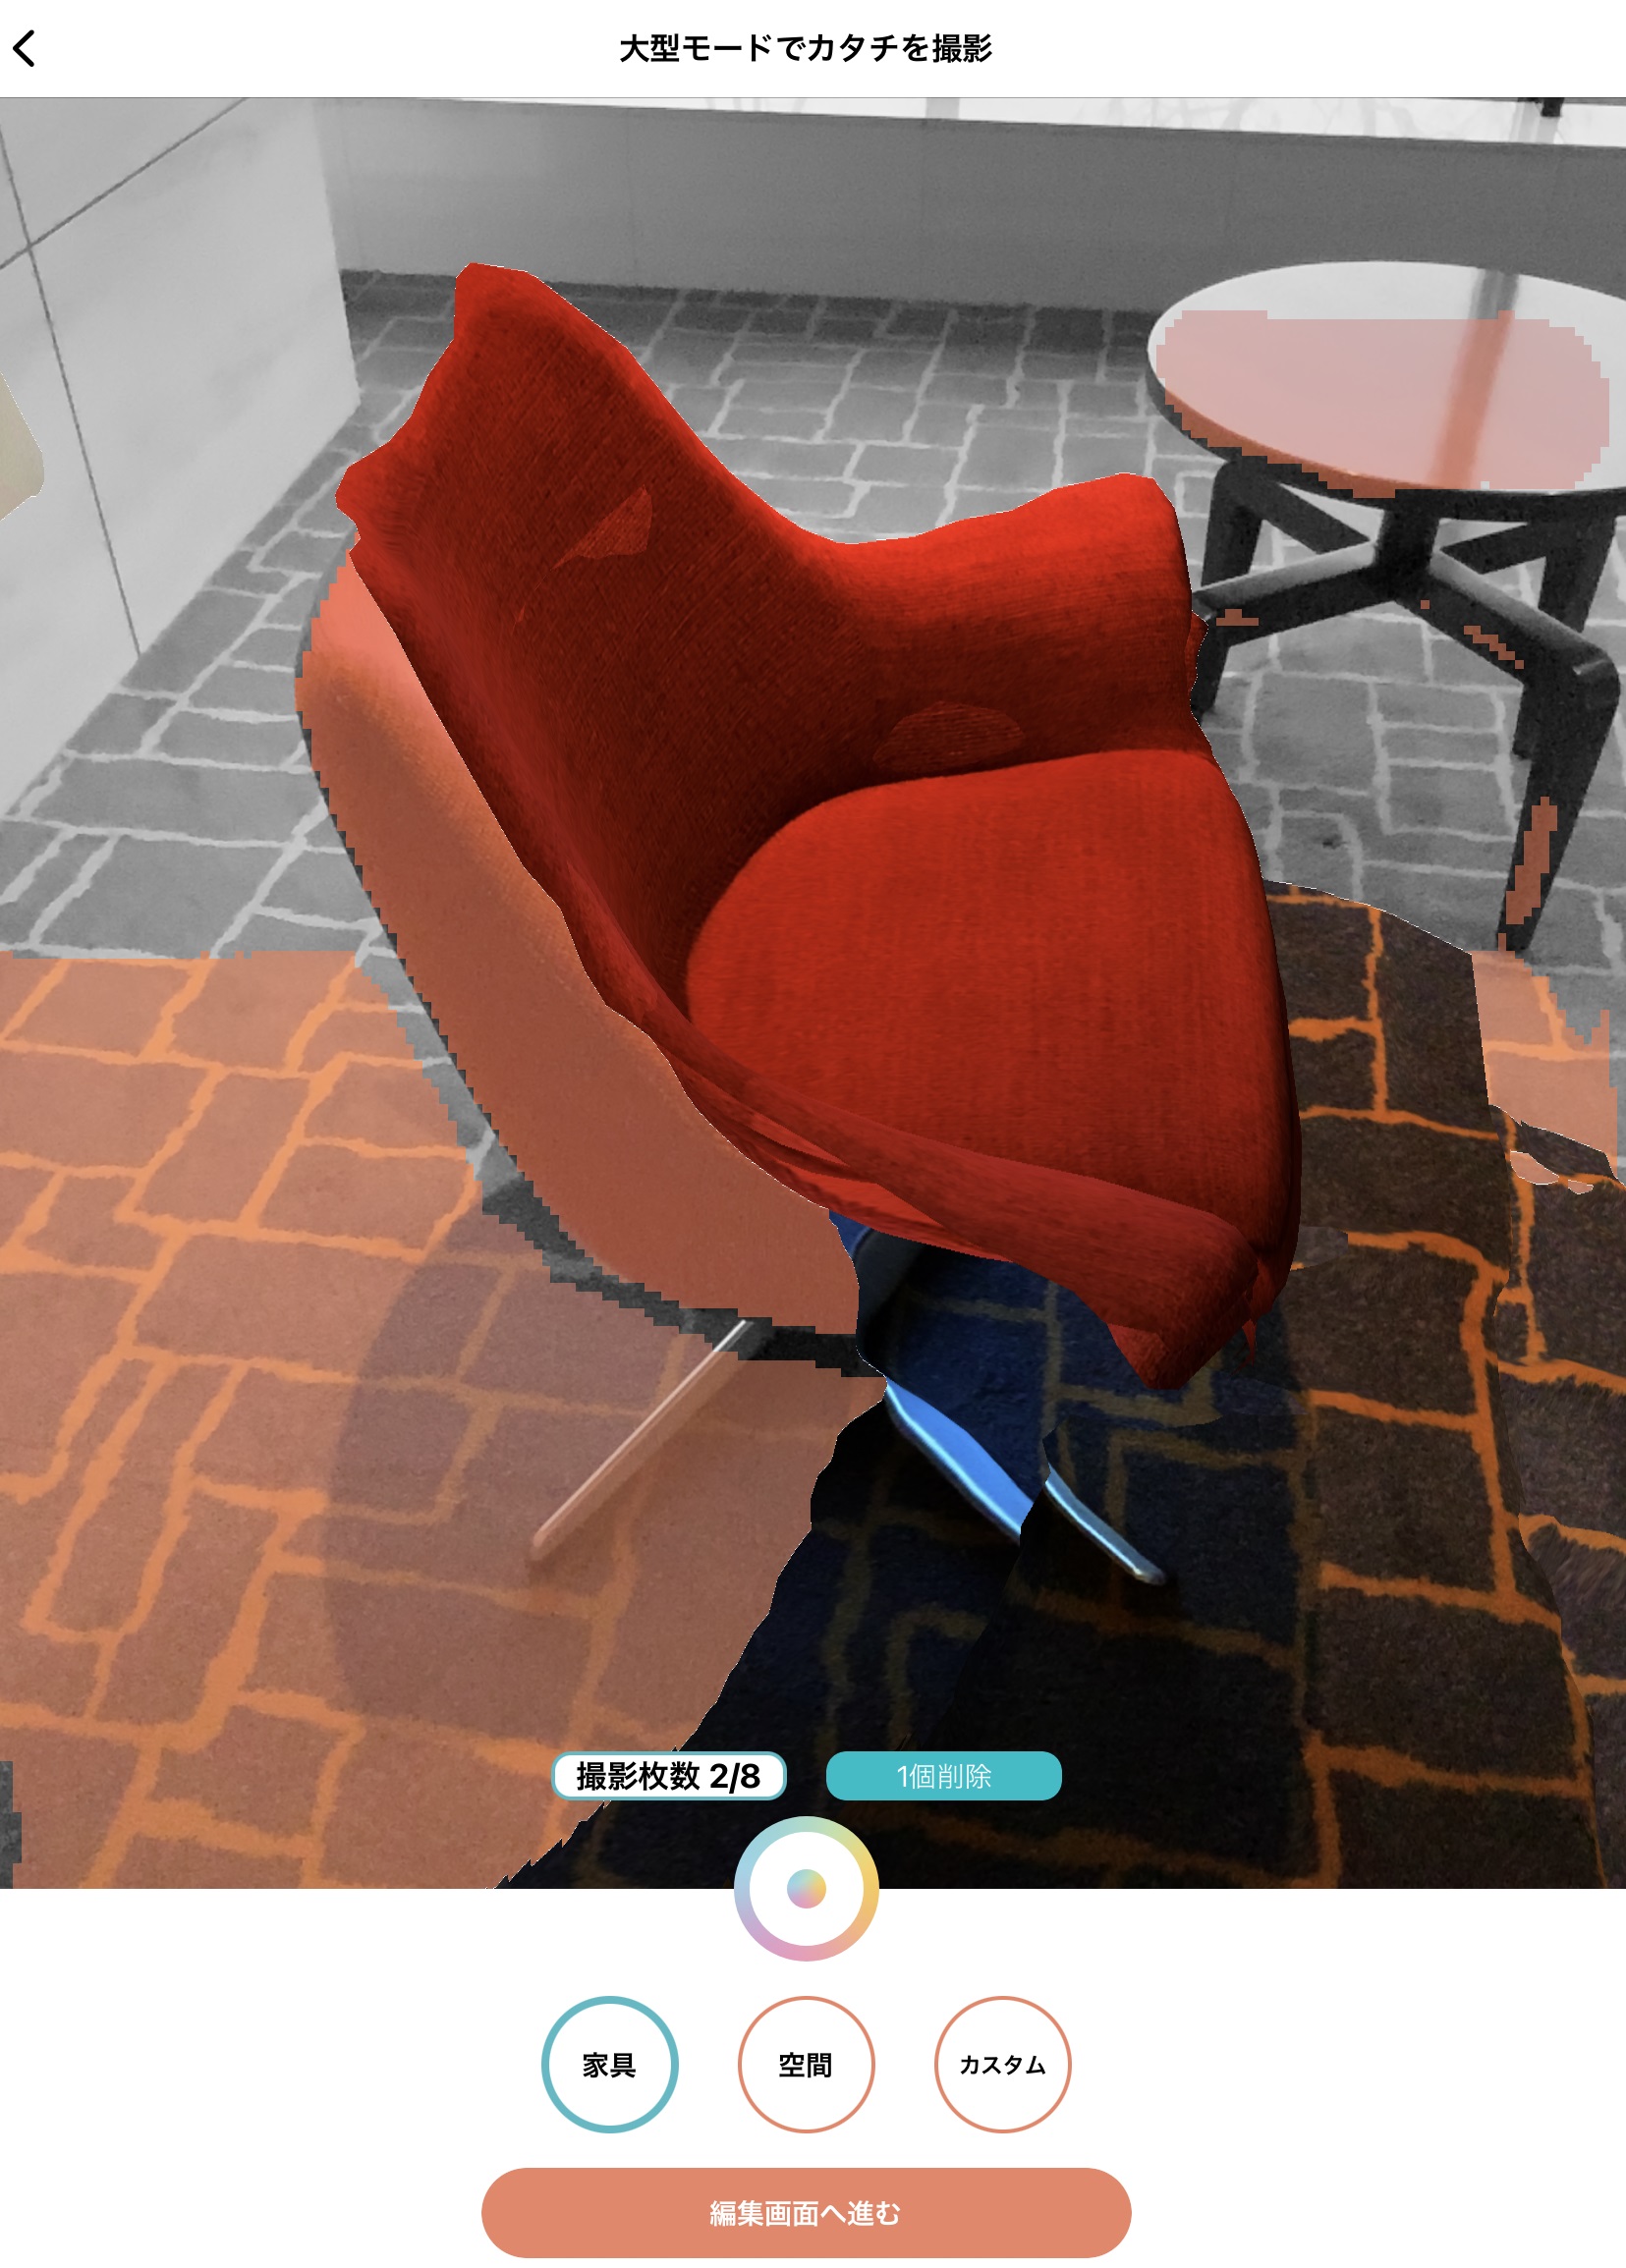
Frame the target object in and tap the shoot button on the bottom center.
Deep orange area is the part where the shooting is completed. You can take maximum 8 pictures(front, side, back and etc)
Tips:
Shooting each face of the object, taking it as a hexahedron will help to crete a very good 3D model. Faces overlapping should be avoided.
Shooting each face of the object, taking it as a hexahedron will help to crete a very good 3D model. Faces overlapping should be avoided.
5.カタチの編集
Beautify the object you shot by getting rid of the environment around the object that has been taken with the target object.
6.保存する
Set up a wallpaper, texts and visibility setting(Private/Public), press save to complete.
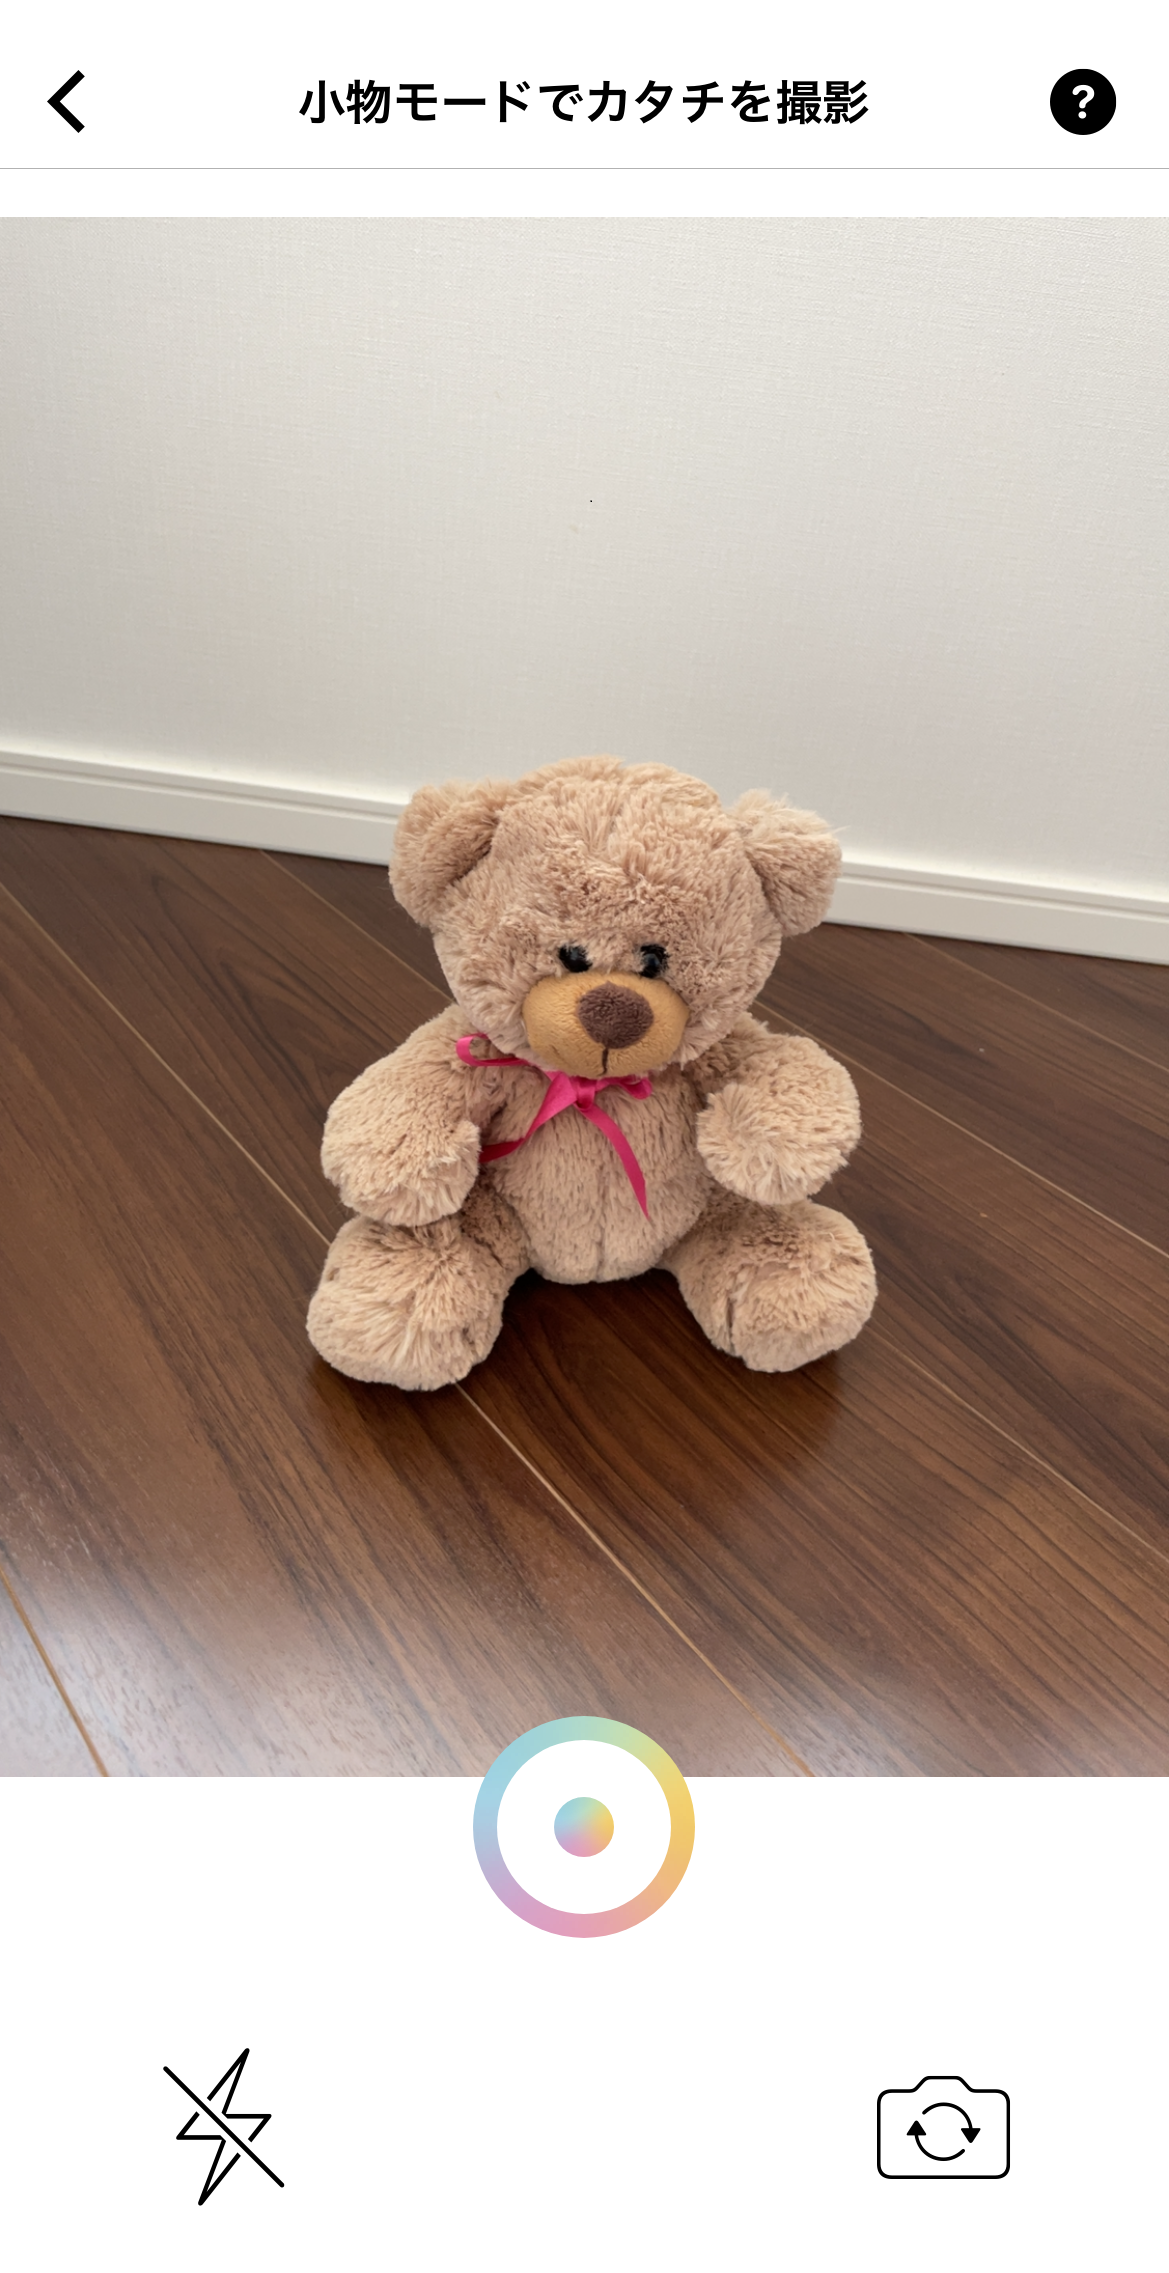
1.撮影の準備
アプリ画面右下にあるカメラアイコンをタップし、スキャンカメラを立ち上げます。
2.スキャン撮影
撮影したい対象物にカメラを向けて撮影ボタンを押してください。
スキャン撮影は2D/3Dの切替、インカメラ/アウトカメラの切替を選択して撮影ができます。
スキャン撮影は2D/3Dの切替、インカメラ/アウトカメラの切替を選択して撮影ができます。
【撮影のポイント】
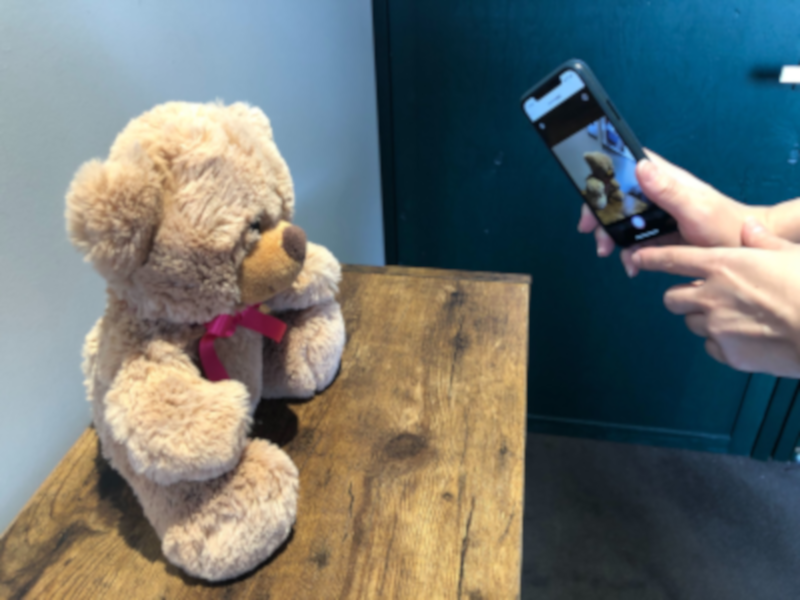
・対象物に対し、カメラを少し斜め上に構えて撮影するときれいに撮れます。
・対象物から50㎝ほどカメラを離して撮影をしてください。近過ぎるとうまくカタチを撮ることができません。
・対象物に対し、カメラを少し斜め上に構えて撮影するときれいに撮れます。
・対象物から50㎝ほどカメラを離して撮影をしてください。近過ぎるとうまくカタチを撮ることができません。
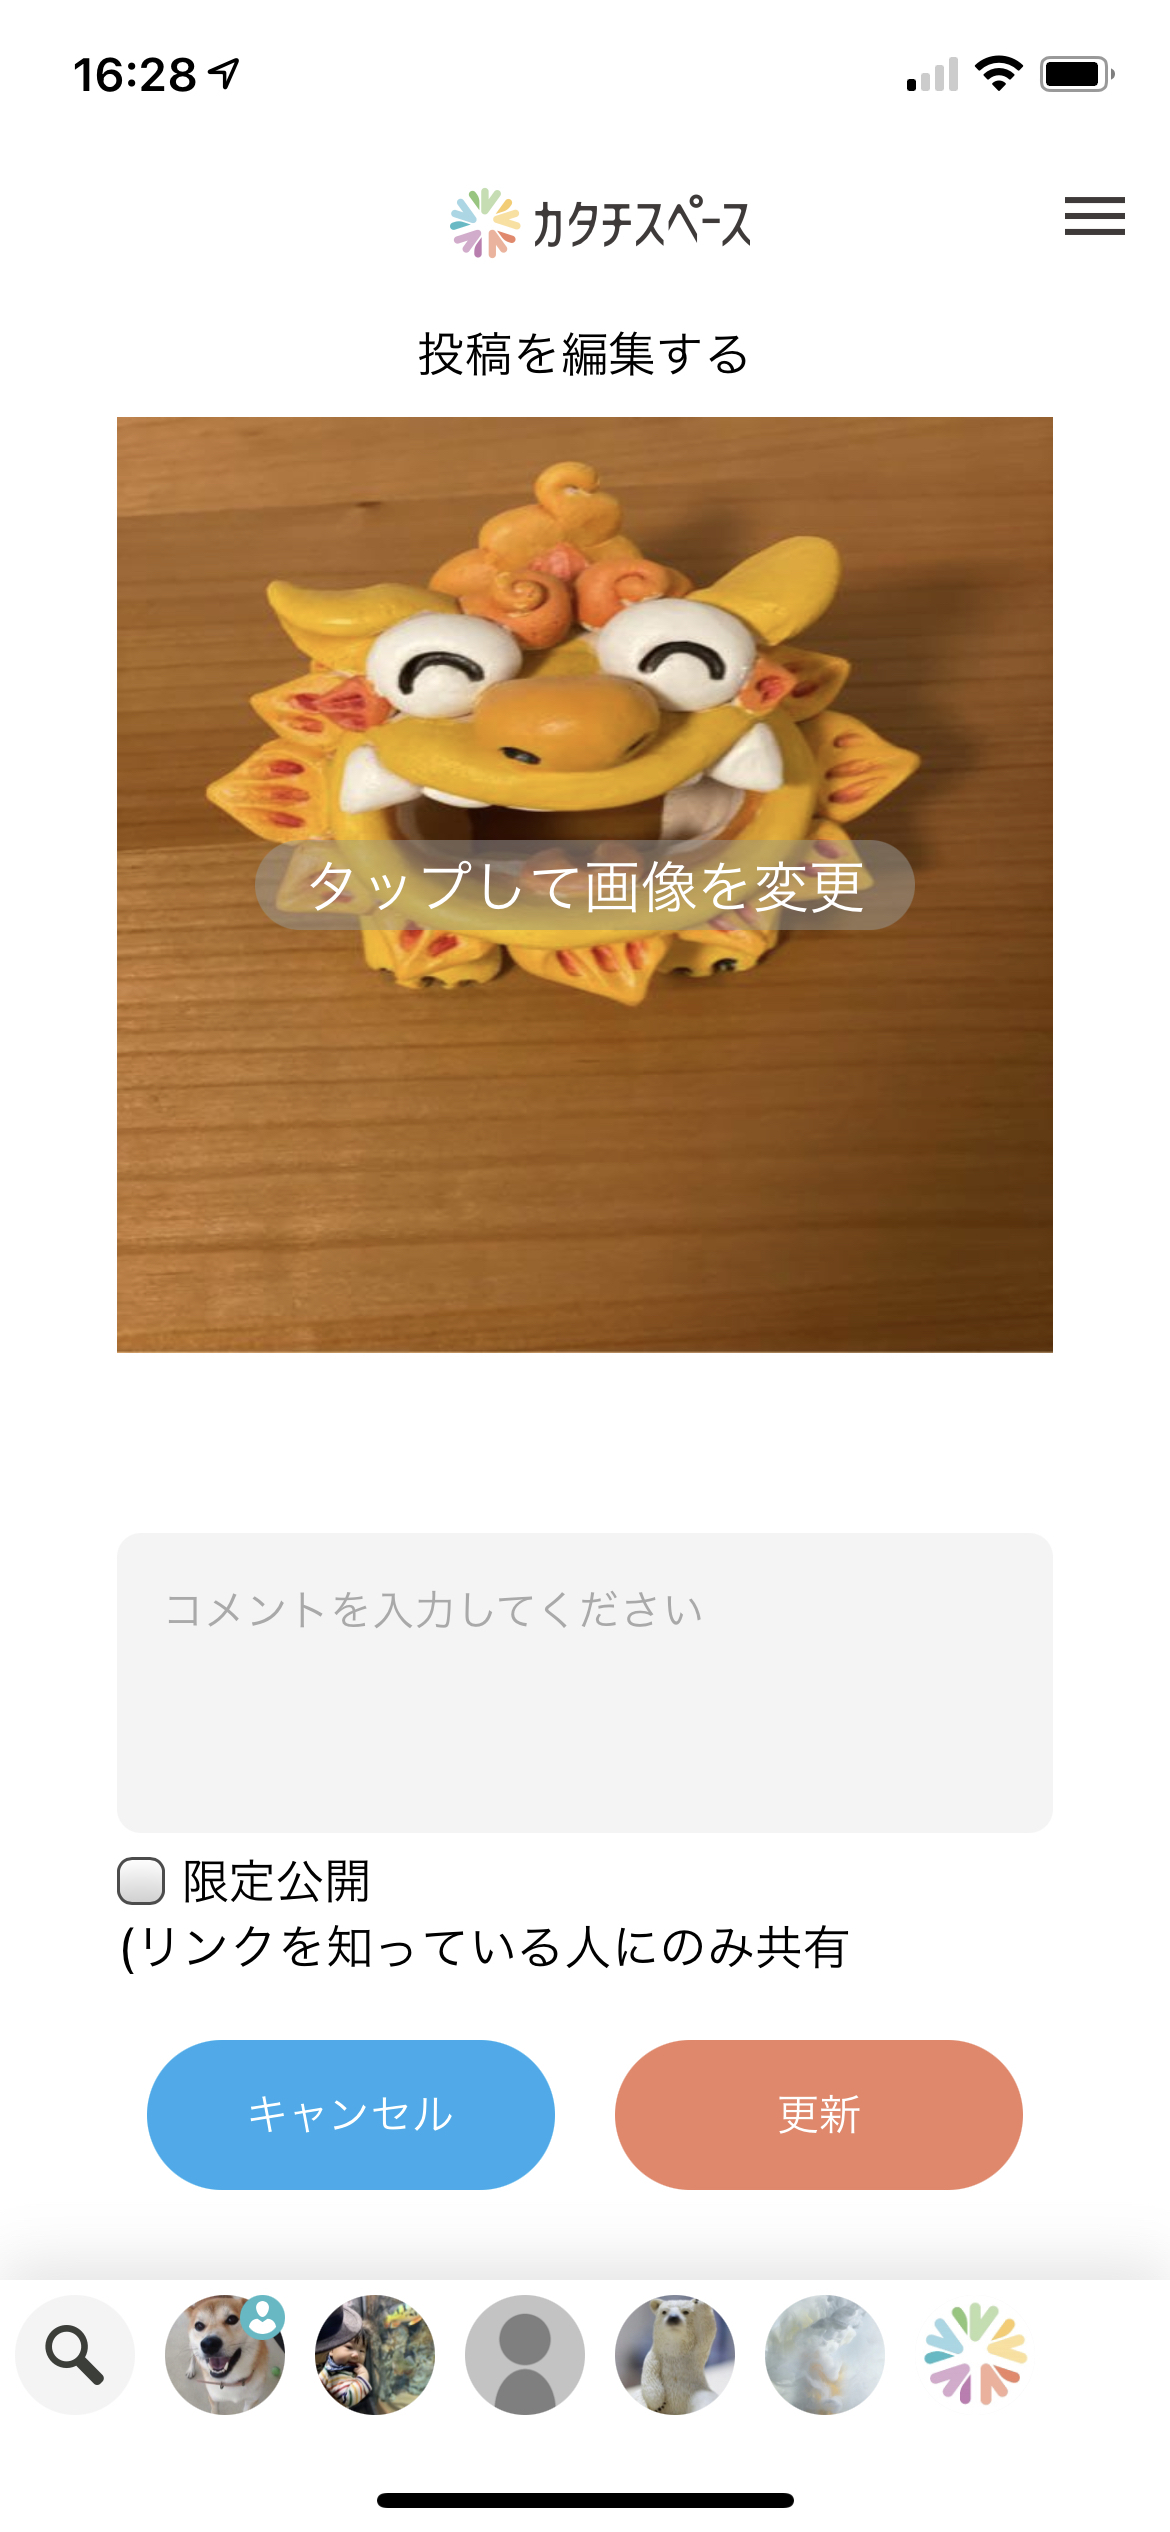
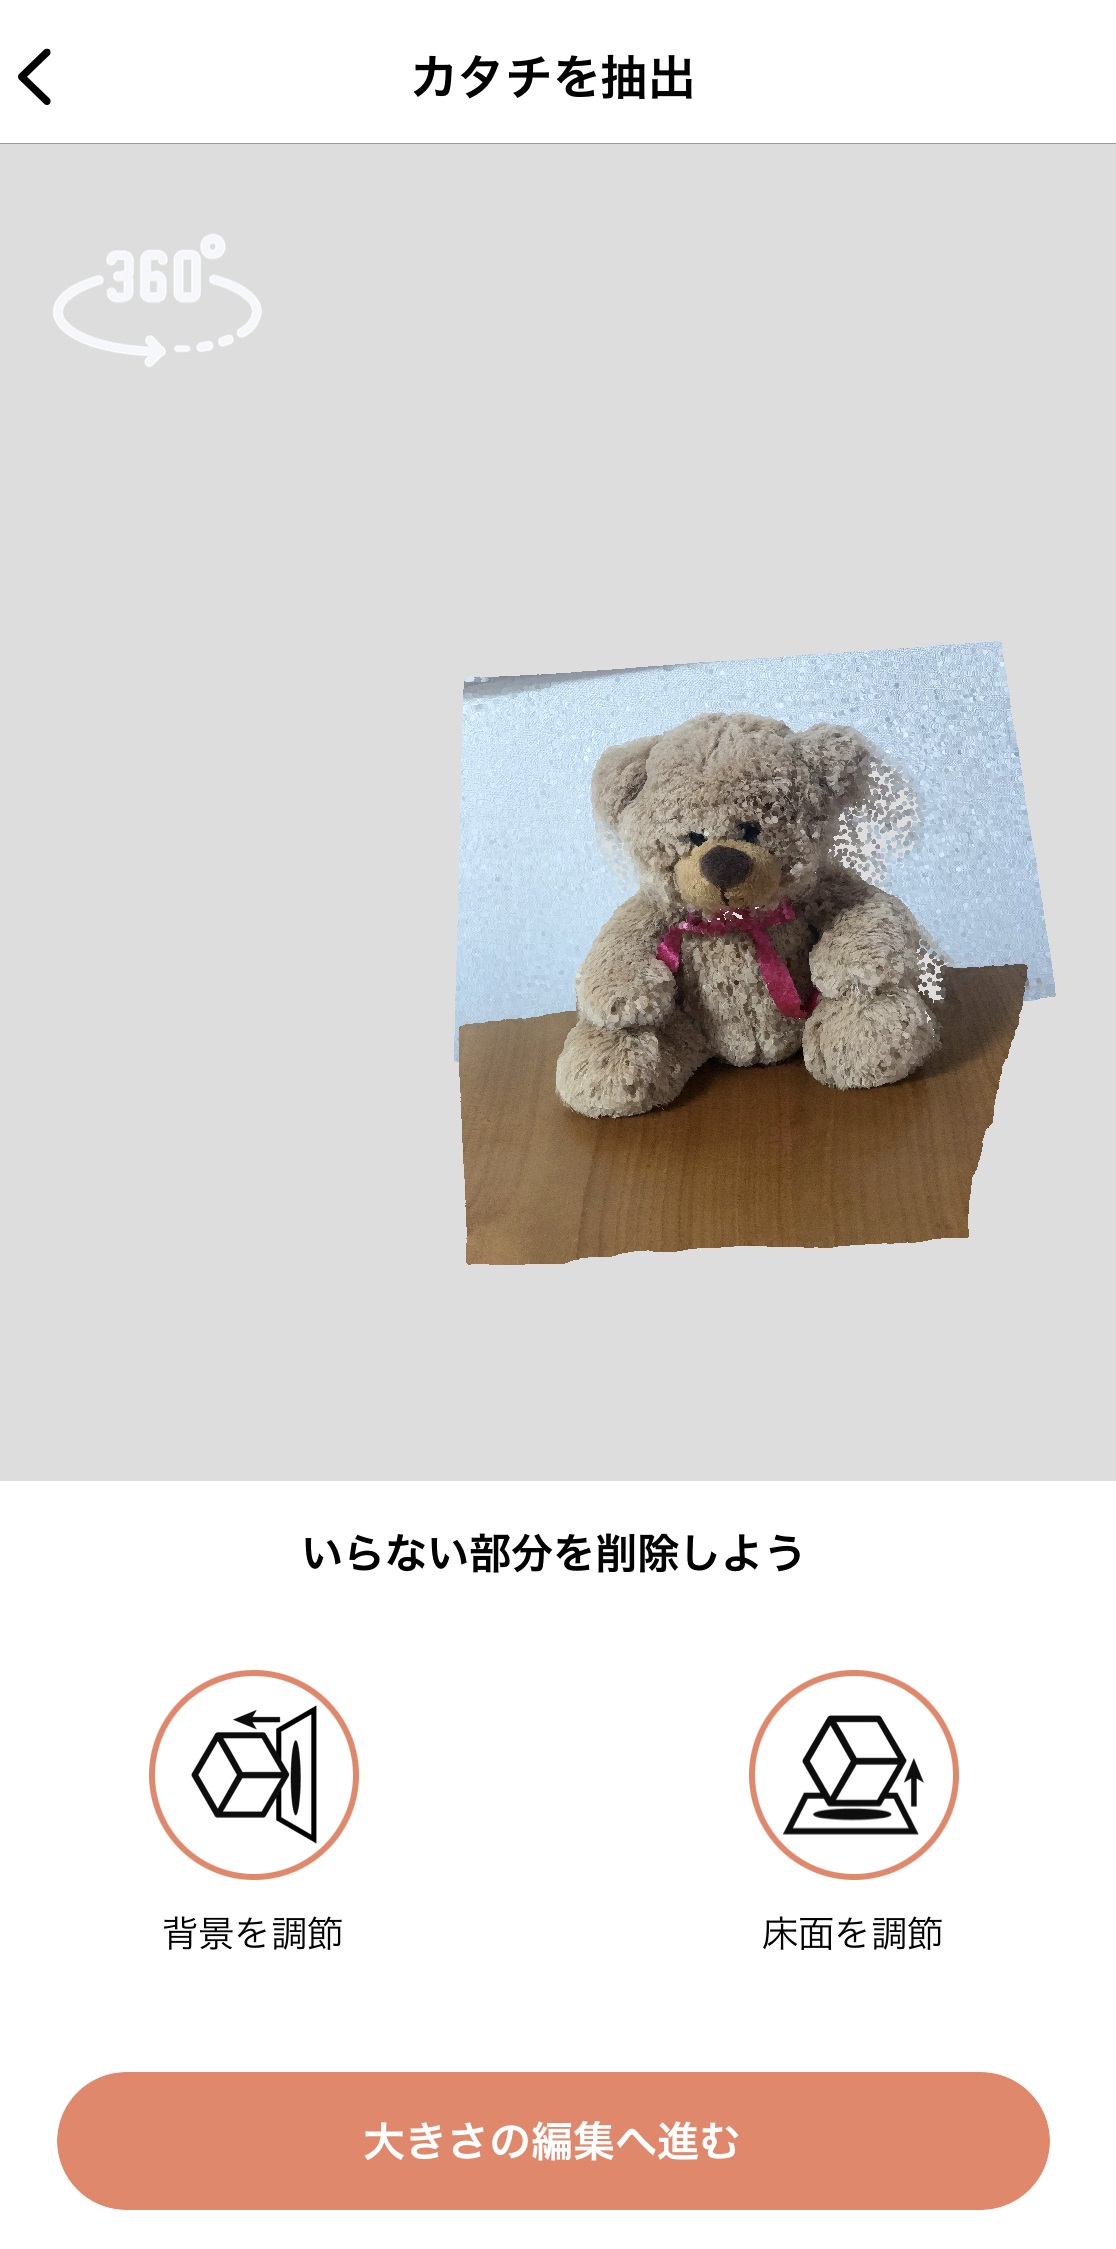
3.カタチの編集
撮影したカタチを編集します。
編集機能は背景と床面の調節機能があります。
それぞれのボタンをタップすると編集画面が切り替わります。
編集機能は背景と床面の調節機能があります。
それぞれのボタンをタップすると編集画面が切り替わります。
4.背景の調節
背景の調節機能は、撮影したカタチの背景を好きな位置で切り取ることができます。
バーを左から右へ移動させると、緑の壁が手前まで動きます。
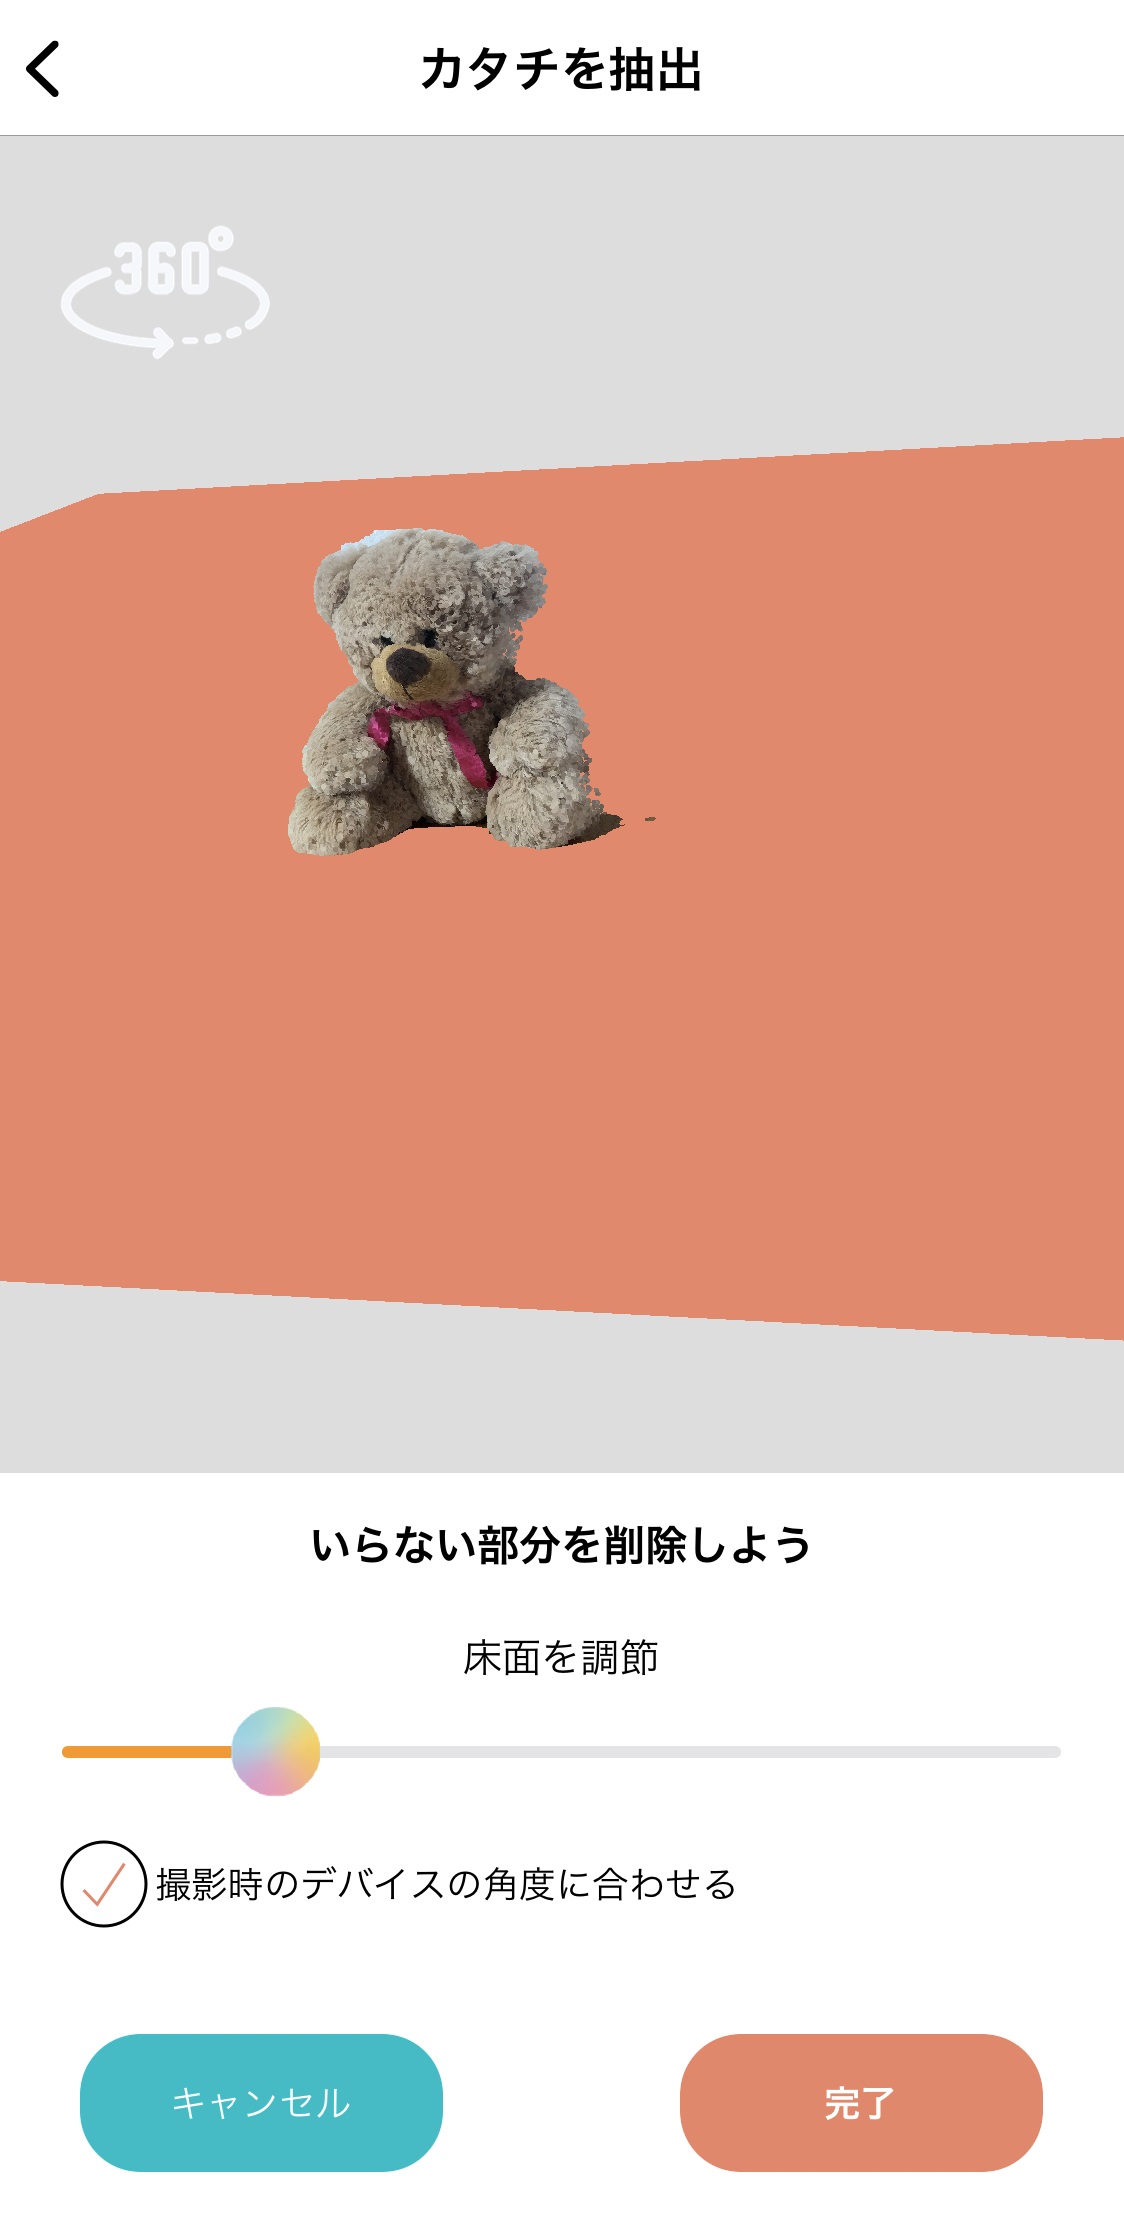
『撮影時のデバイスの角度に合わせる』にチェックを入れると傾きが修正されます。好きな位置に調整し、完了を押せば切り取りが完了です。
バーを左から右へ移動させると、緑の壁が手前まで動きます。
『撮影時のデバイスの角度に合わせる』にチェックを入れると傾きが修正されます。好きな位置に調整し、完了を押せば切り取りが完了です。
5.床面の調節
床面の調節機能は、背景と同様に撮影したカタチの床面を好きな位置で切り取ることができます。
バーを左から右へ移動させると、オレンジの床が手前まで動きます。
『撮影時のデバイスの角度に合わせる』にチェックを入れると傾きが修正されます。好きな位置に調整し、完了を押せば切り取りが完了です。
バーを左から右へ移動させると、オレンジの床が手前まで動きます。
『撮影時のデバイスの角度に合わせる』にチェックを入れると傾きが修正されます。好きな位置に調整し、完了を押せば切り取りが完了です。
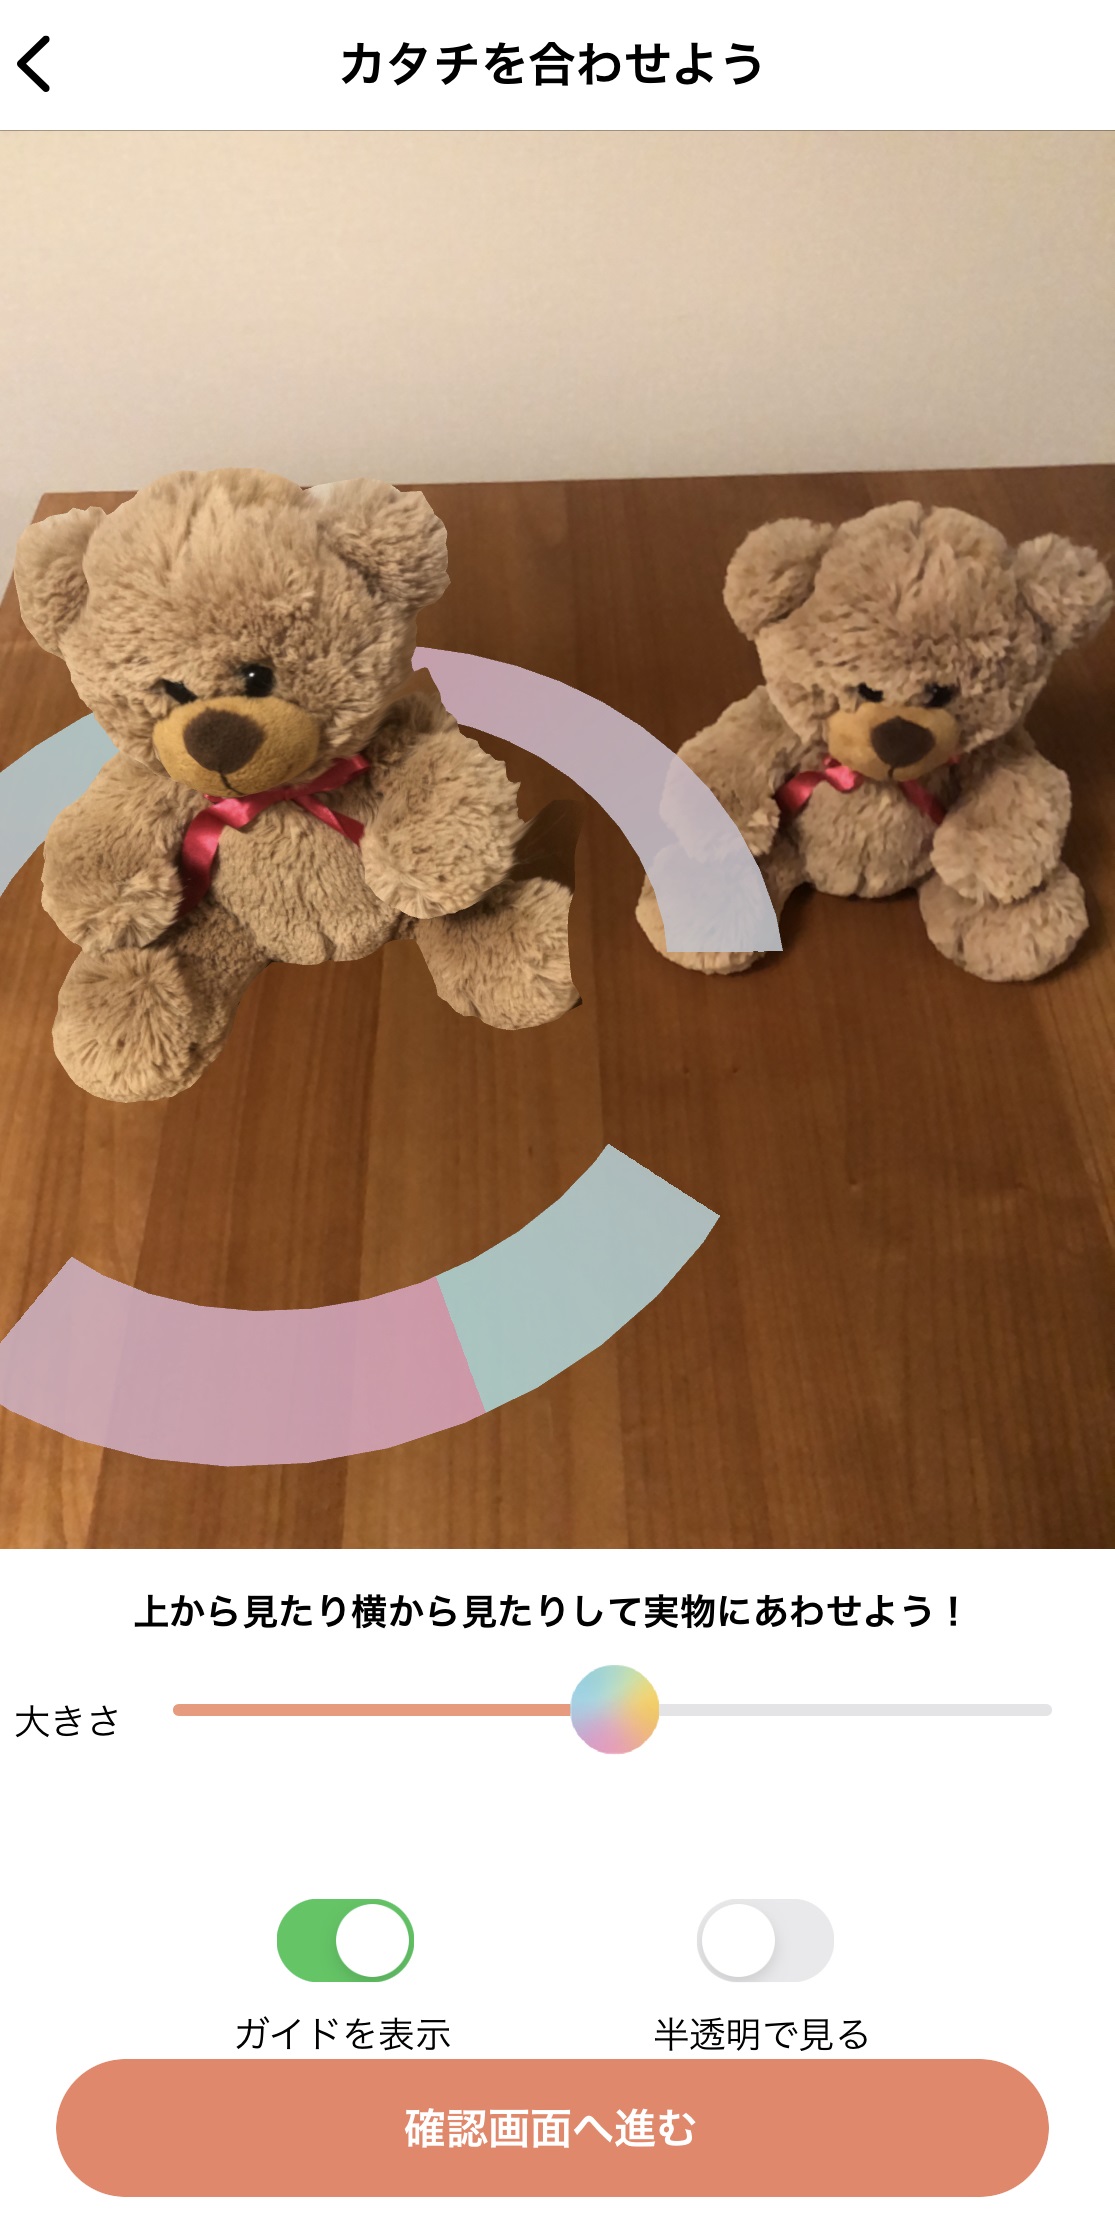
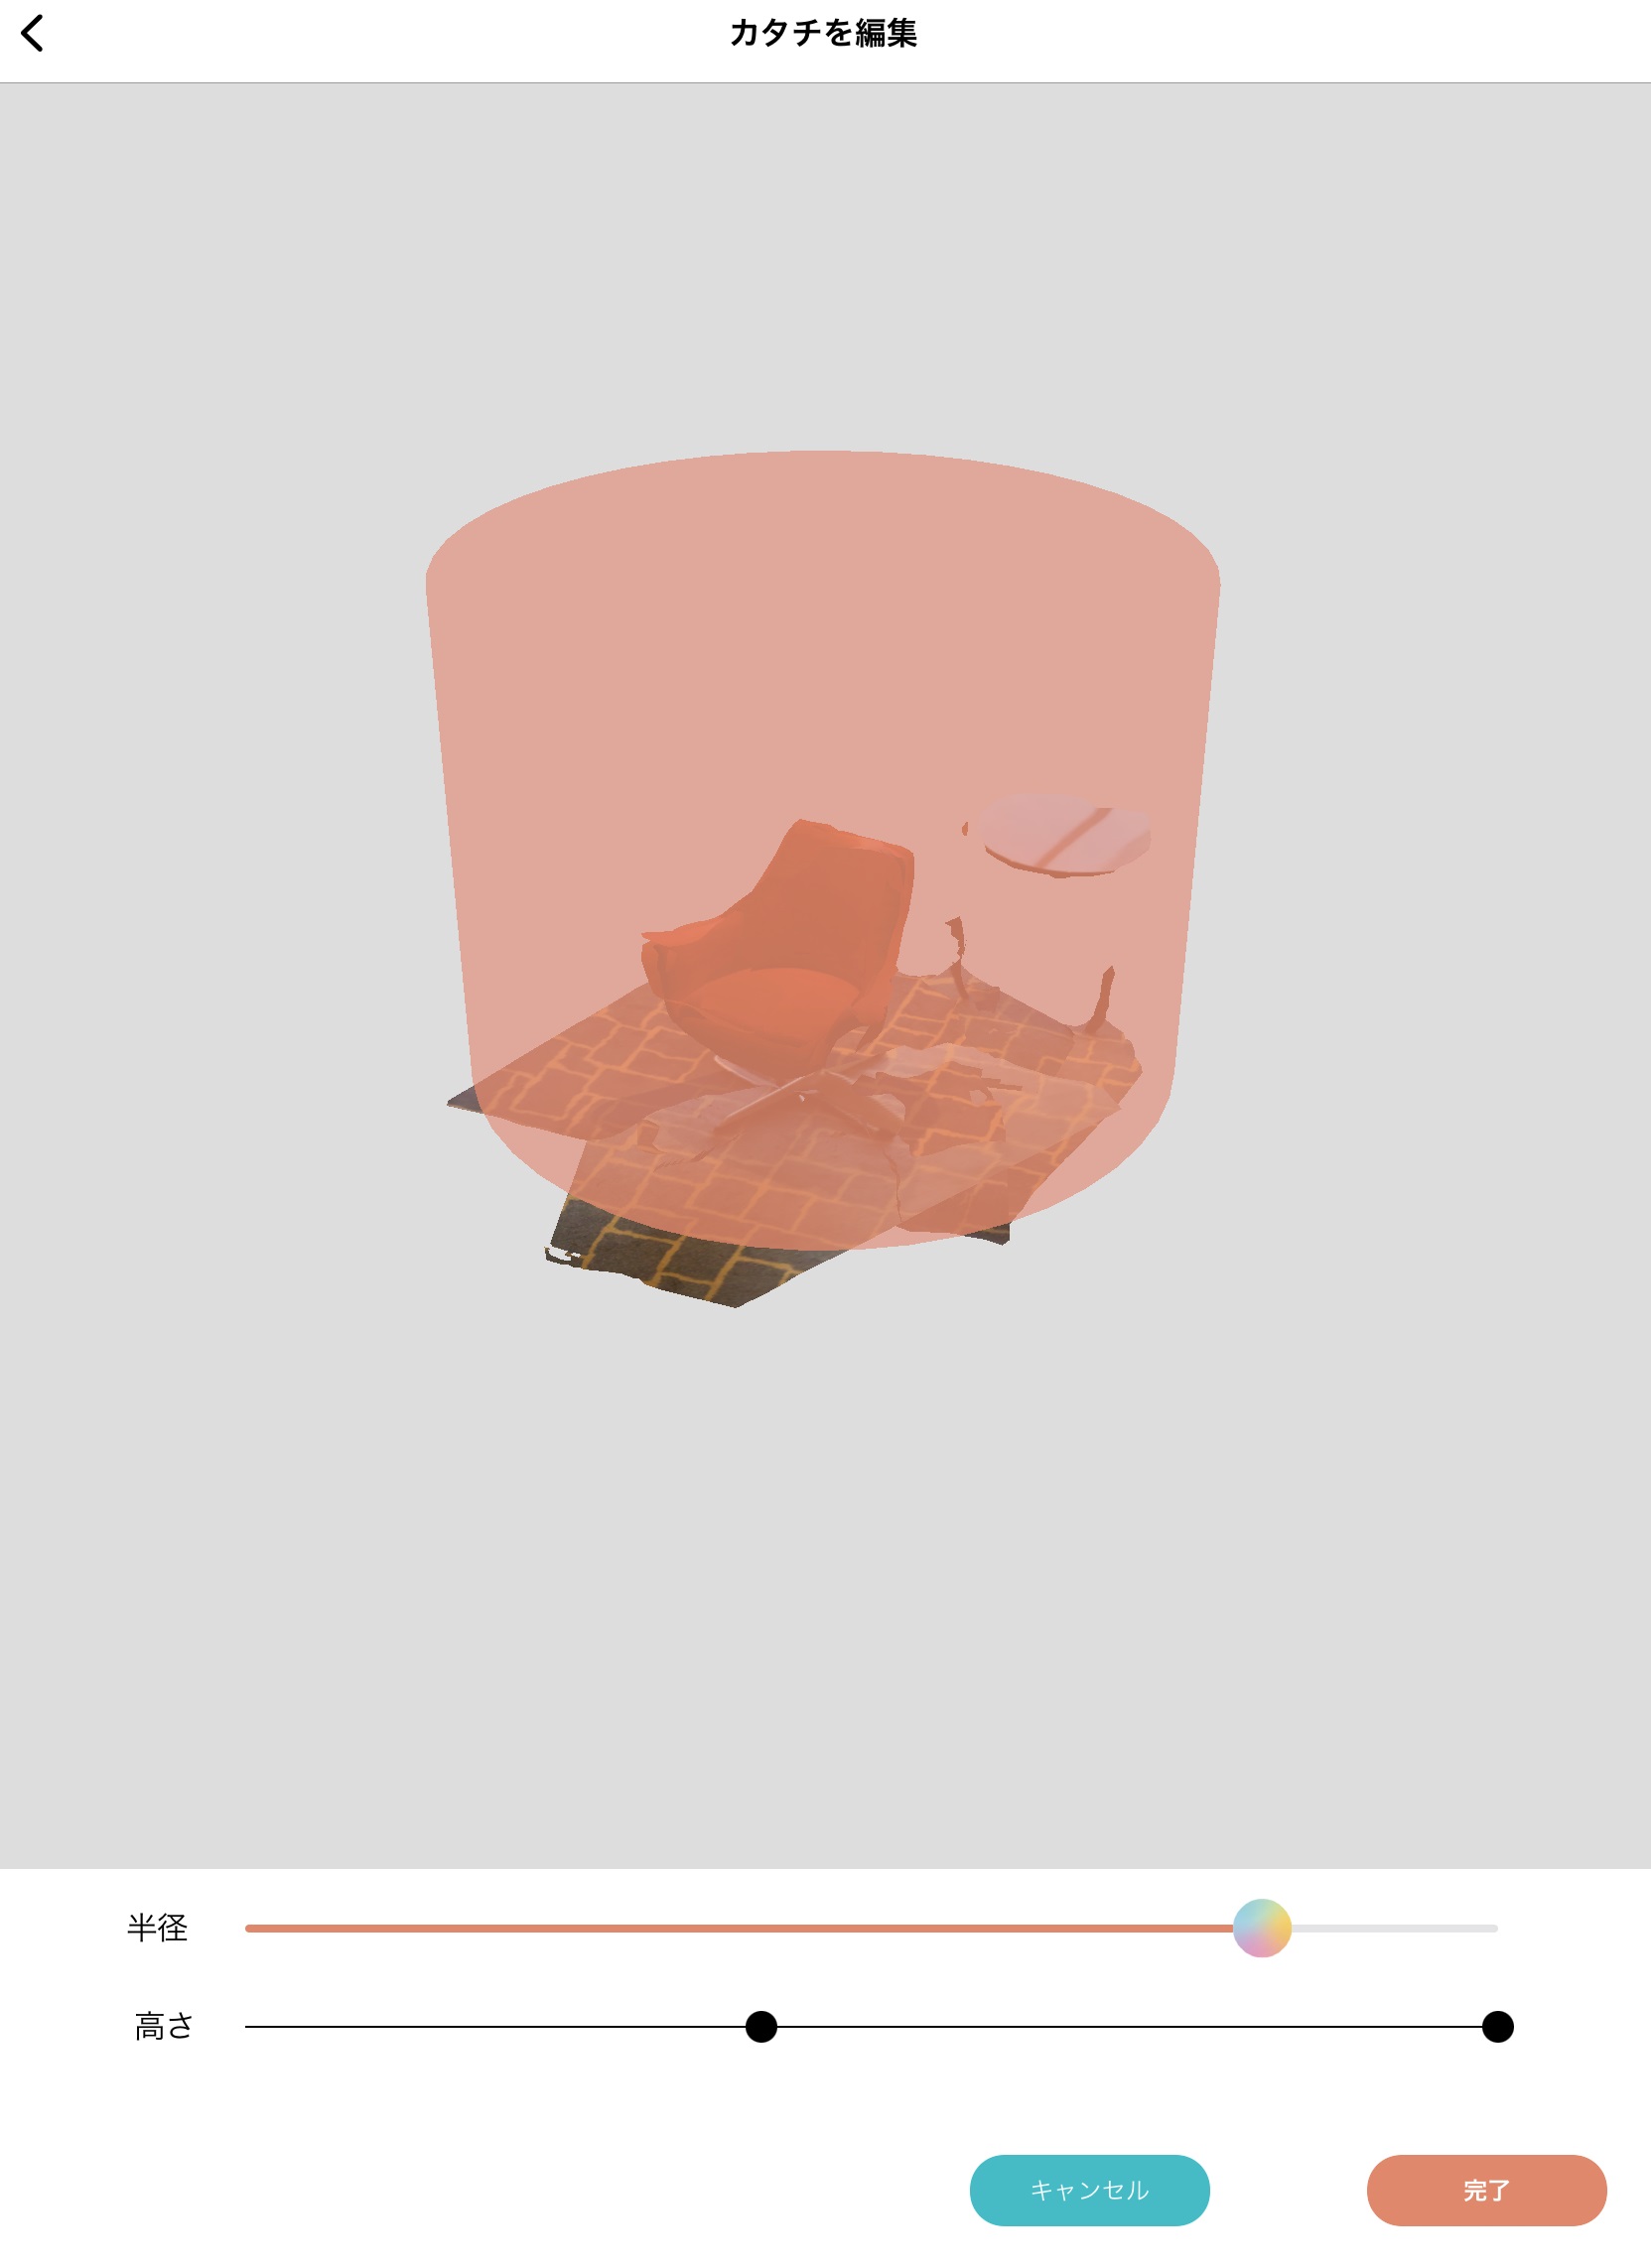
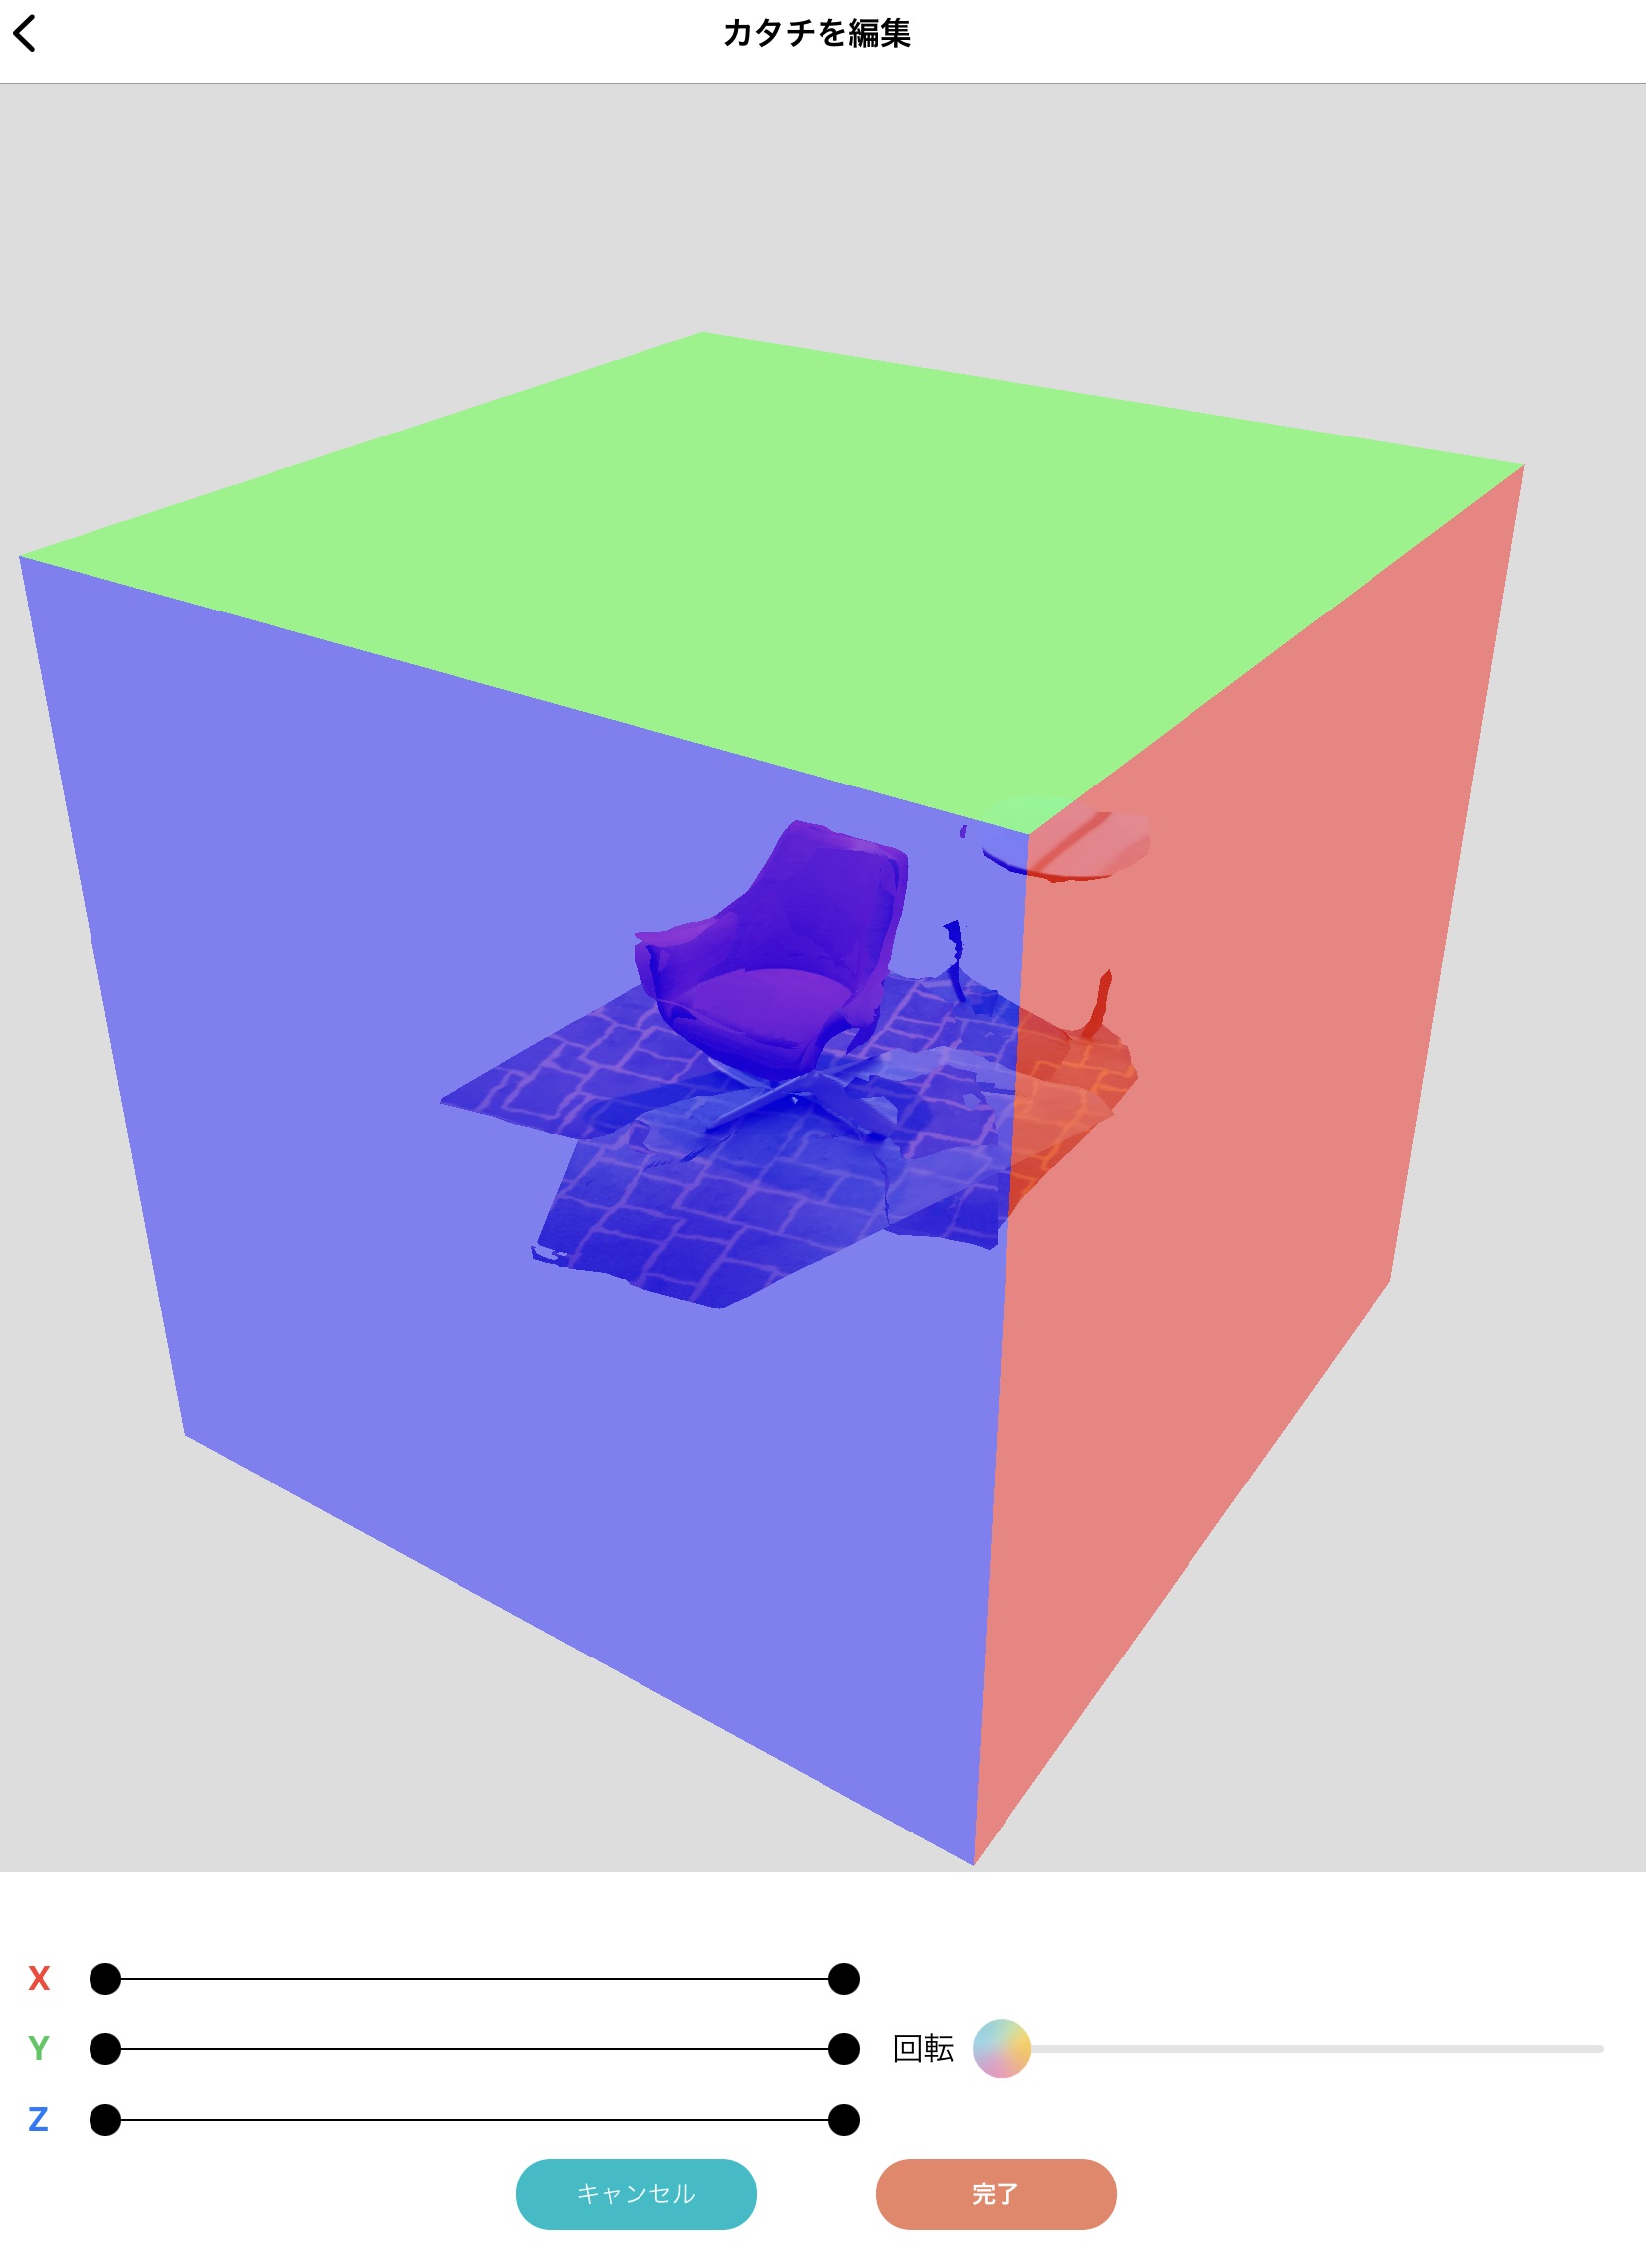
6.大きさの調節
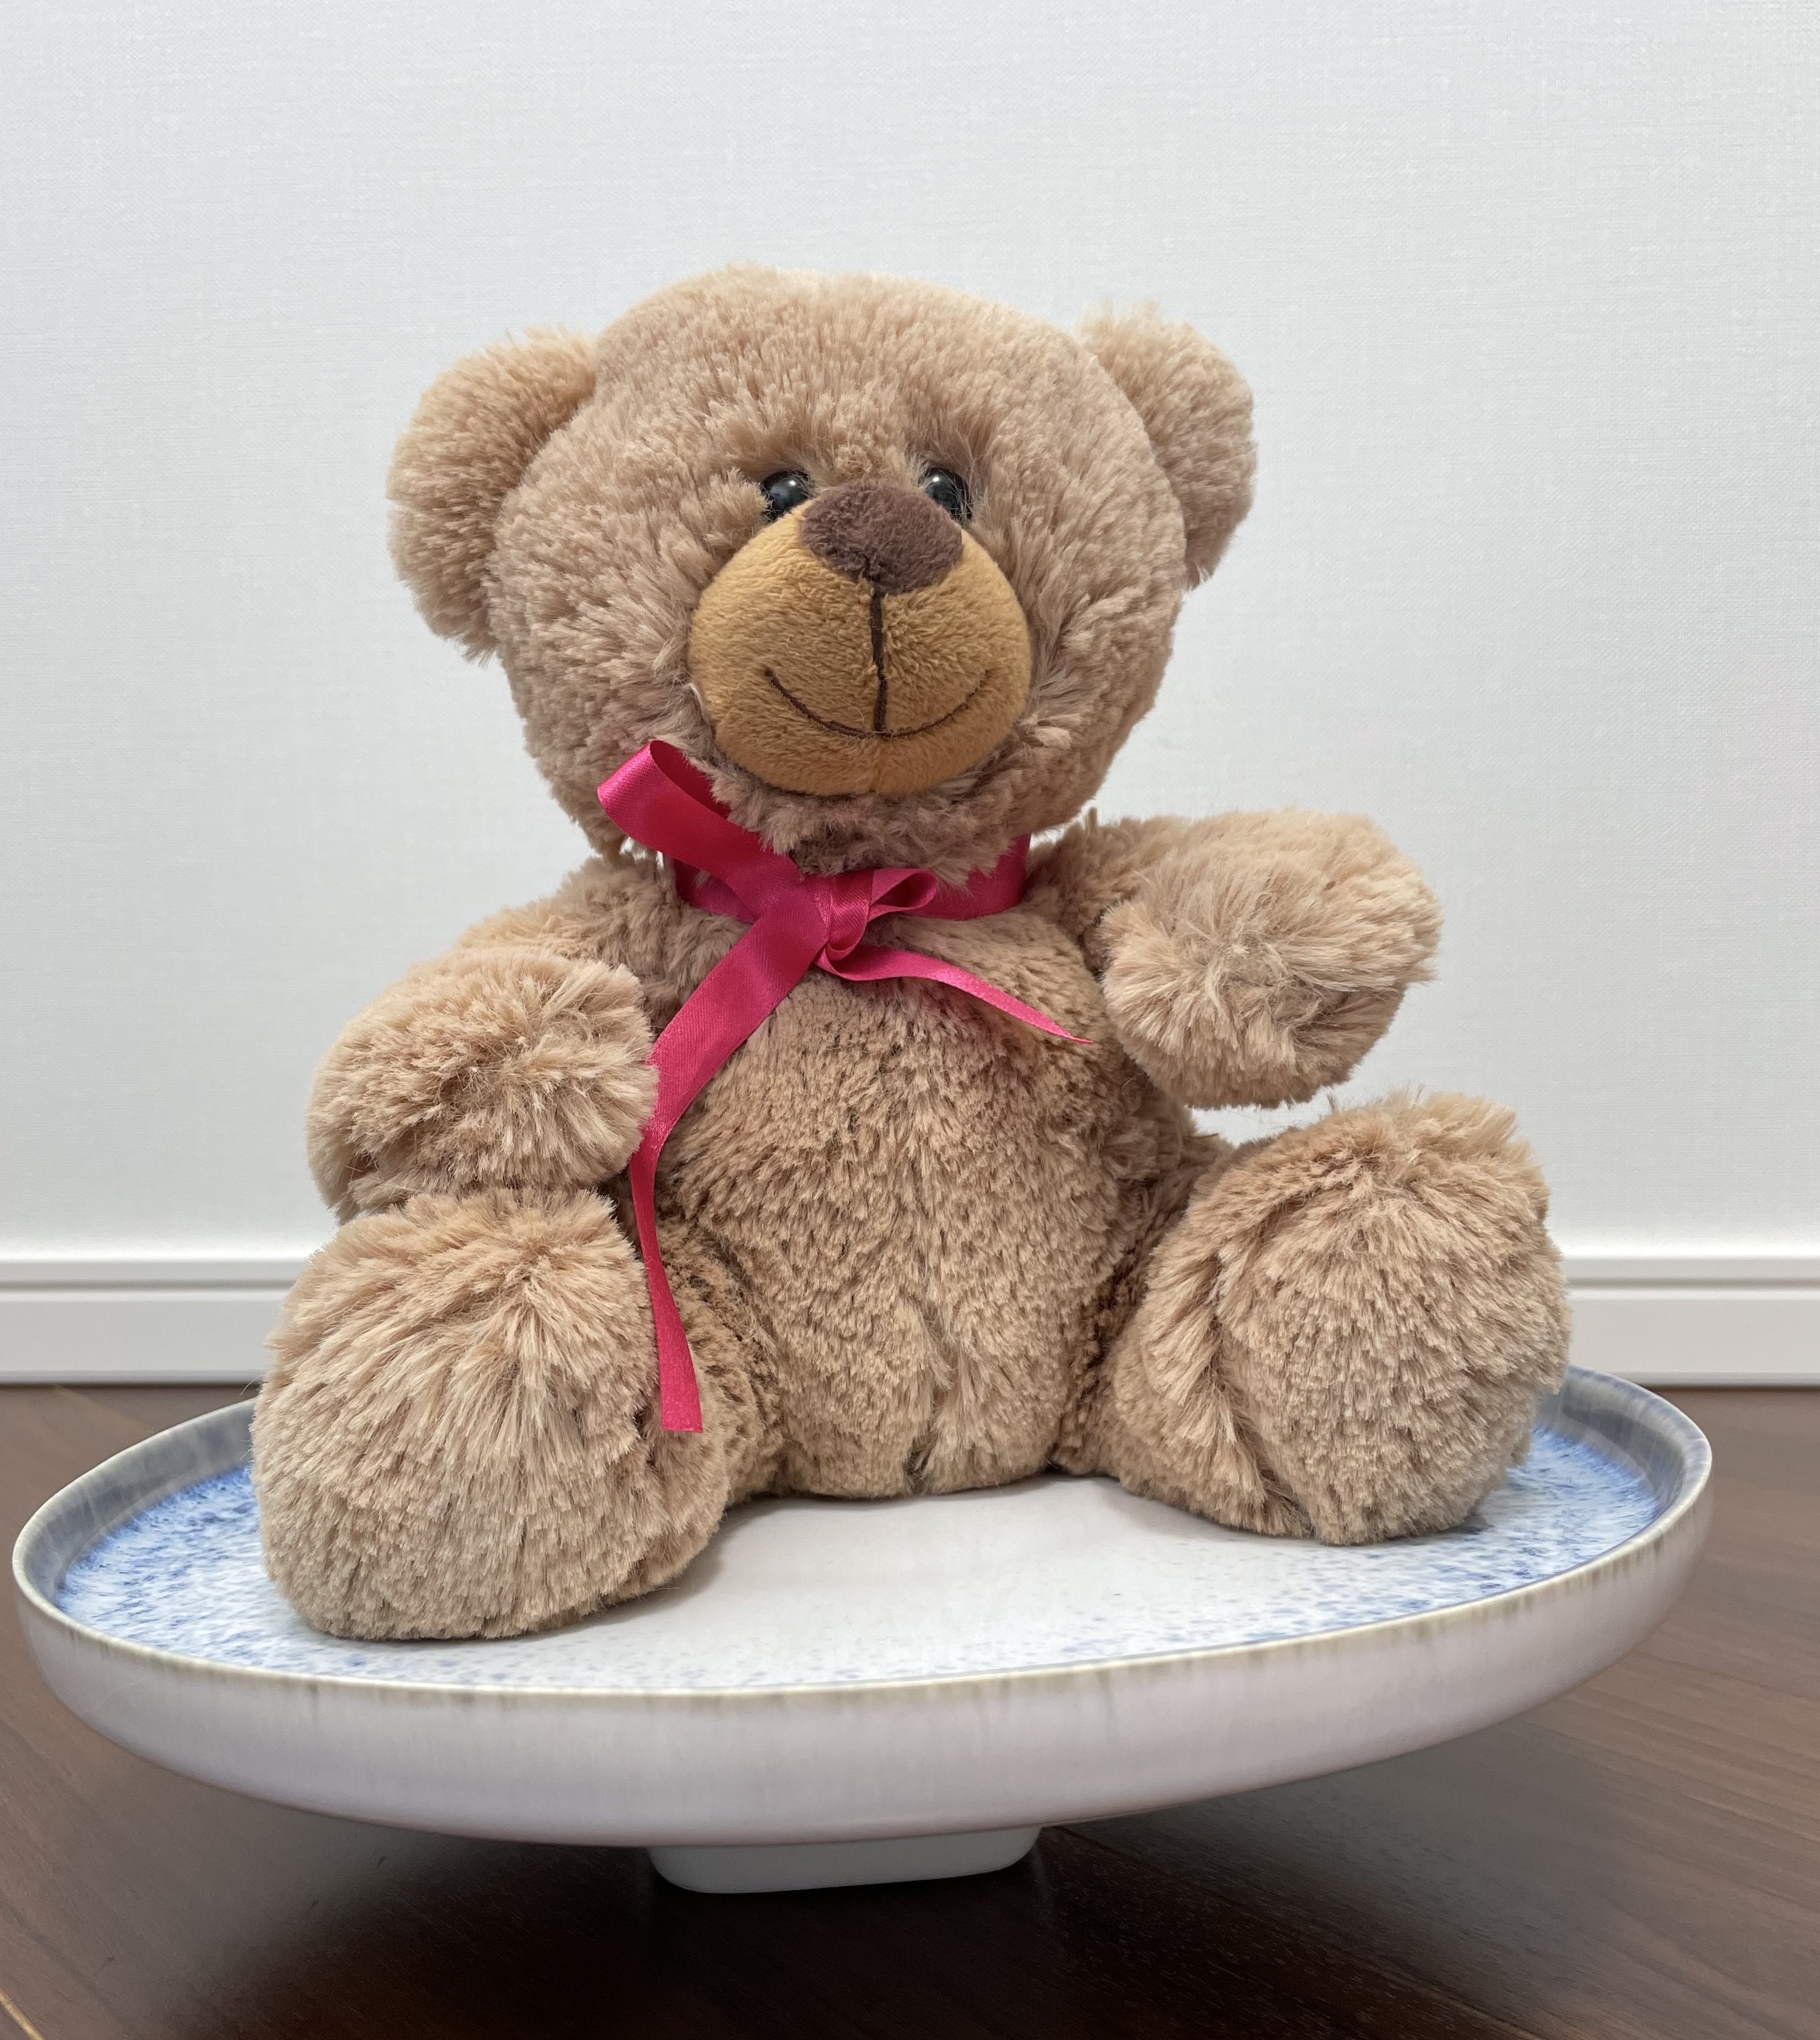
大きさの調節機能は、カタチの大きさを調節できます。対象物と並べて実寸サイズに調整をしてください。
【調節のポイント】
・カタチを表示する際、撮影対象物と表示位置がずれないように注意してください。手前/奥にずれてしまうと実際の大きさと異なってしまいます。
・『半透明で見る』ボタンをタップして、撮影対象物とカタチを重ねて大きさを調節すると大きさを確認しやすいです。
・カタチを表示する際、撮影対象物と表示位置がずれないように注意してください。手前/奥にずれてしまうと実際の大きさと異なってしまいます。
・『半透明で見る』ボタンをタップして、撮影対象物とカタチを重ねて大きさを調節すると大きさを確認しやすいです。
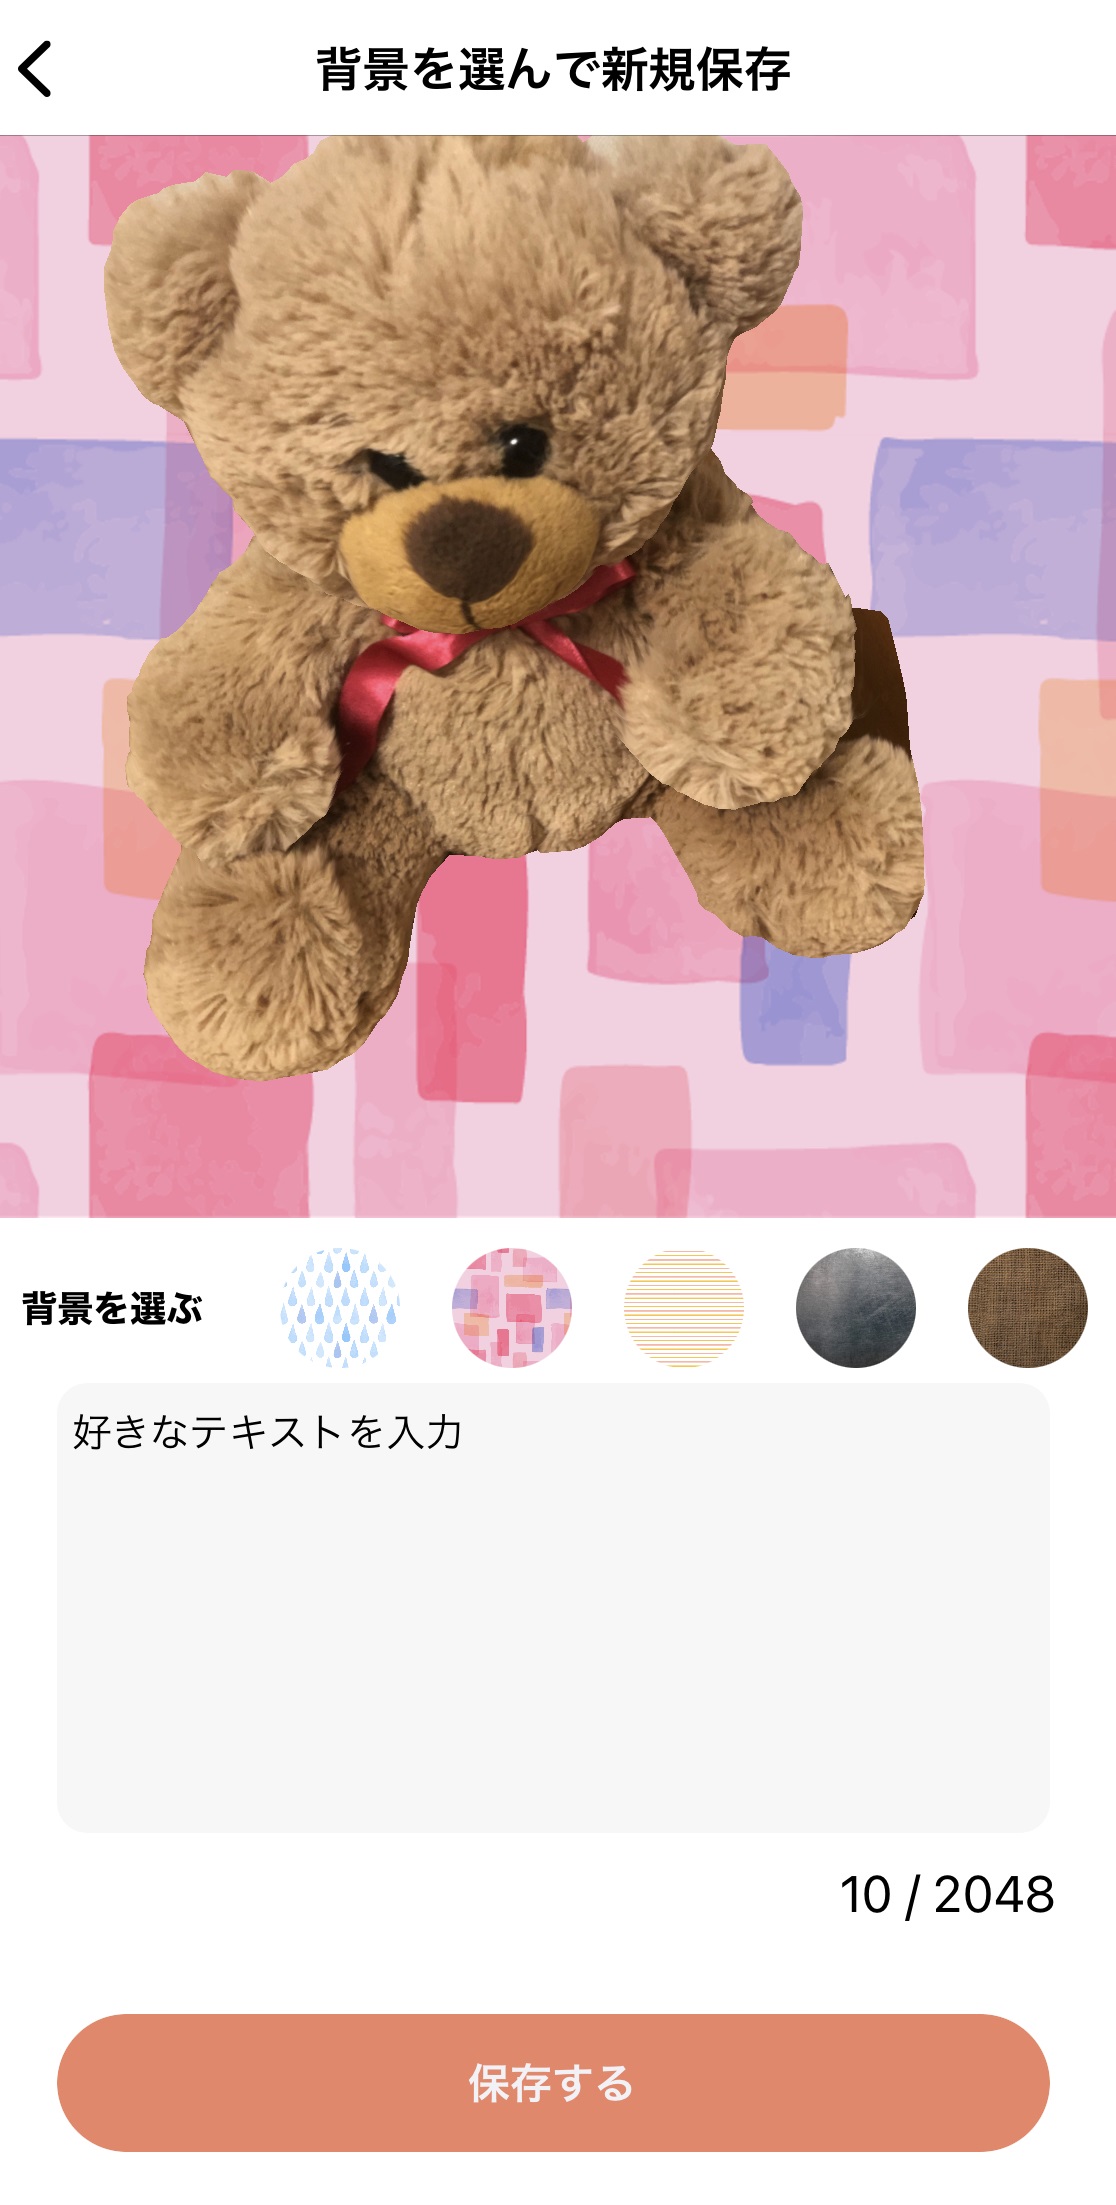
7.プレビュー
編集したカタチをプレビュー画面で確認します。
背景や床面を修正したい場合は画面左上の矢印をタップして編集画面に戻ってください。撮影をやり直す場合には『もう一度撮影』をタップすると撮影画面に戻ります。(先ほど編集したカタチは保存されません)
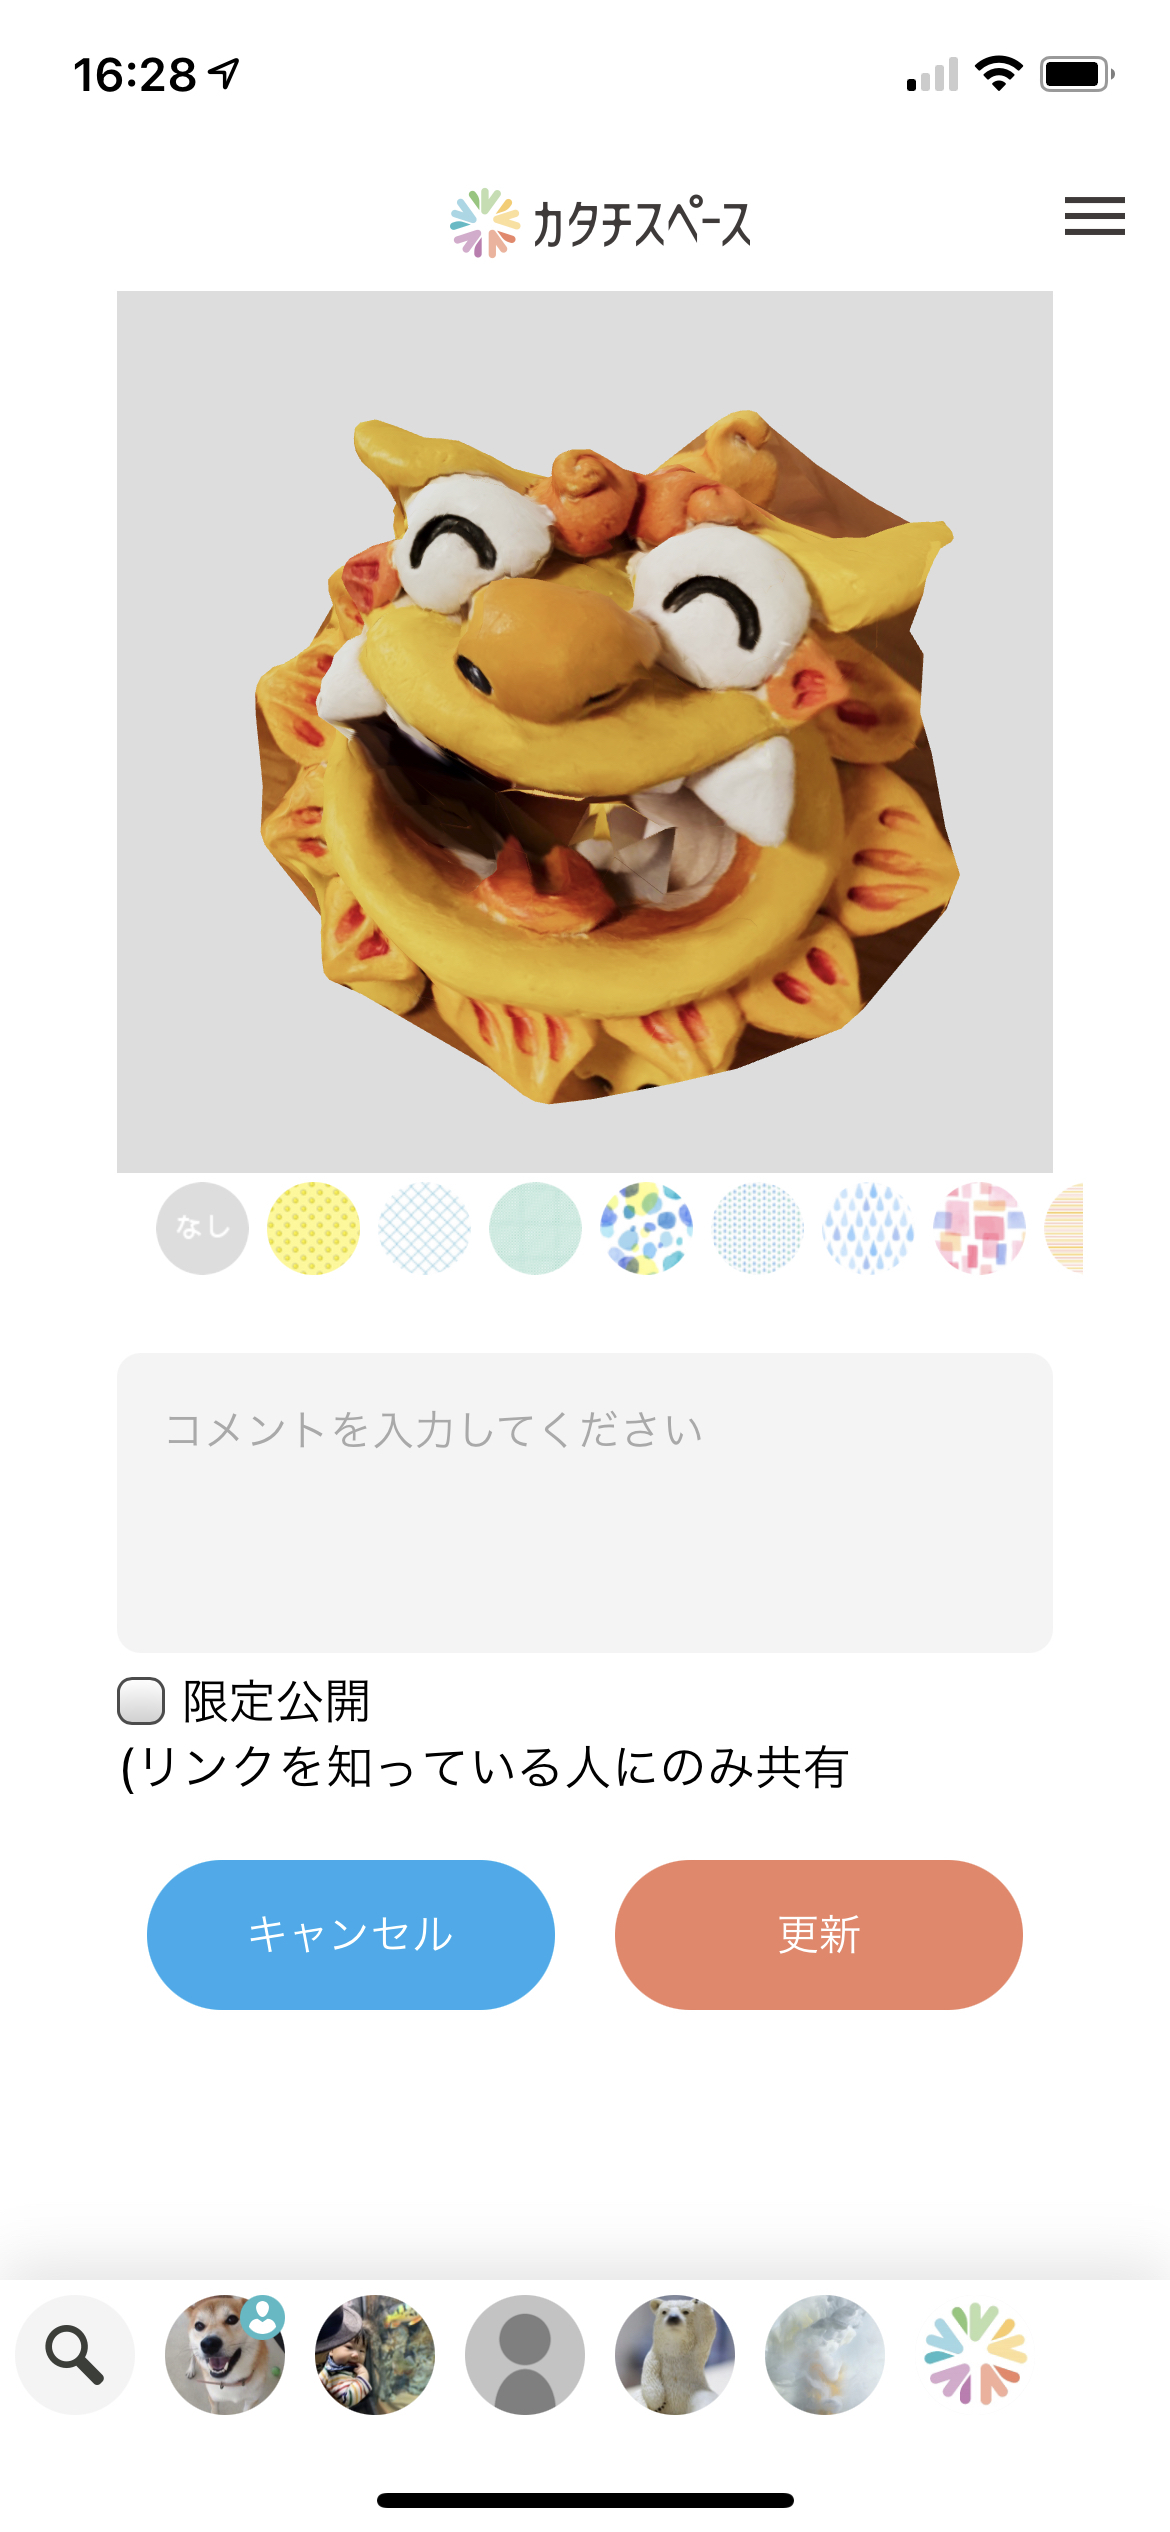
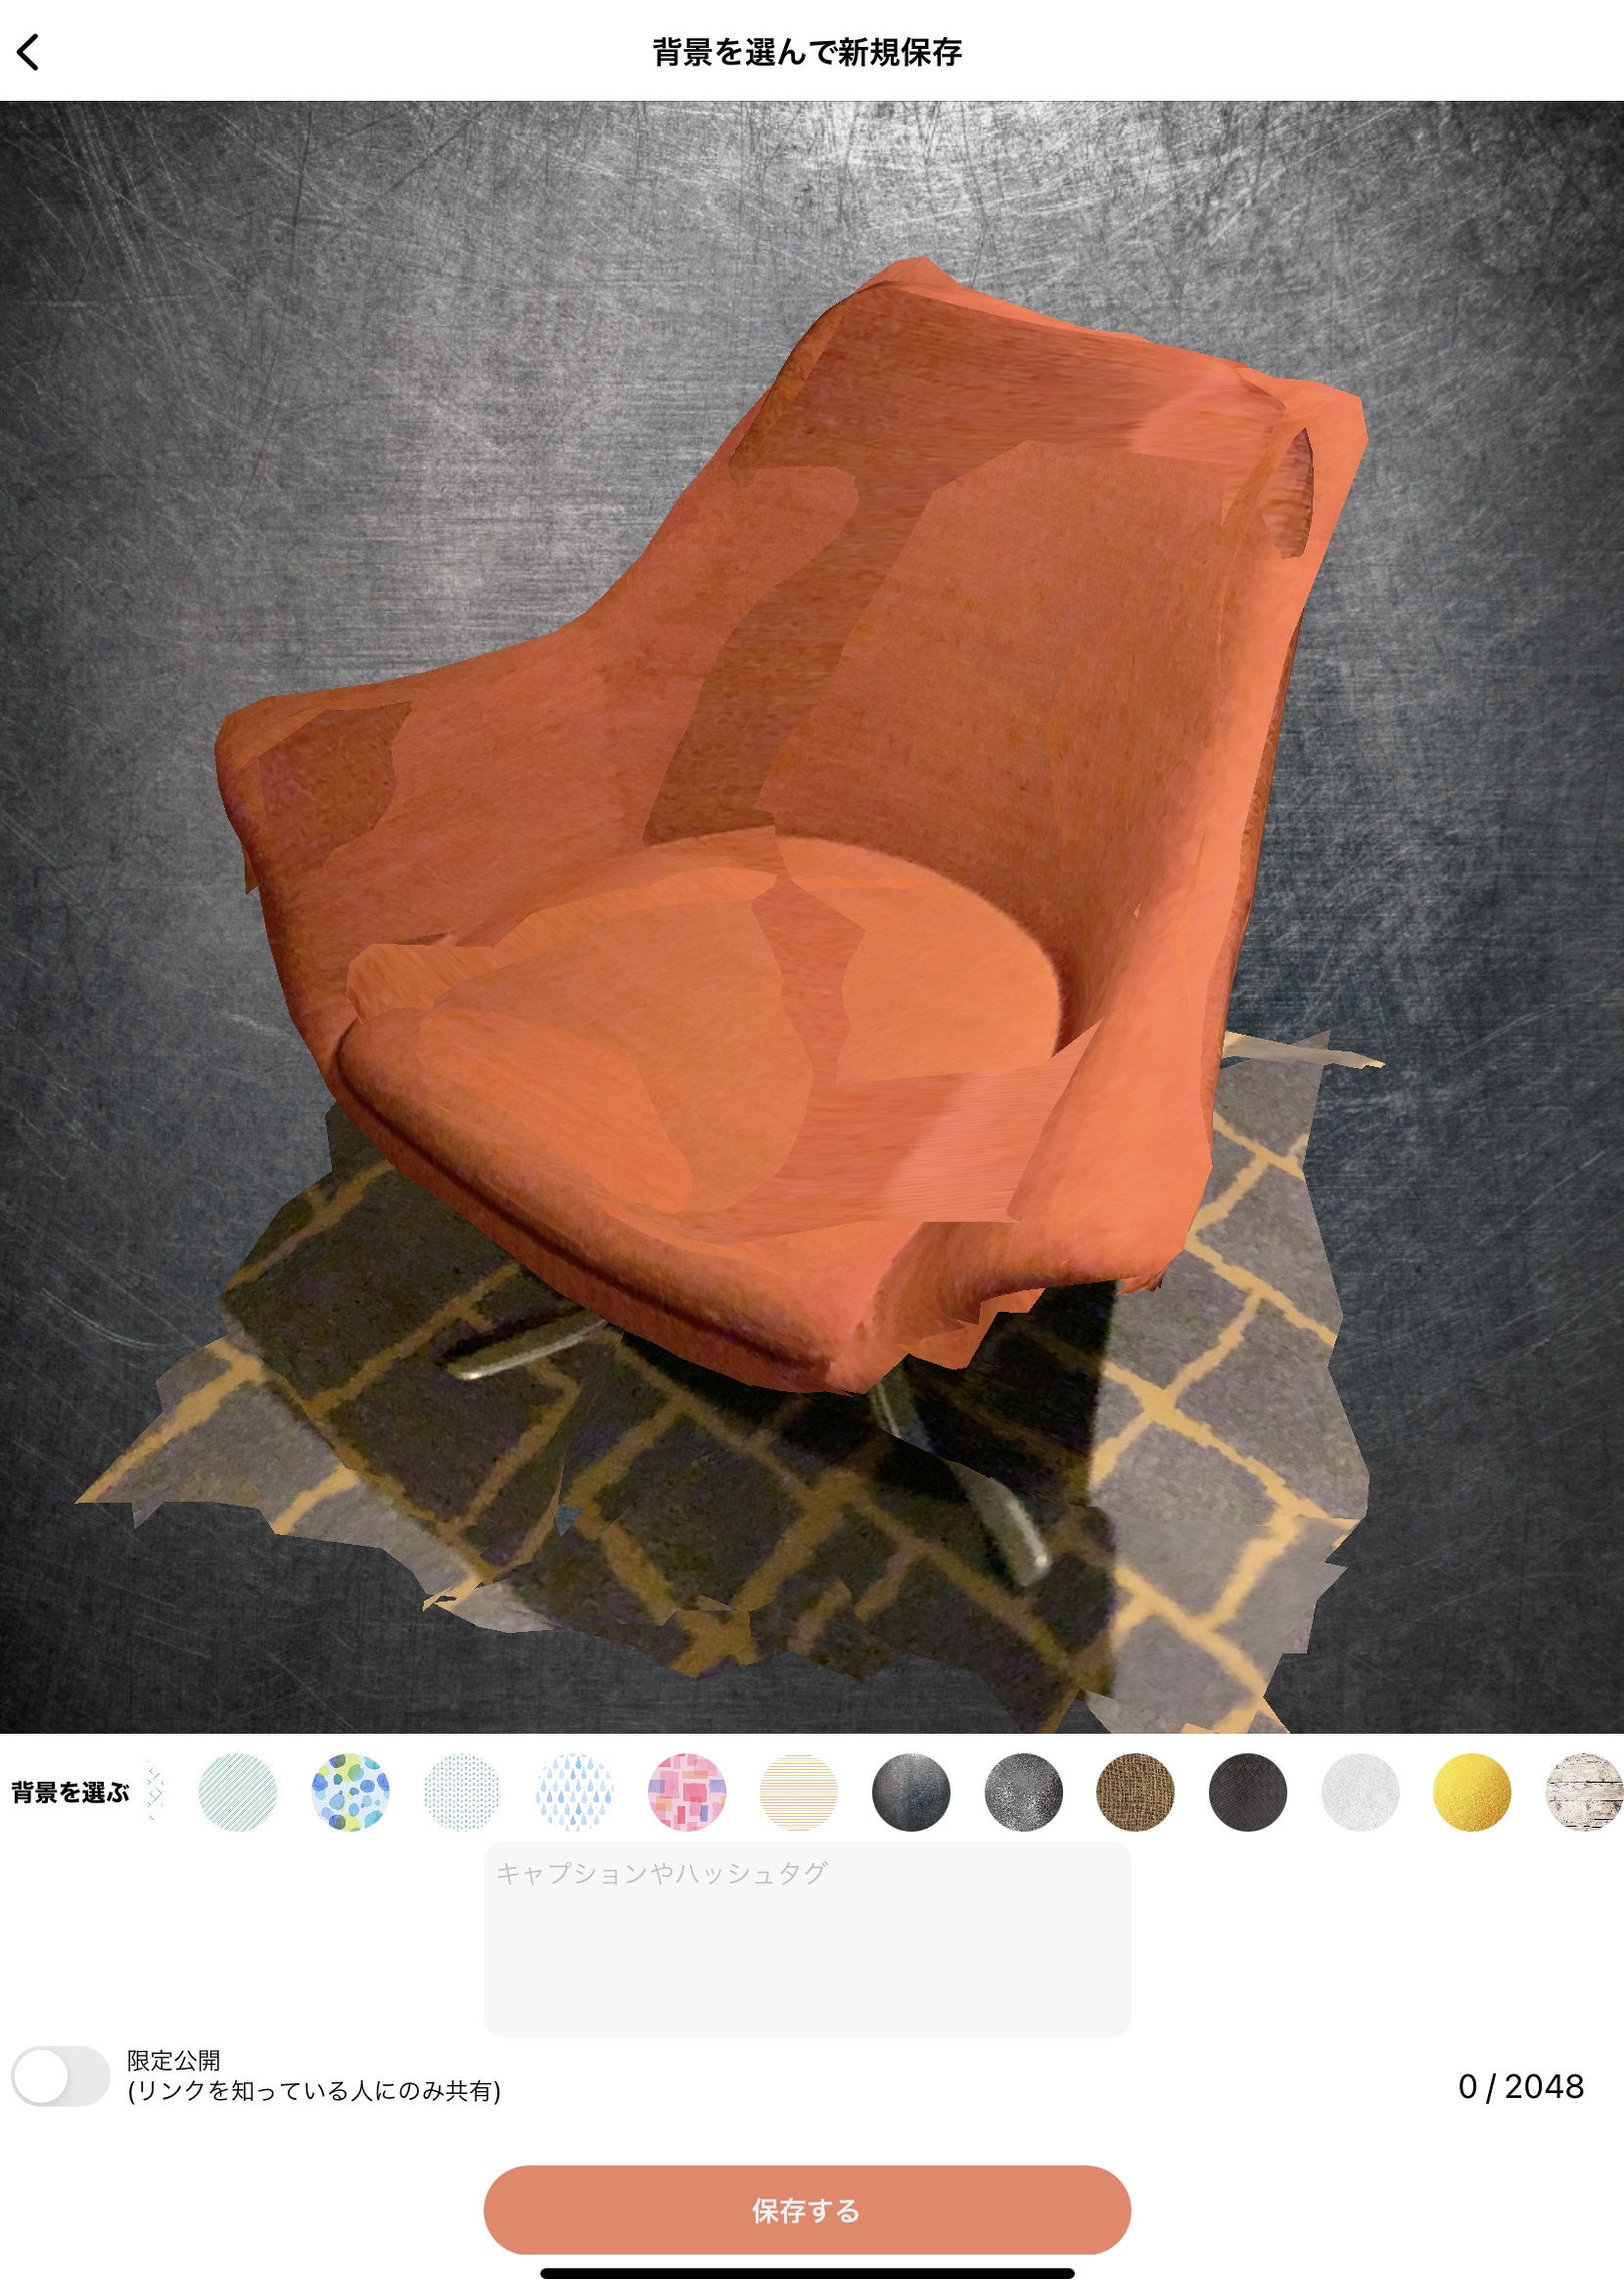
編集が完了したら好きな背景を選択してください。背景は右にスクロールすると様々な柄を選択可能です。この選択した背景で、現在見えている画面が投稿後サムネイル画像になります。
最後はテキストの入力です。
好きなコメントを入力したら『保存する』ボタンをタップすると投稿が完了します。
背景や床面を修正したい場合は画面左上の矢印をタップして編集画面に戻ってください。撮影をやり直す場合には『もう一度撮影』をタップすると撮影画面に戻ります。(先ほど編集したカタチは保存されません)
編集が完了したら好きな背景を選択してください。背景は右にスクロールすると様々な柄を選択可能です。この選択した背景で、現在見えている画面が投稿後サムネイル画像になります。
最後はテキストの入力です。
好きなコメントを入力したら『保存する』ボタンをタップすると投稿が完了します。